

While I was working with this client in Los Angeles on other projects around their house (See living room makeover), they happened to mention “Well, eventually we want to build some kind of storage in the garage, do you think you can help us with that?” Um…yes, please! I love drafting out closets.
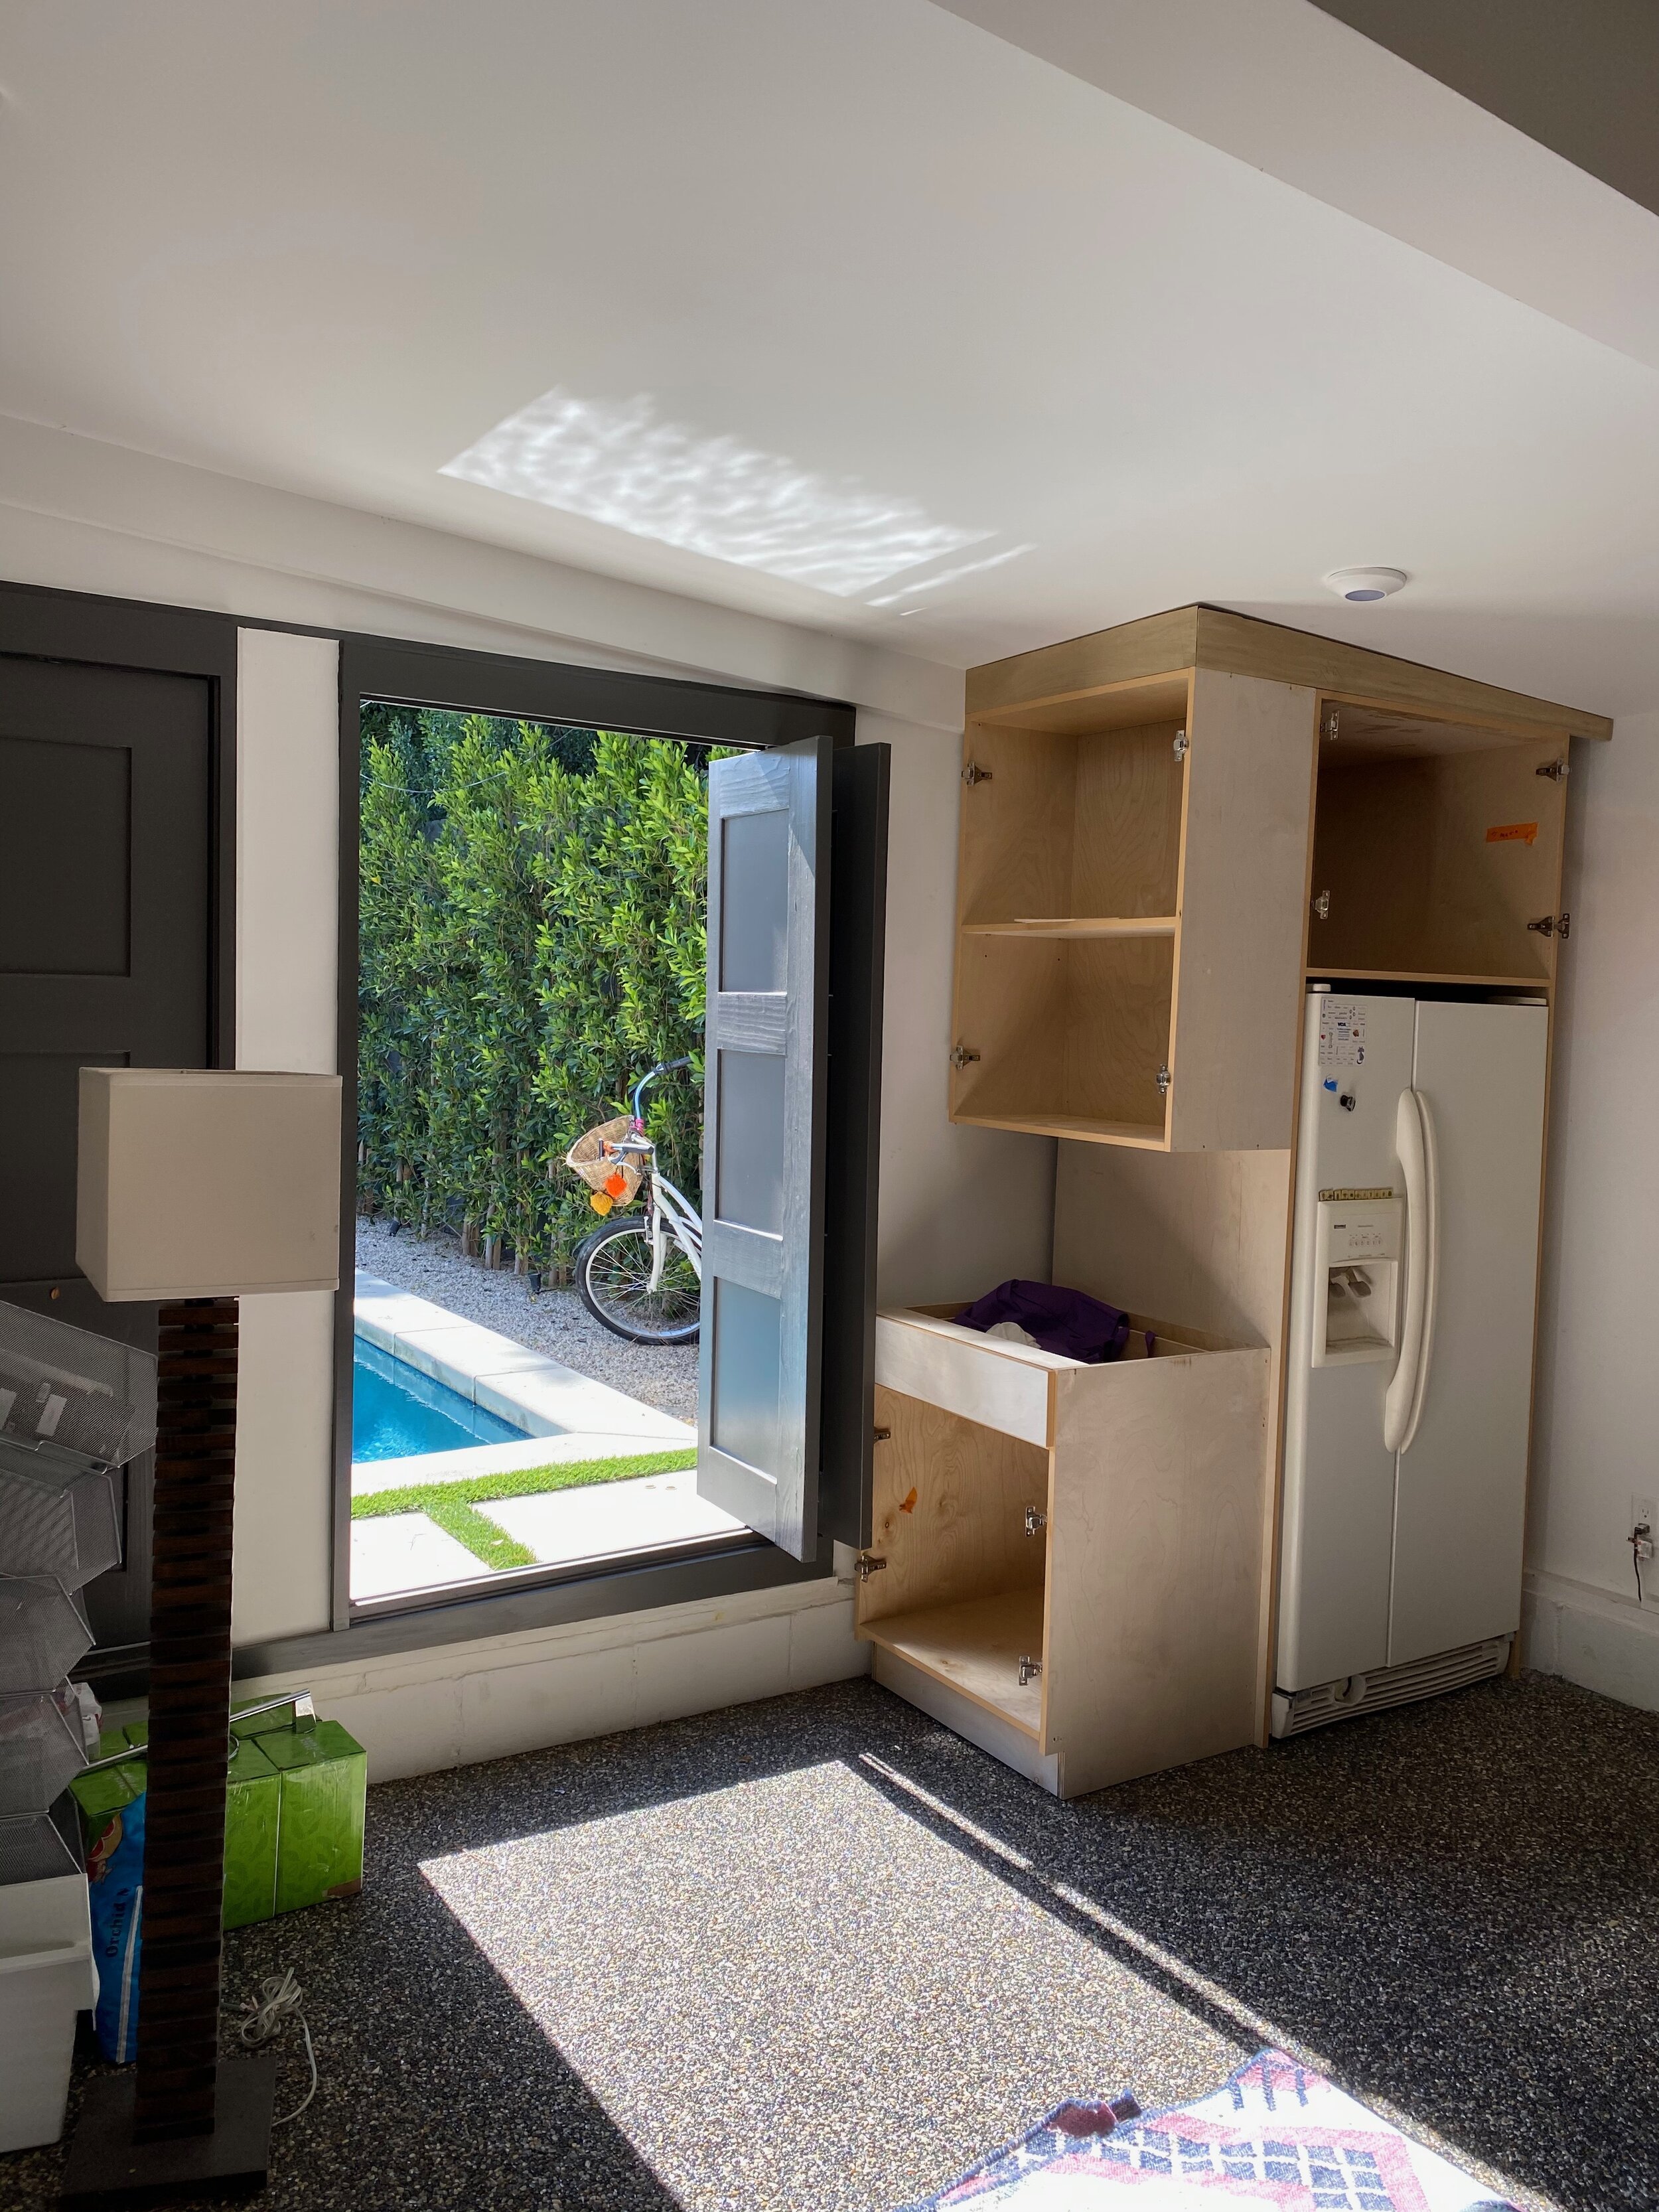
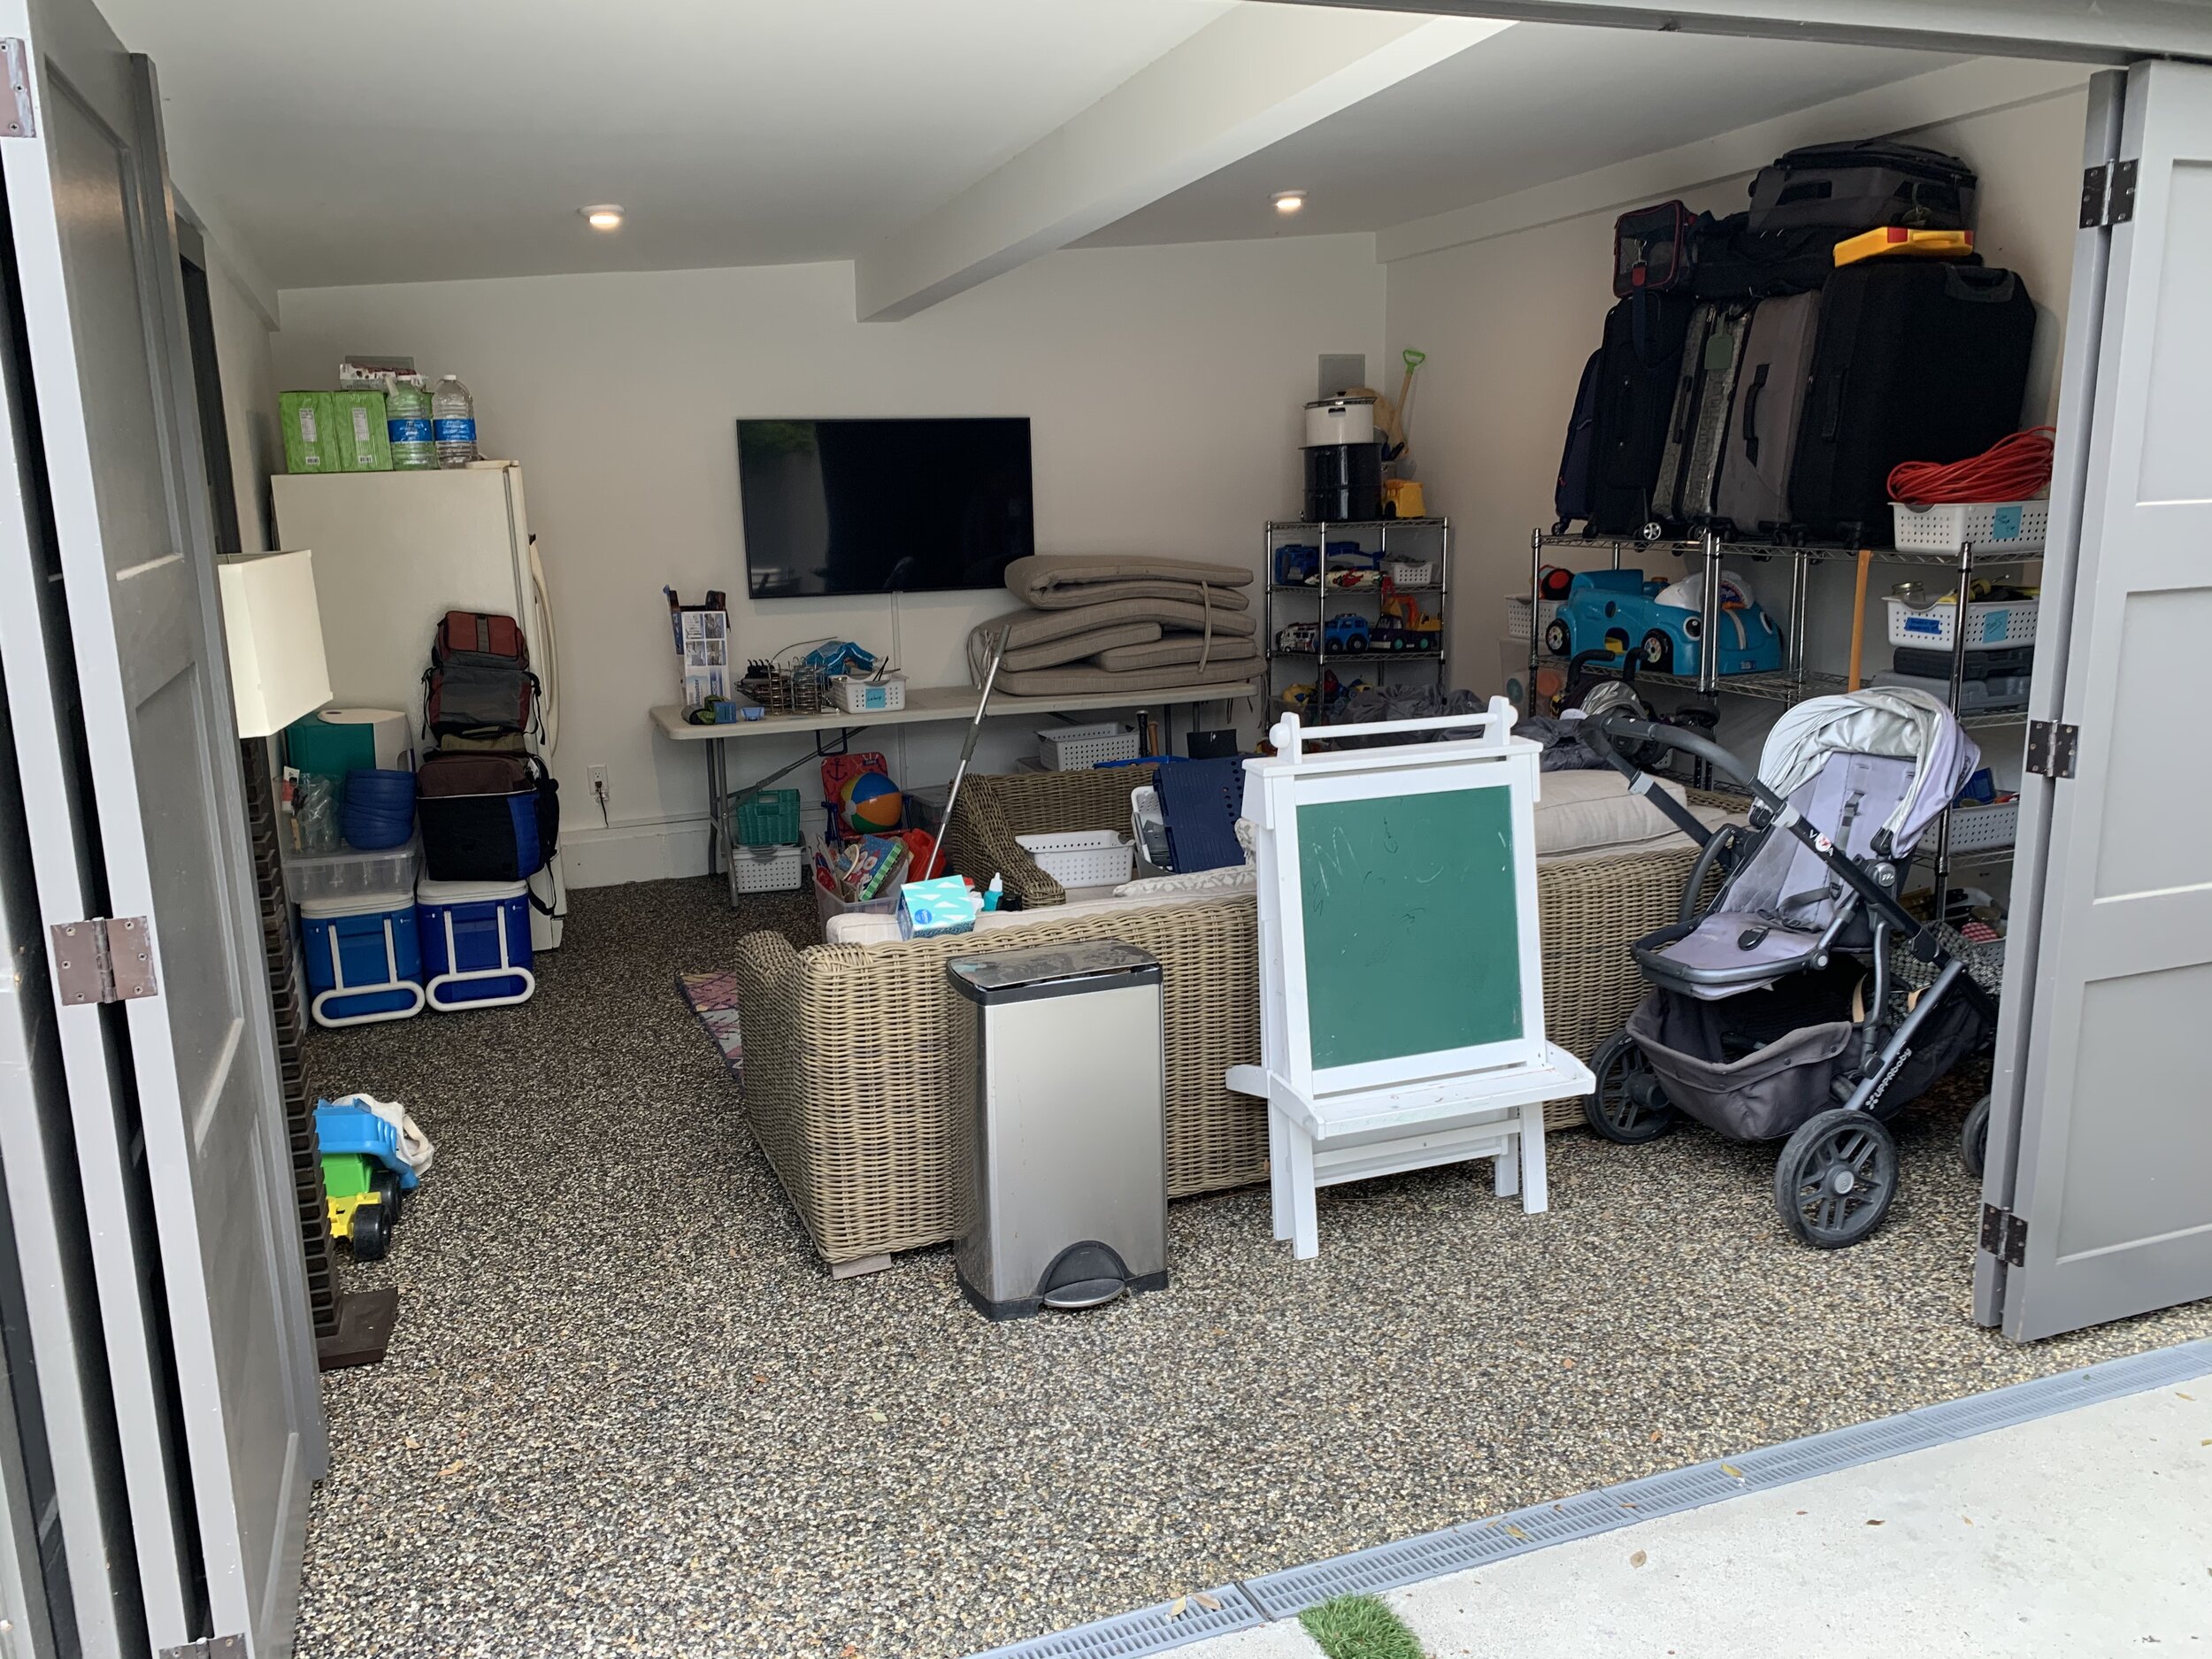
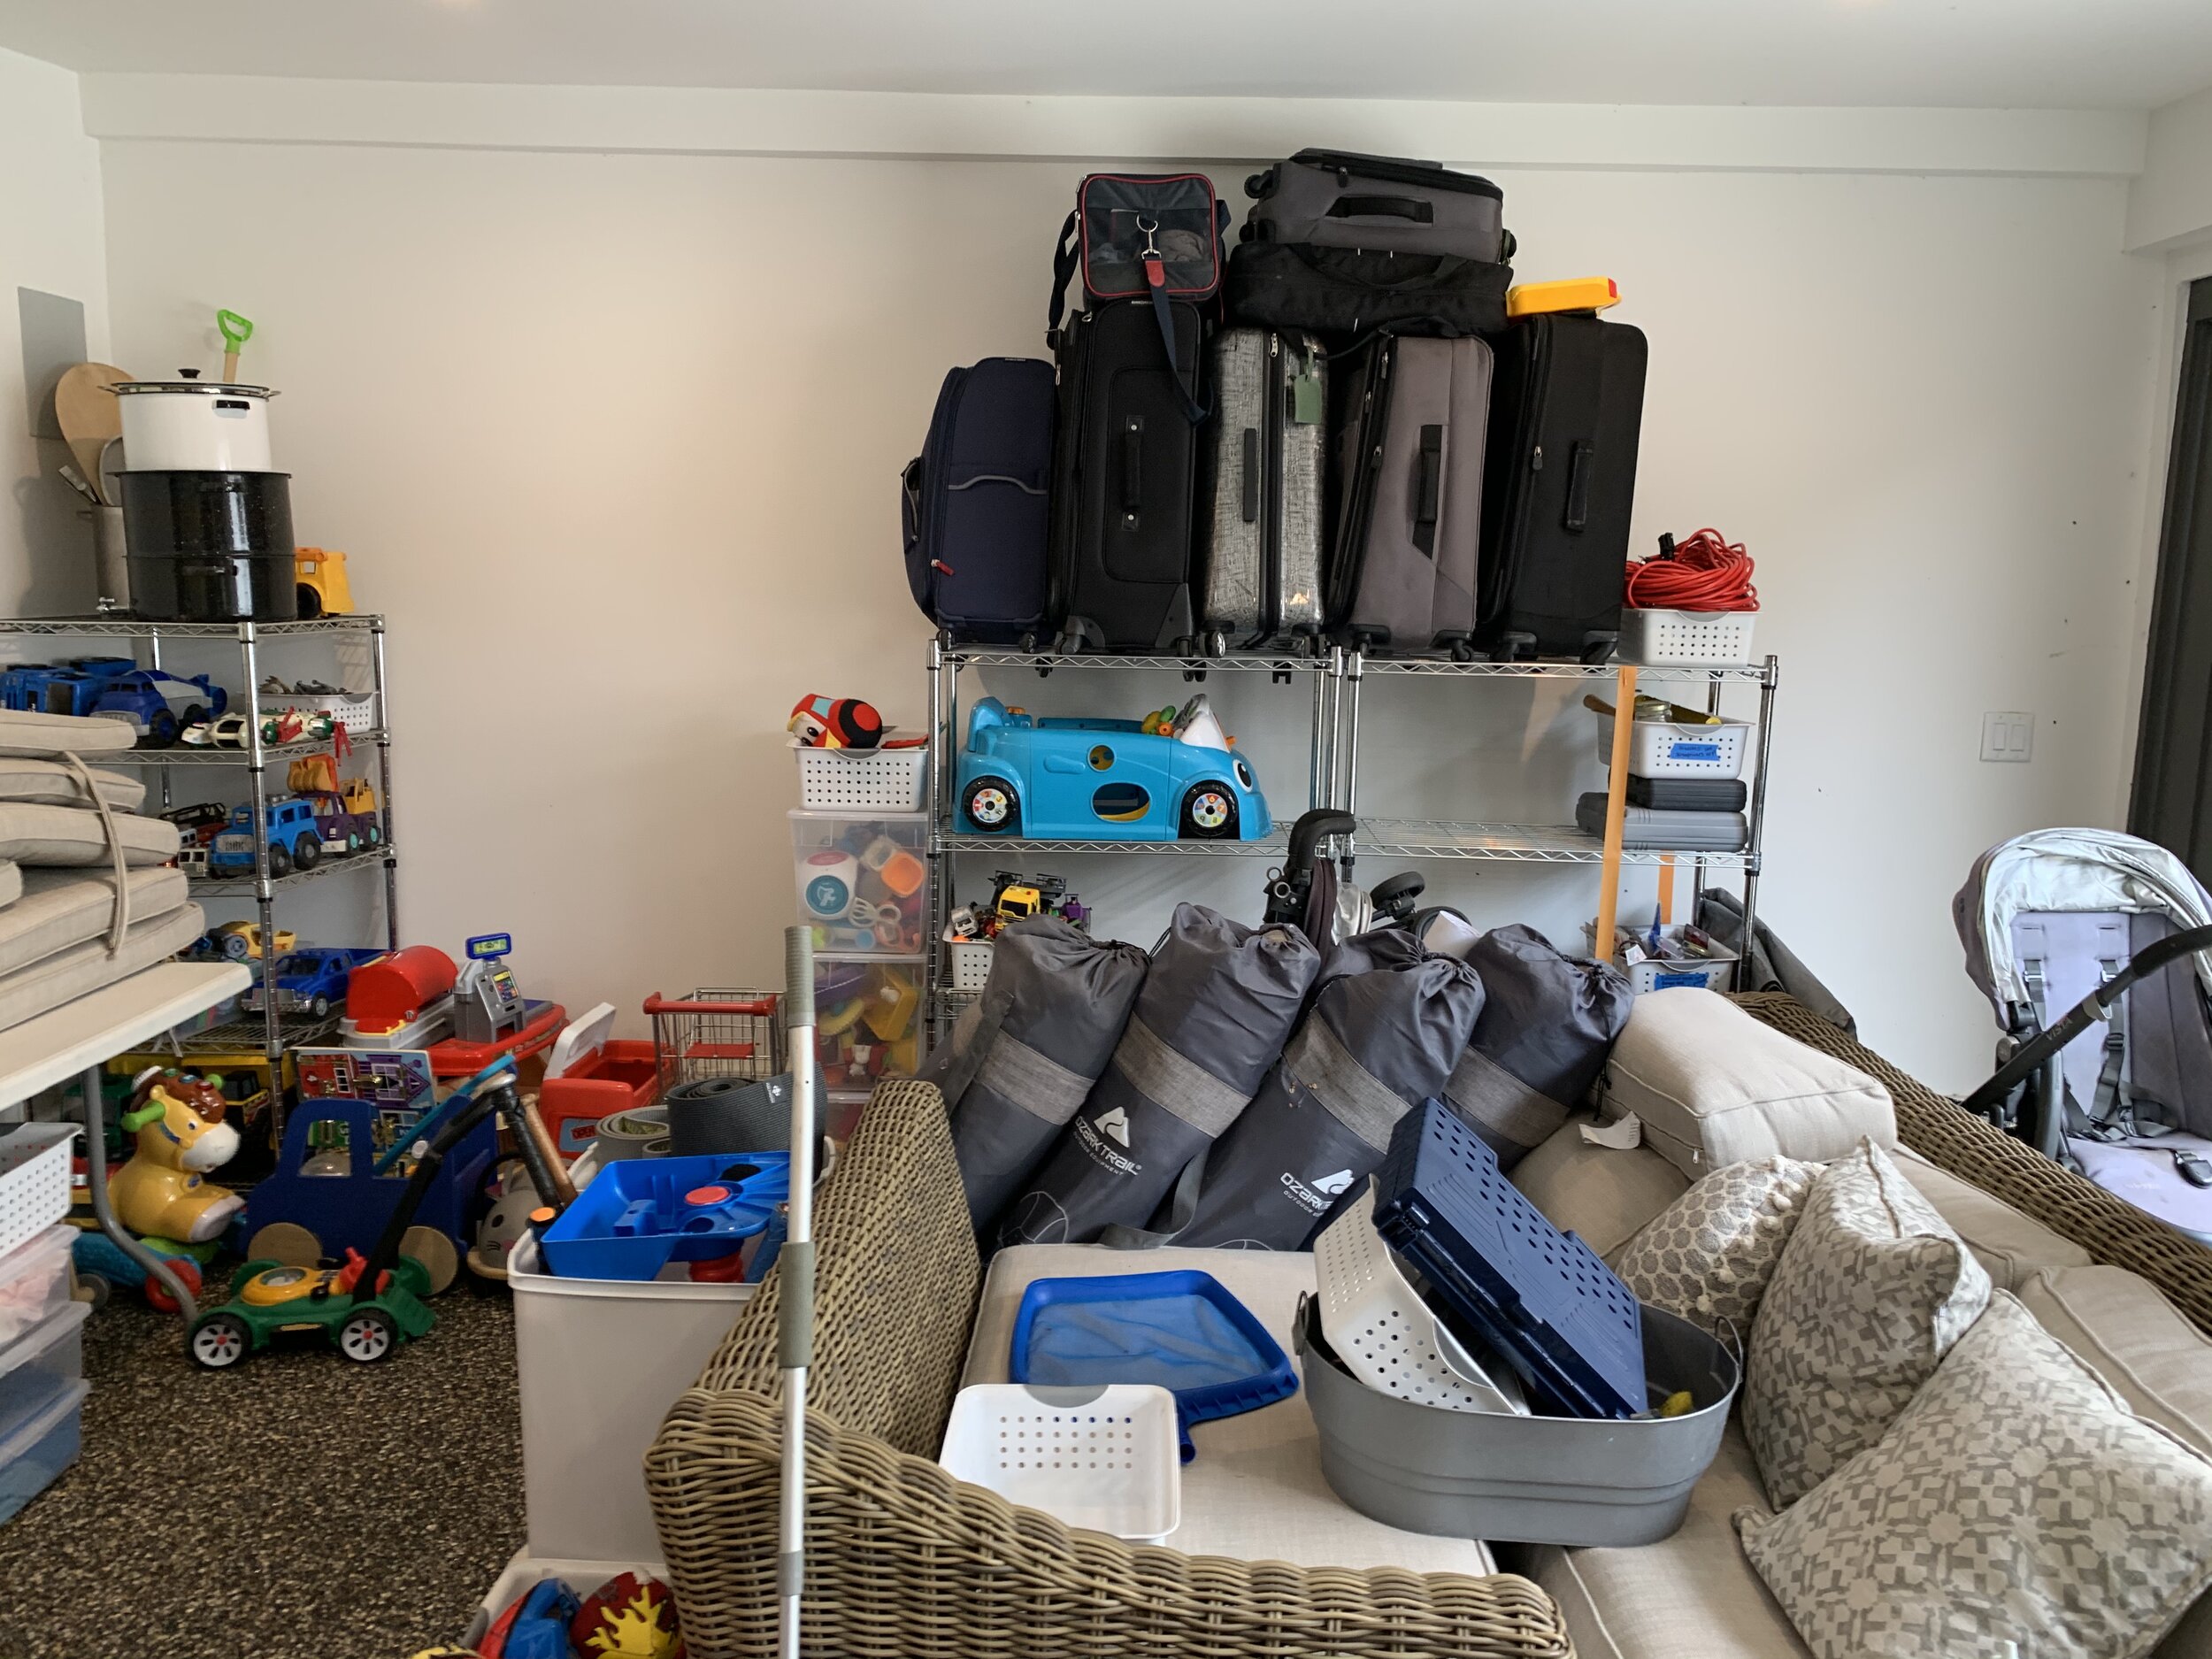
They were already using the garage as an outdoor movie room but stuff starting piling up and taking over the space. I can see why they wanted to add storage. It could be challenging to build out the perfect custom storage closet for this garage/movie room but as a professional organizer and decorator, this happens to be one of my favorite kinds of projects. Here is an opportunity for me to create a space that is a perfect fit for my client, their stuff, and their home.
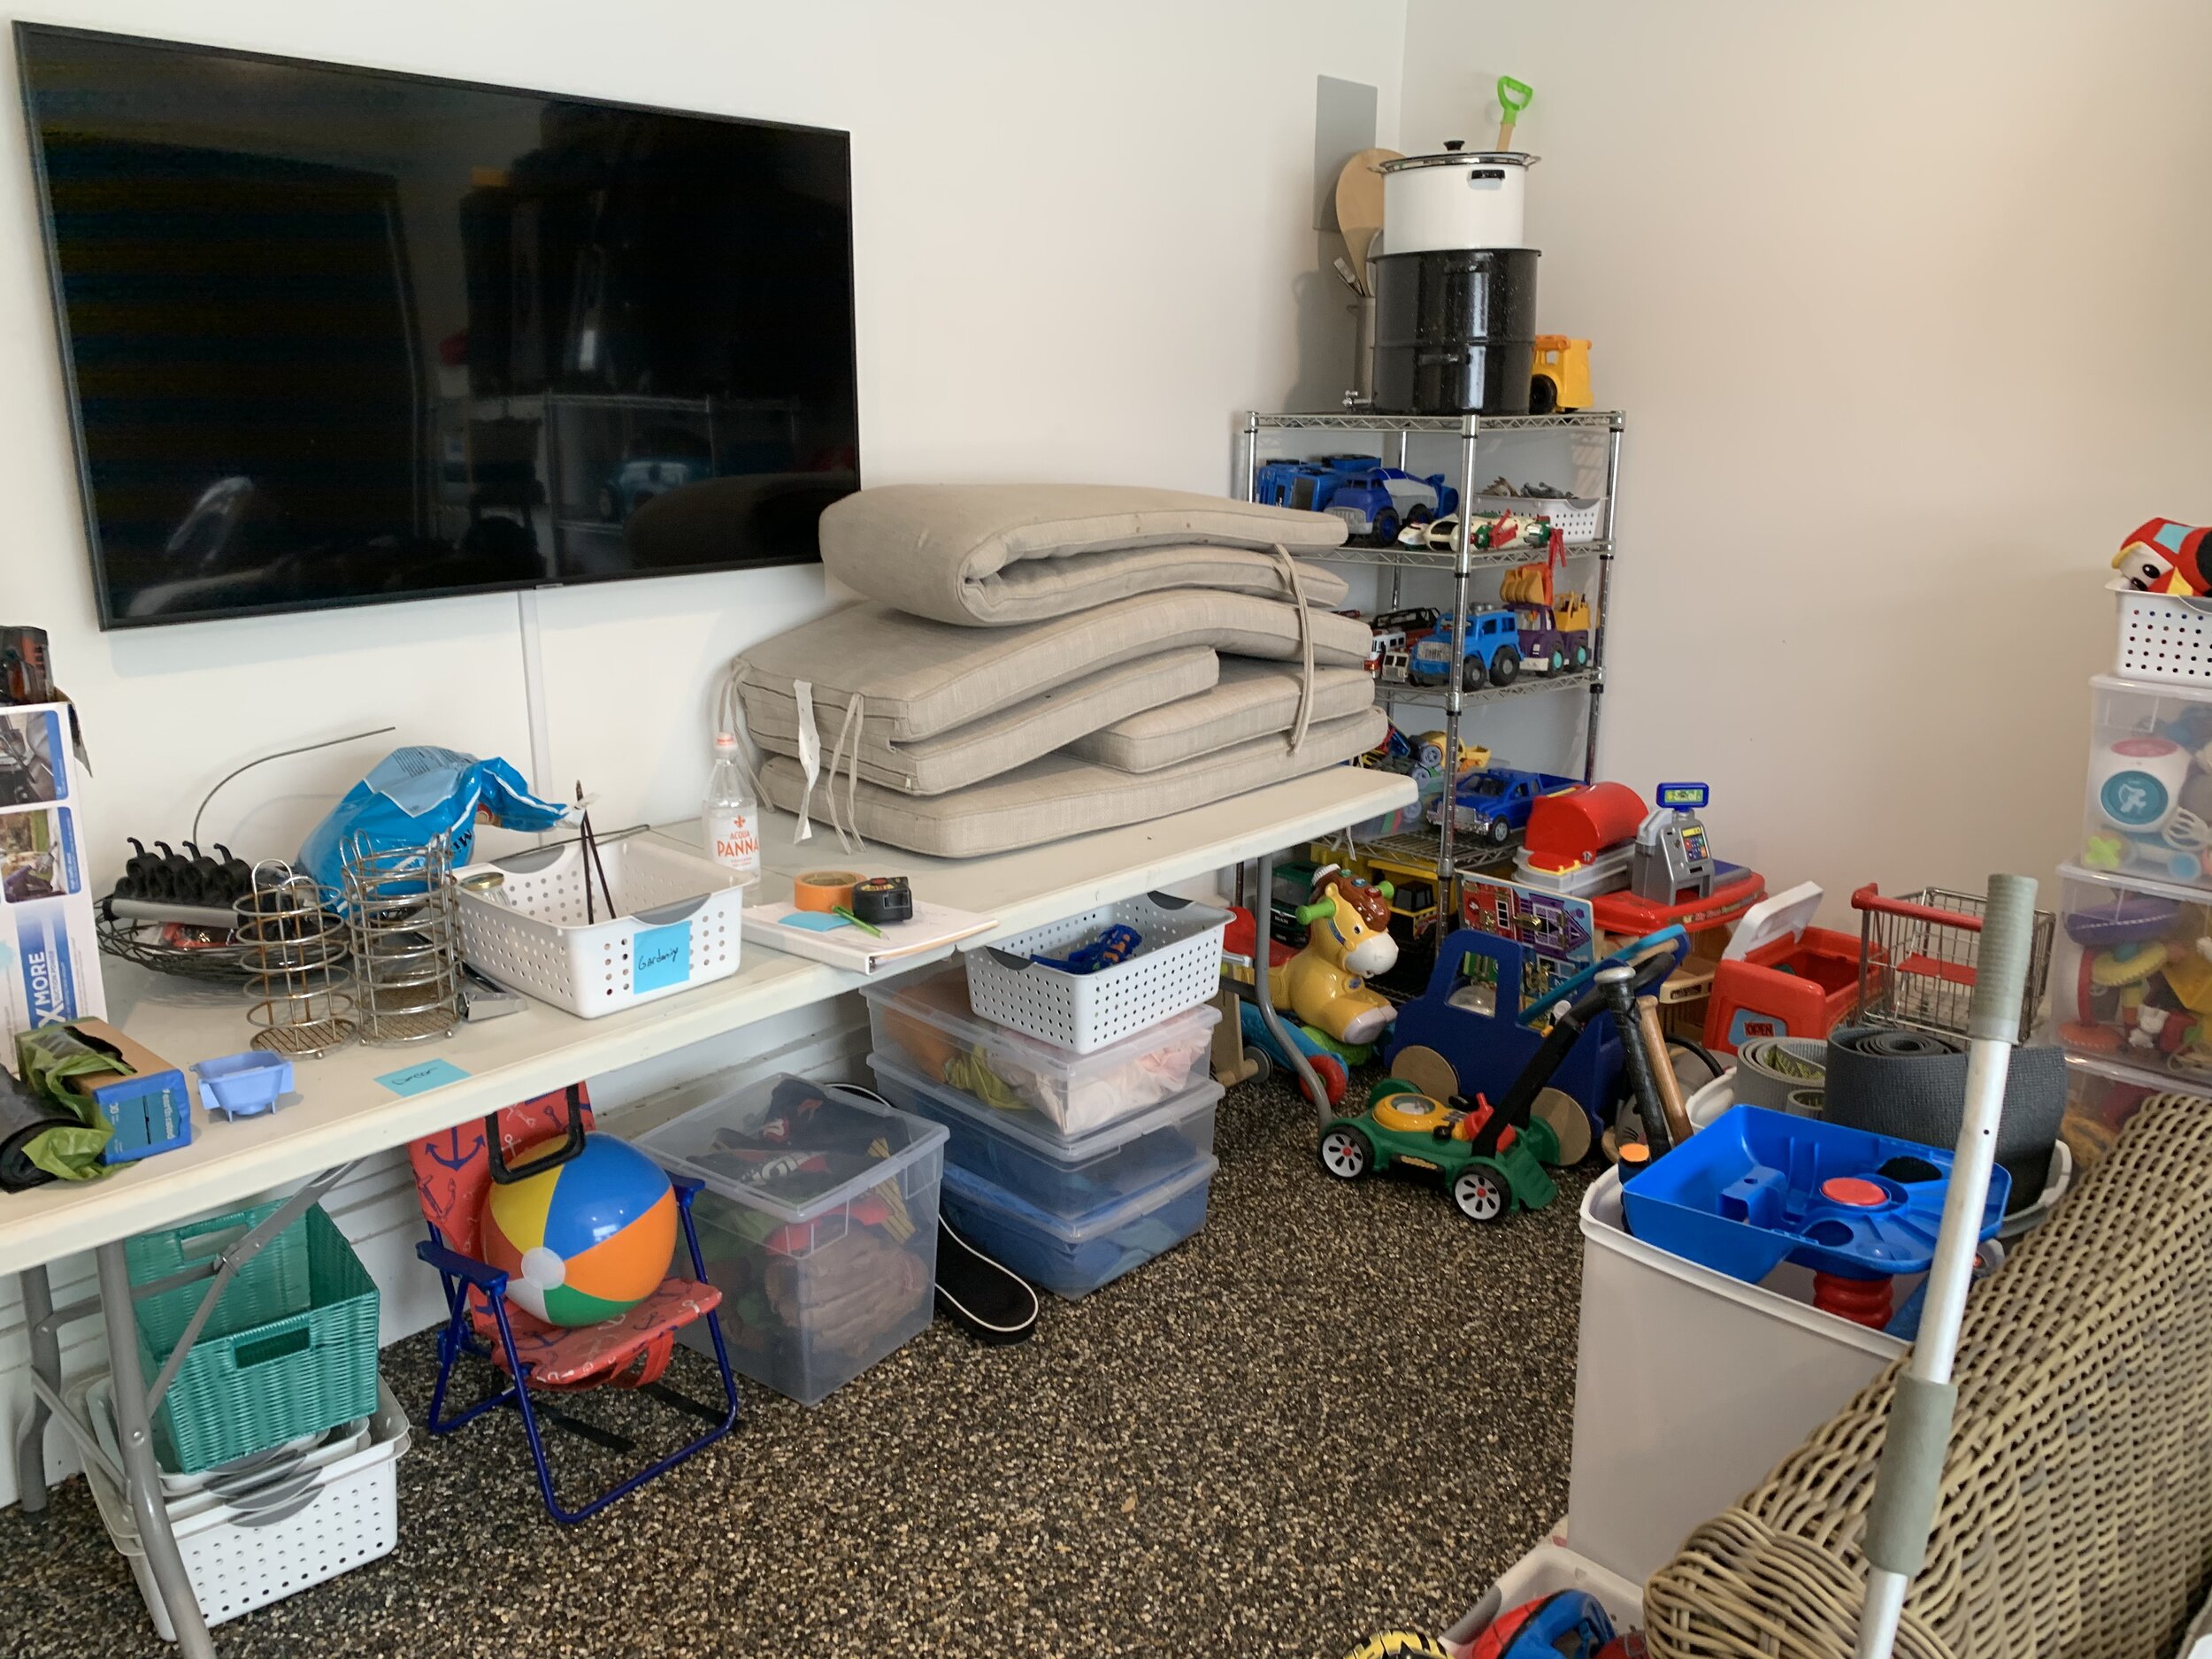
I’m going to walk you through the Space to Love® 5 step method on how to achieve the perfect custom closet. Starting with the first step, Setup. I like to have all the supplies needed beforehand. I make sure I have markers, scissors, boxcutters, gloves, donation bags, recycle bin, trash bags, and post-it notes for labeling categories. We set up fold-out tables to make sure we had room to spread out and be ready for Step 2, Sort.
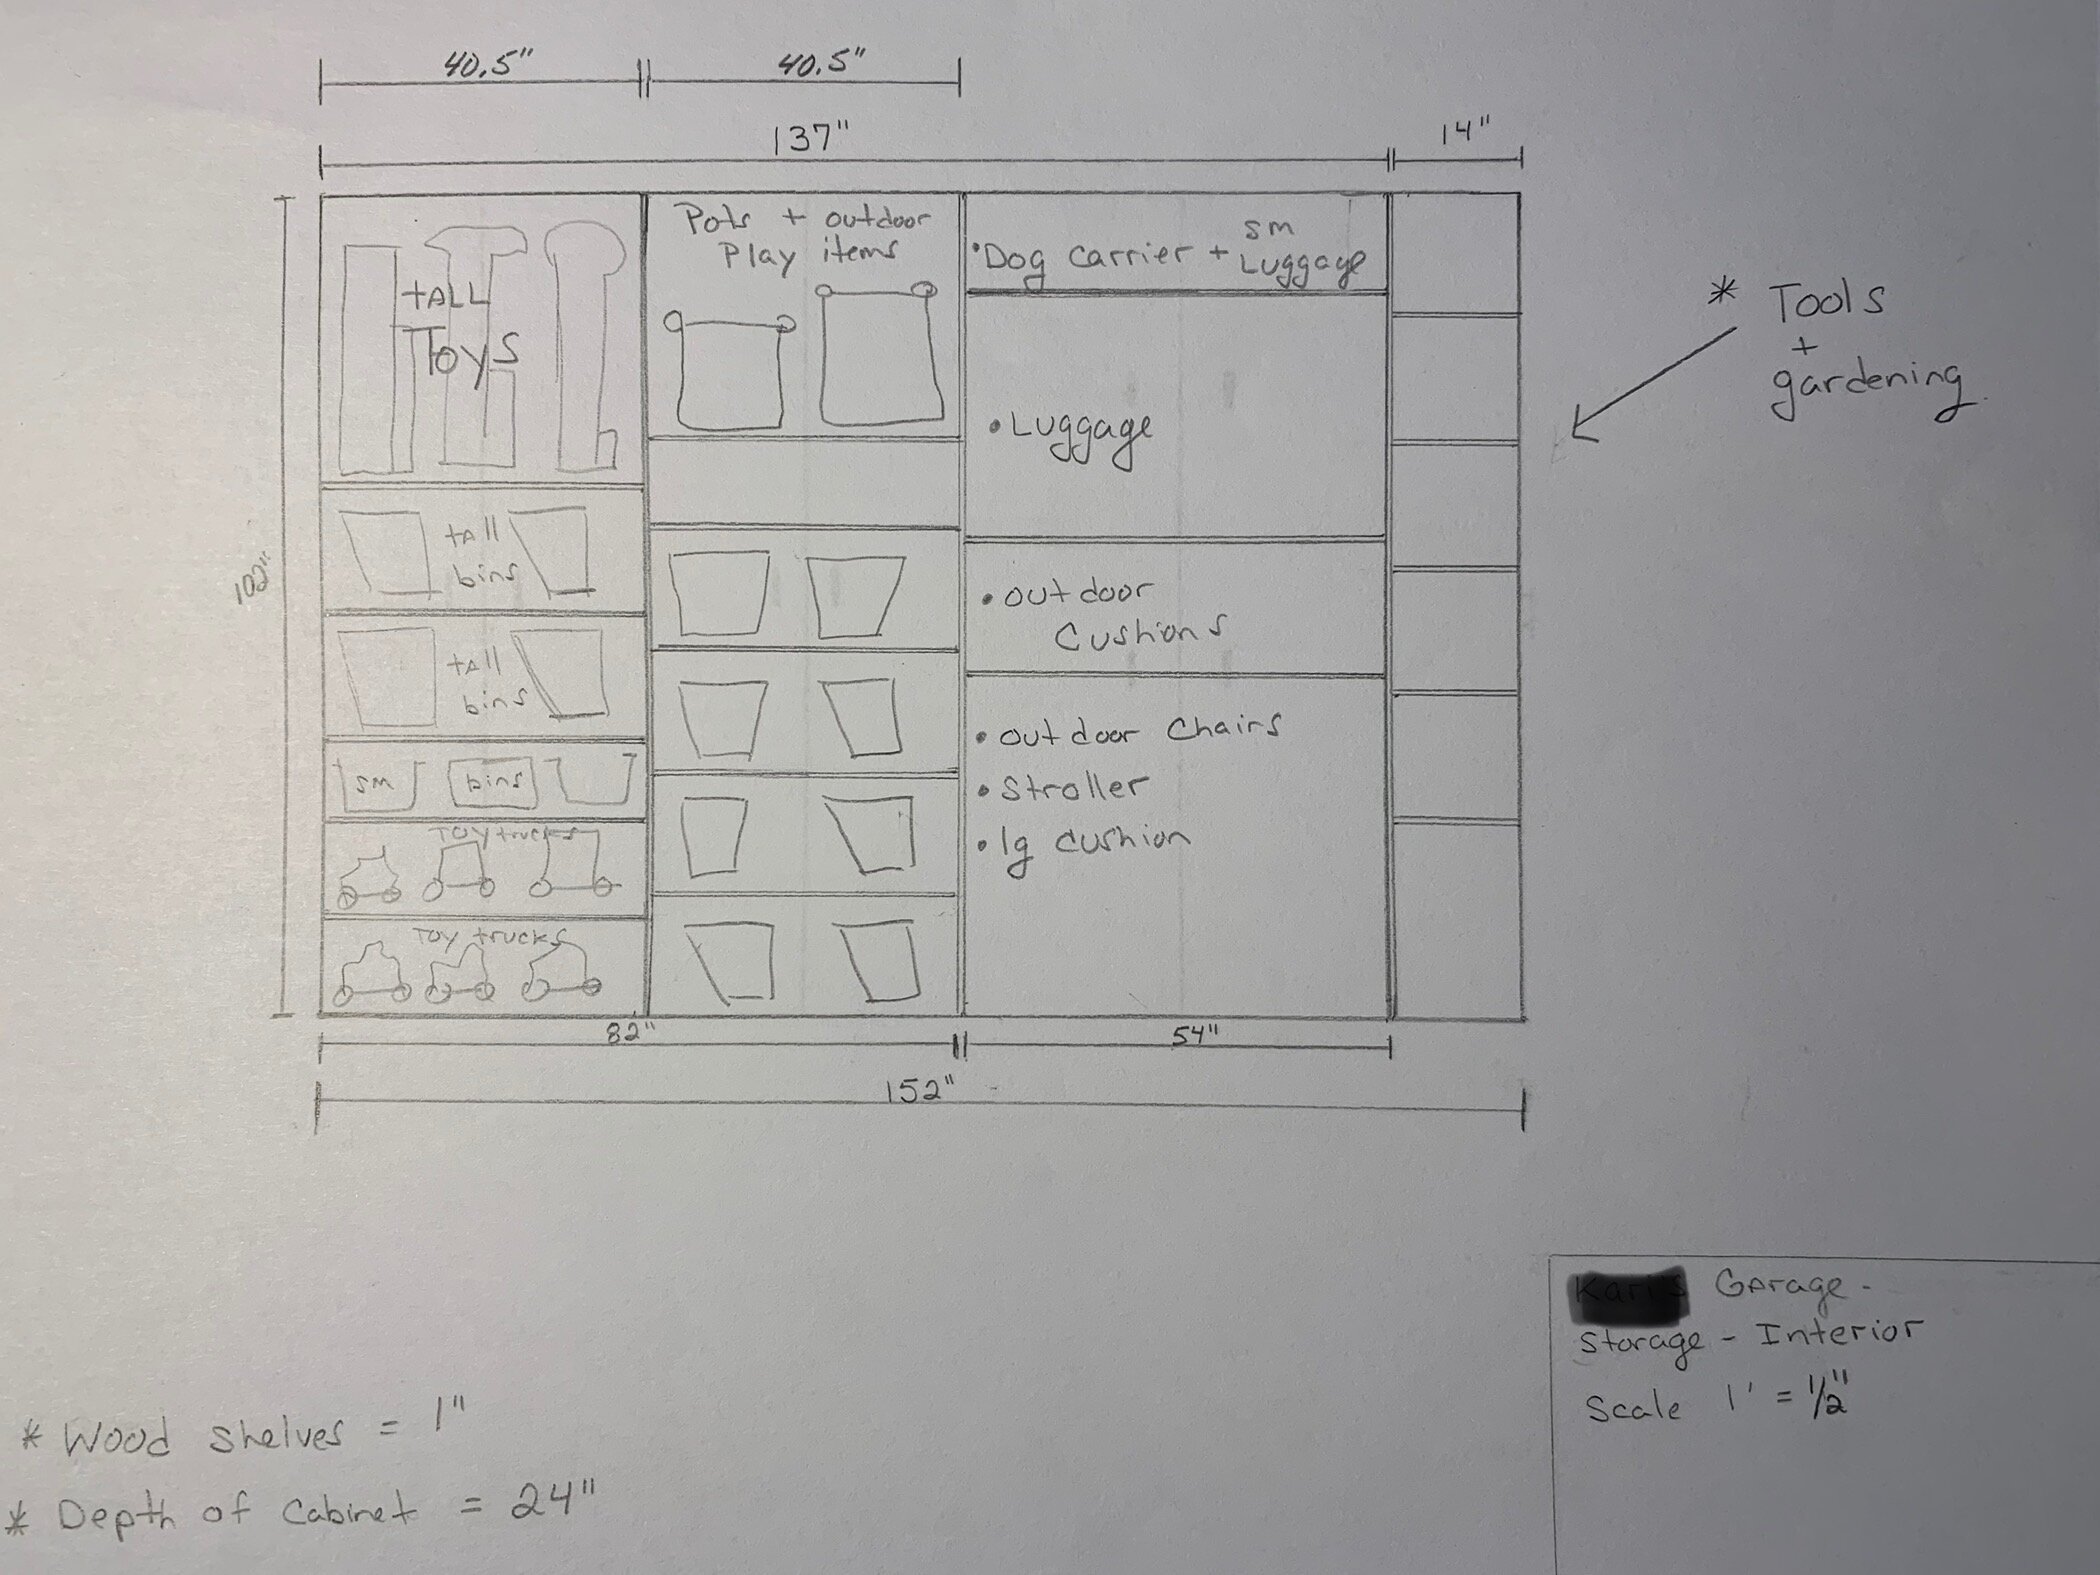
The sorting process is going through everything and separating them into categories. For this project our first category was “kids’ stuff”, which consisted of large and odd-shaped toys, crafts, and painting supplies. The next category was “travel”, which included suitcases, dog carrier, and travel stroller. The remaining categories were pool supplies, outdoor cushions, and tools. Once everything was sorted we were ready for step 3, Select.
Now it was easy for my client to go through each category, one at a time, and assess the items. This gave them a clear idea of what they had so they could make decisions on what they wanted to keep and what they were ready to let go of. If you skip the sorting process it makes the selection part slower, overwhelming, and almost impossible to complete. Once they finished selecting what was no longer working or needed, these items were then donated, trashed, or recycled. Now we were ready to move on to step 4, Sanitize.


For this project, Step 4, Sanitize, was easy because all of the storage was going to be newly custom-built. However, we did clean out all the bins that we were going to keep and stacked them on the temporary metal shelving until the storage unit was complete. We liked the plastic bins that were being used for the kid’s organization. I’m all for keeping what is working and didn’t want to change them out.
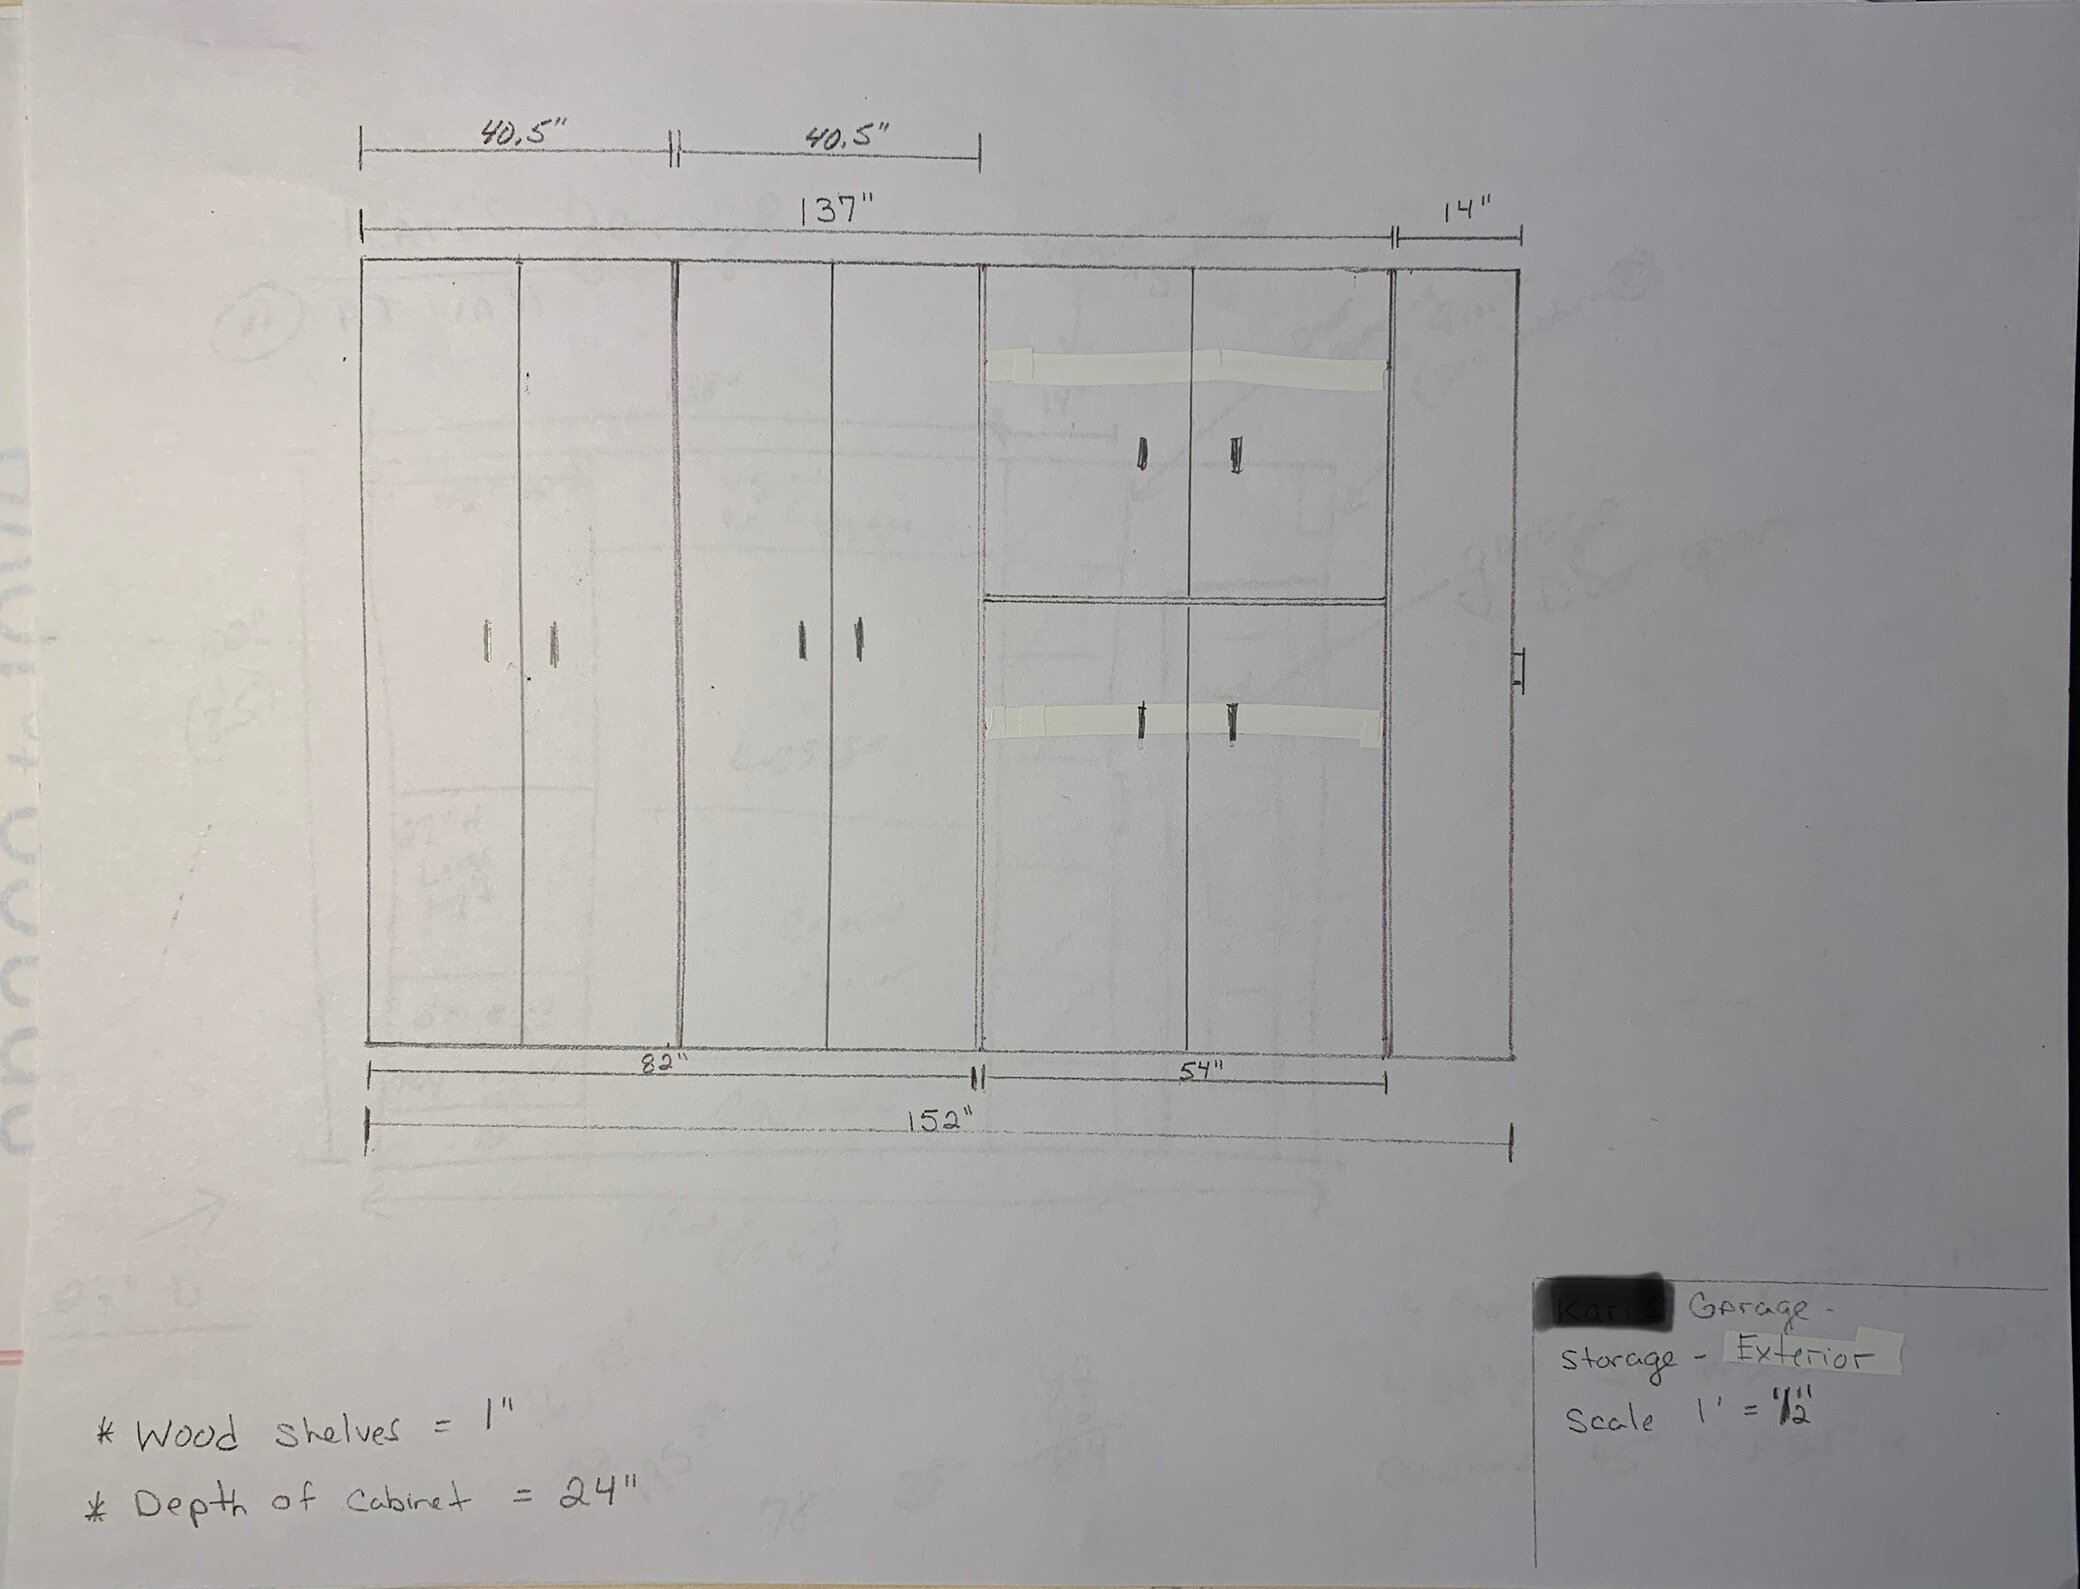
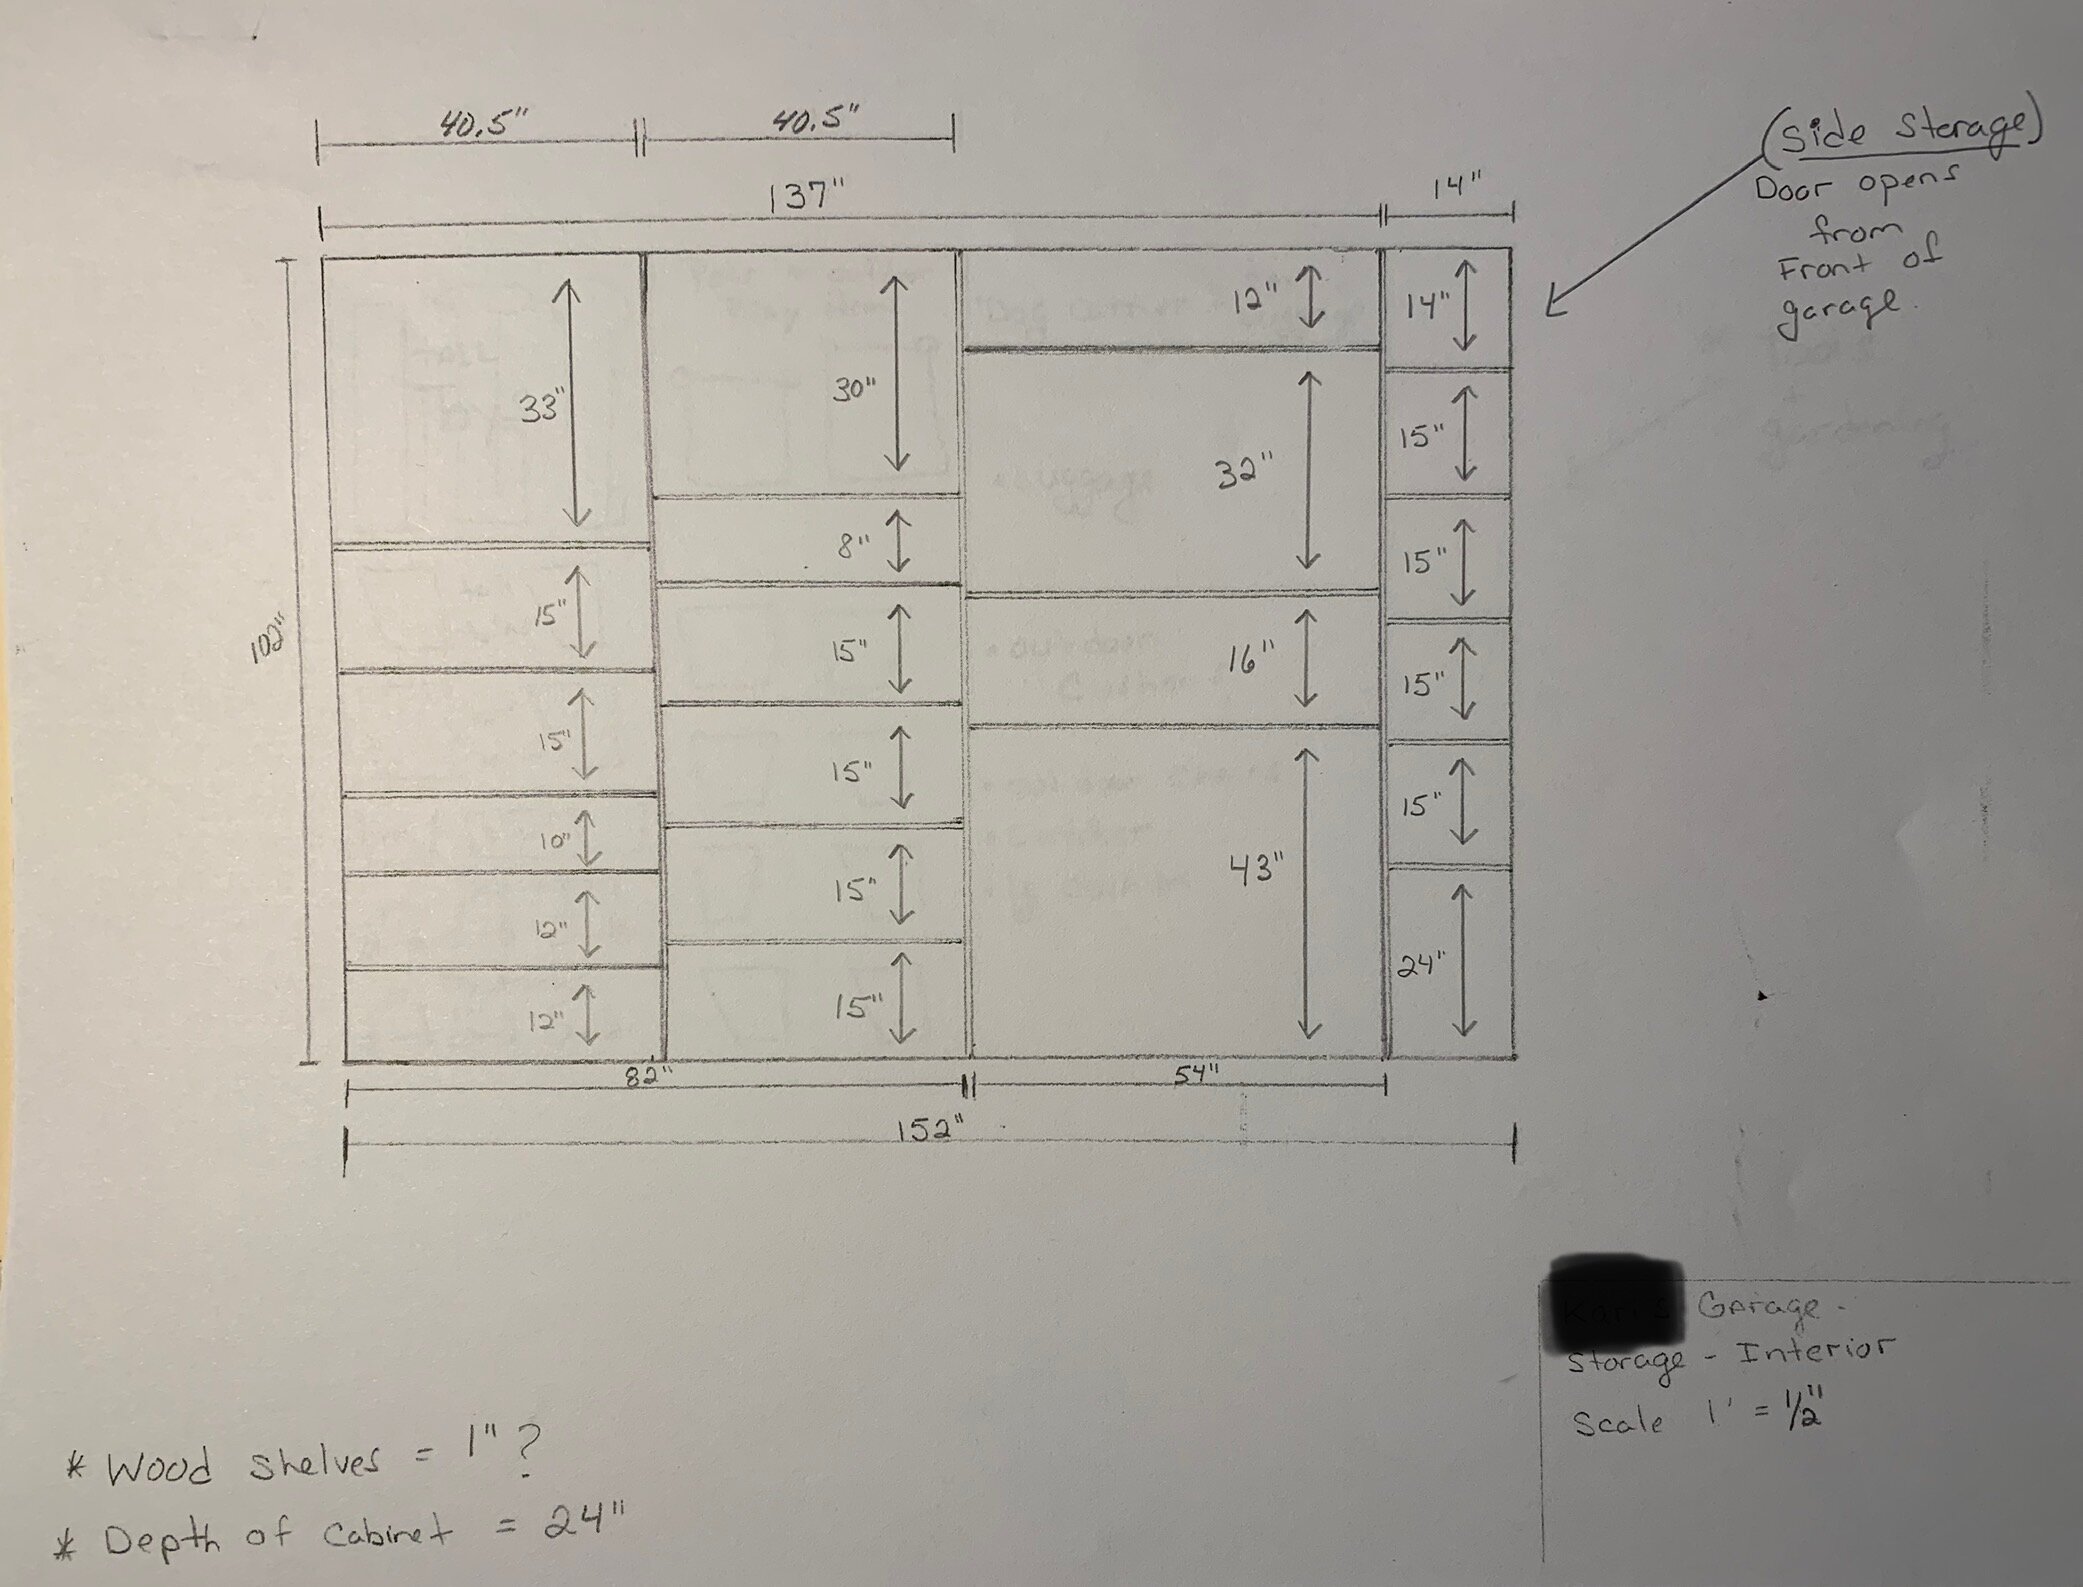
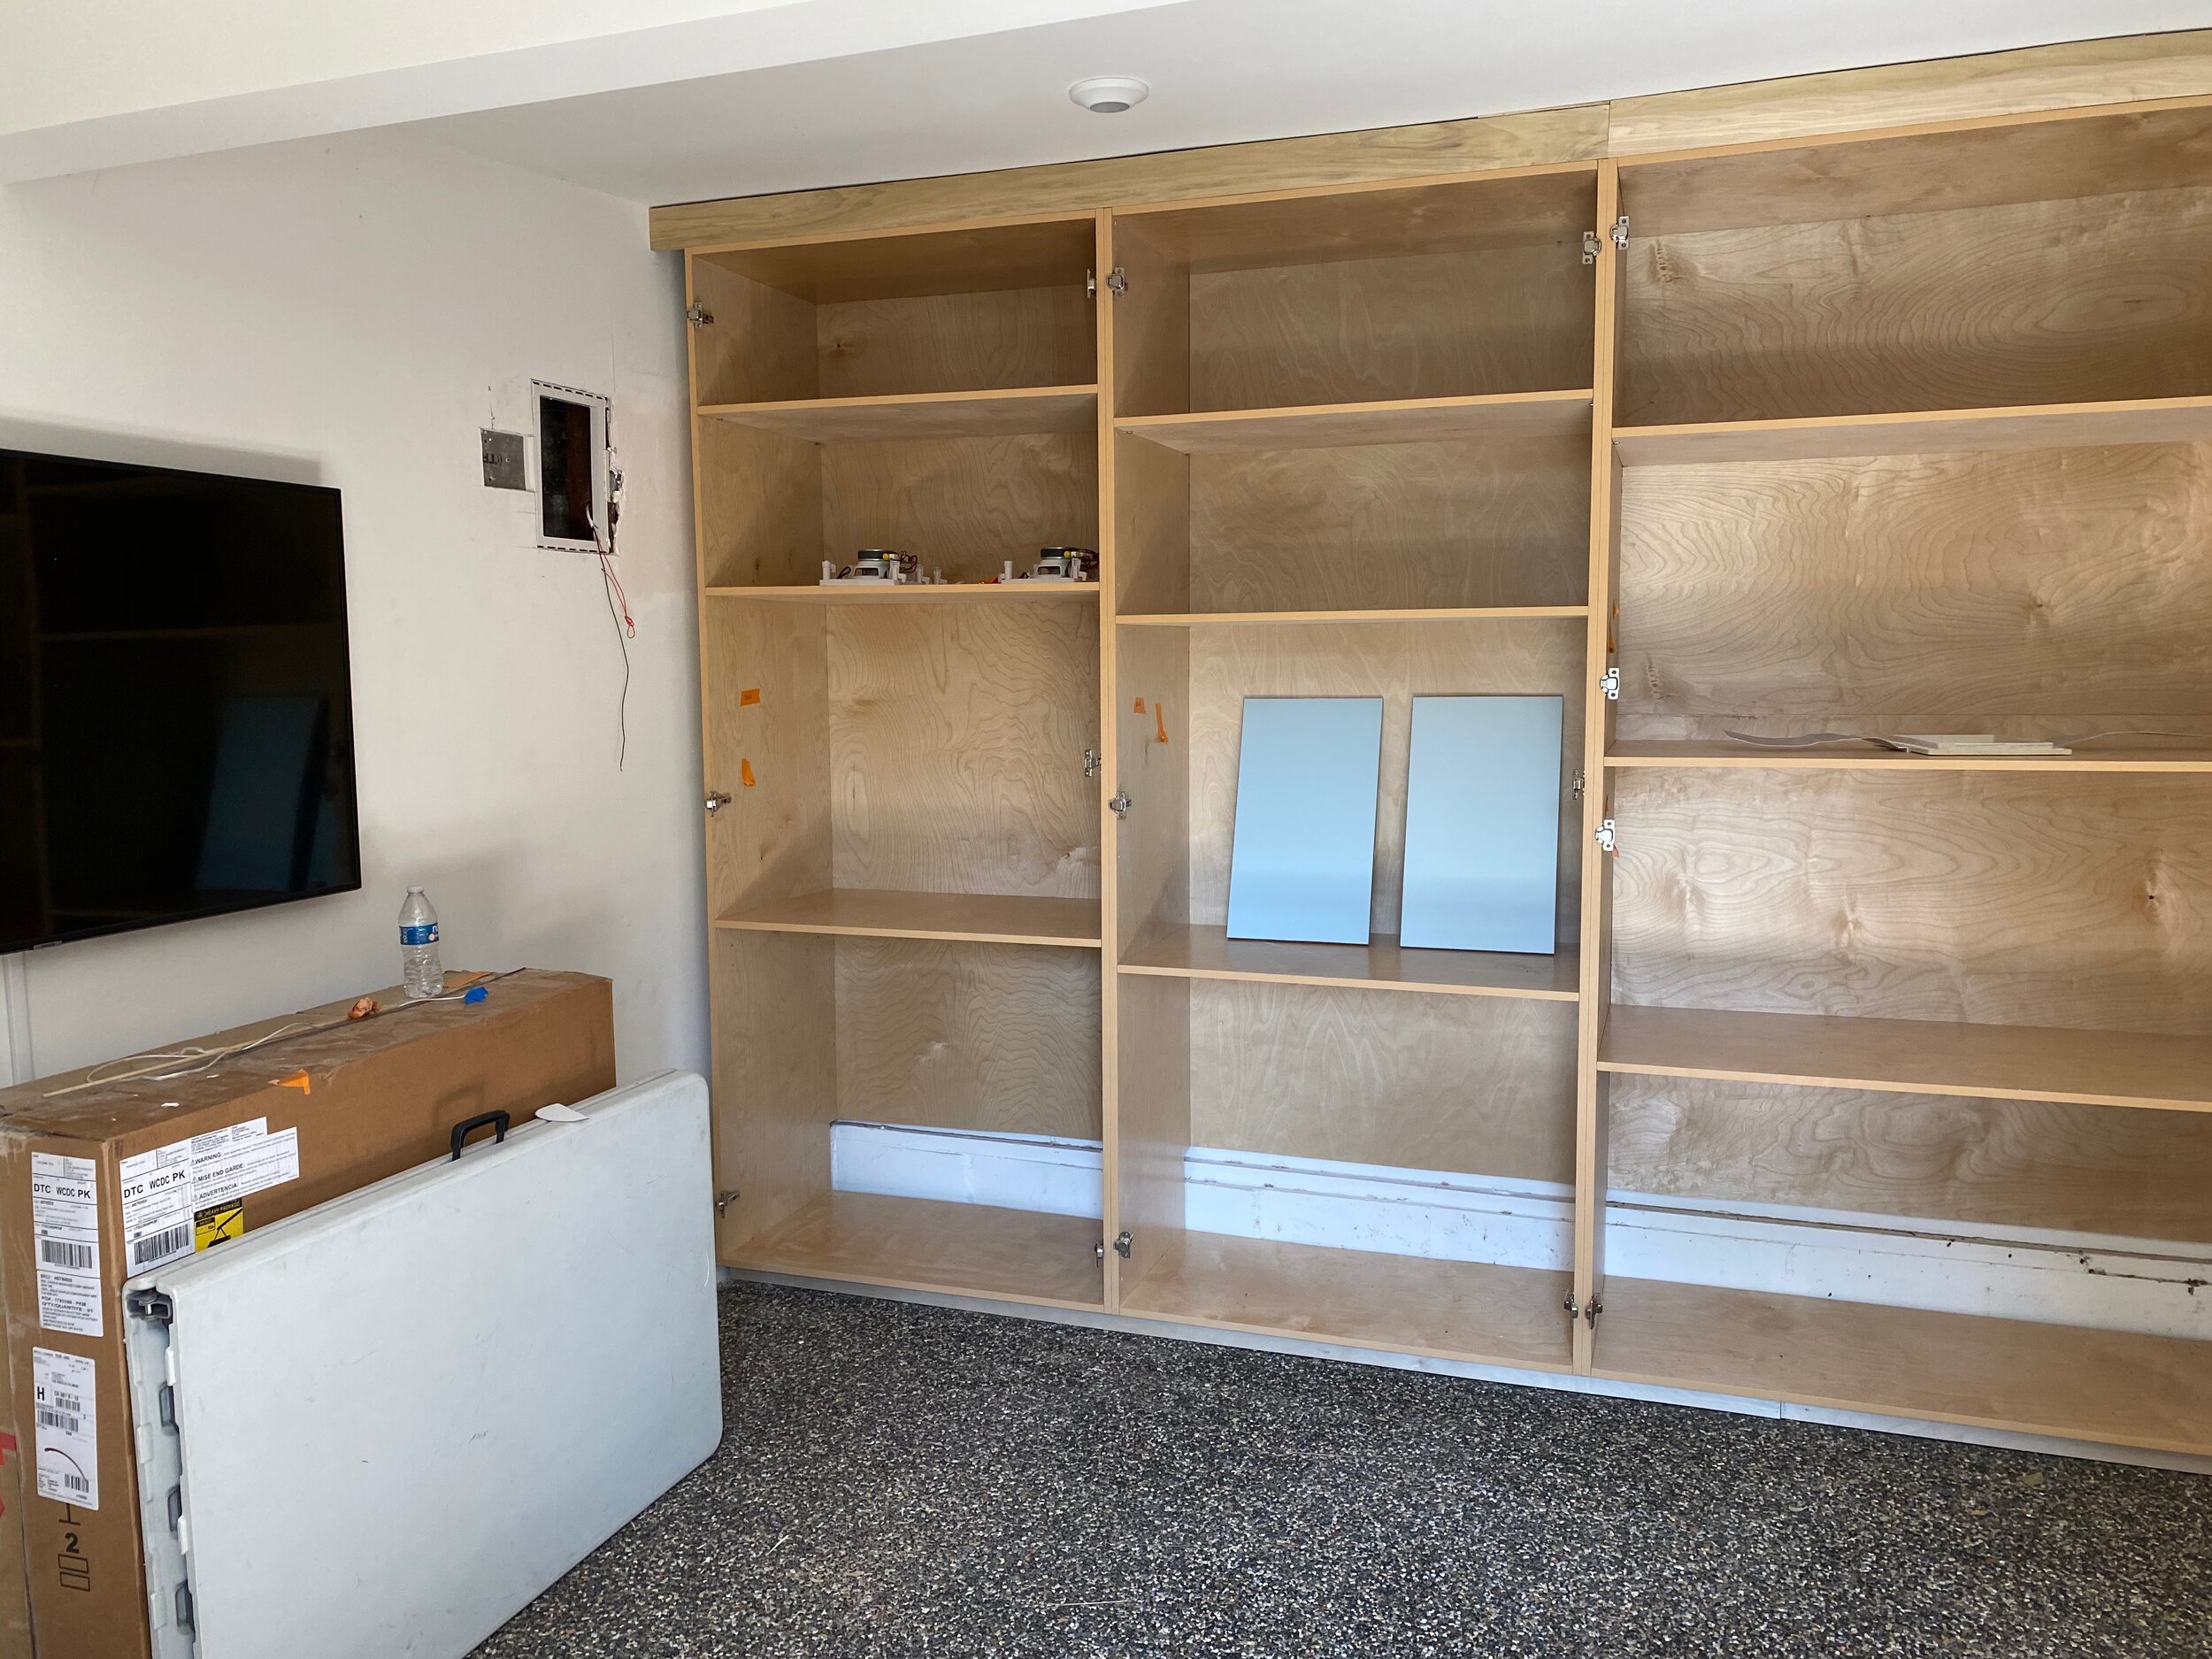
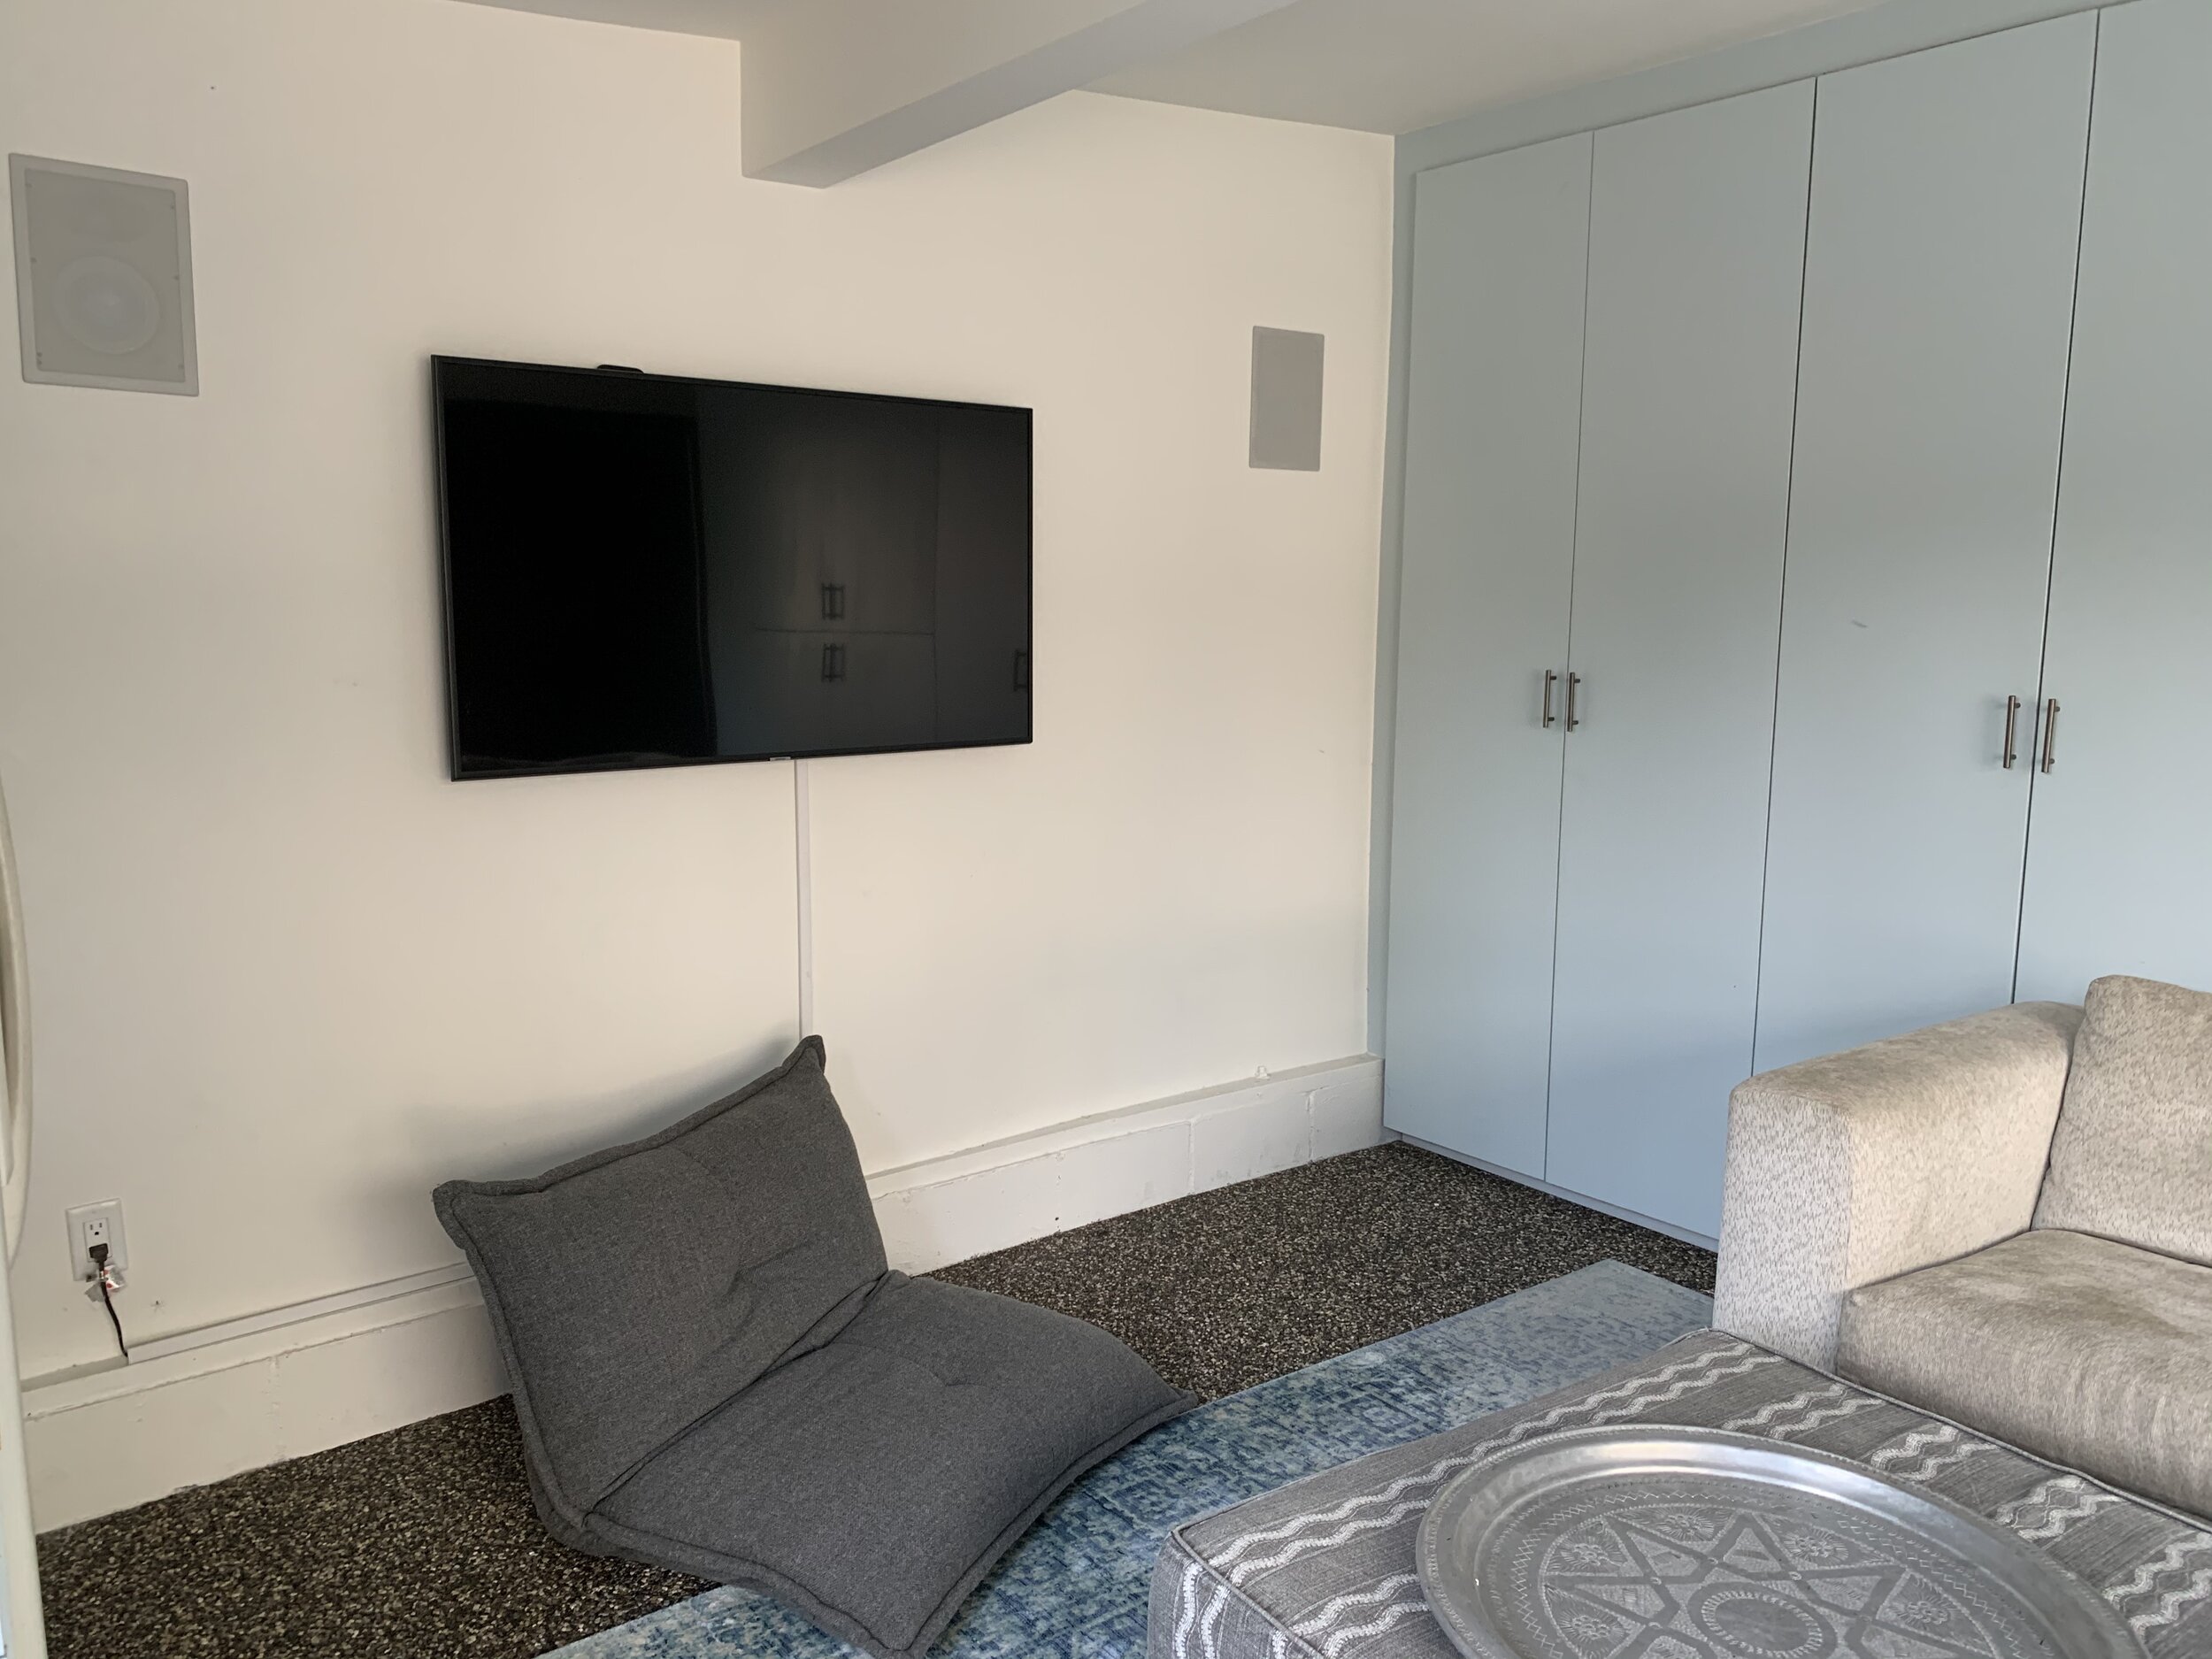
Now for the fun part, Step 5, Style. The goal here was to use the entire right wall to build the custom-fitted storage closet. Also, have additional storage on the opposite wall around the fridge and add a countertop.
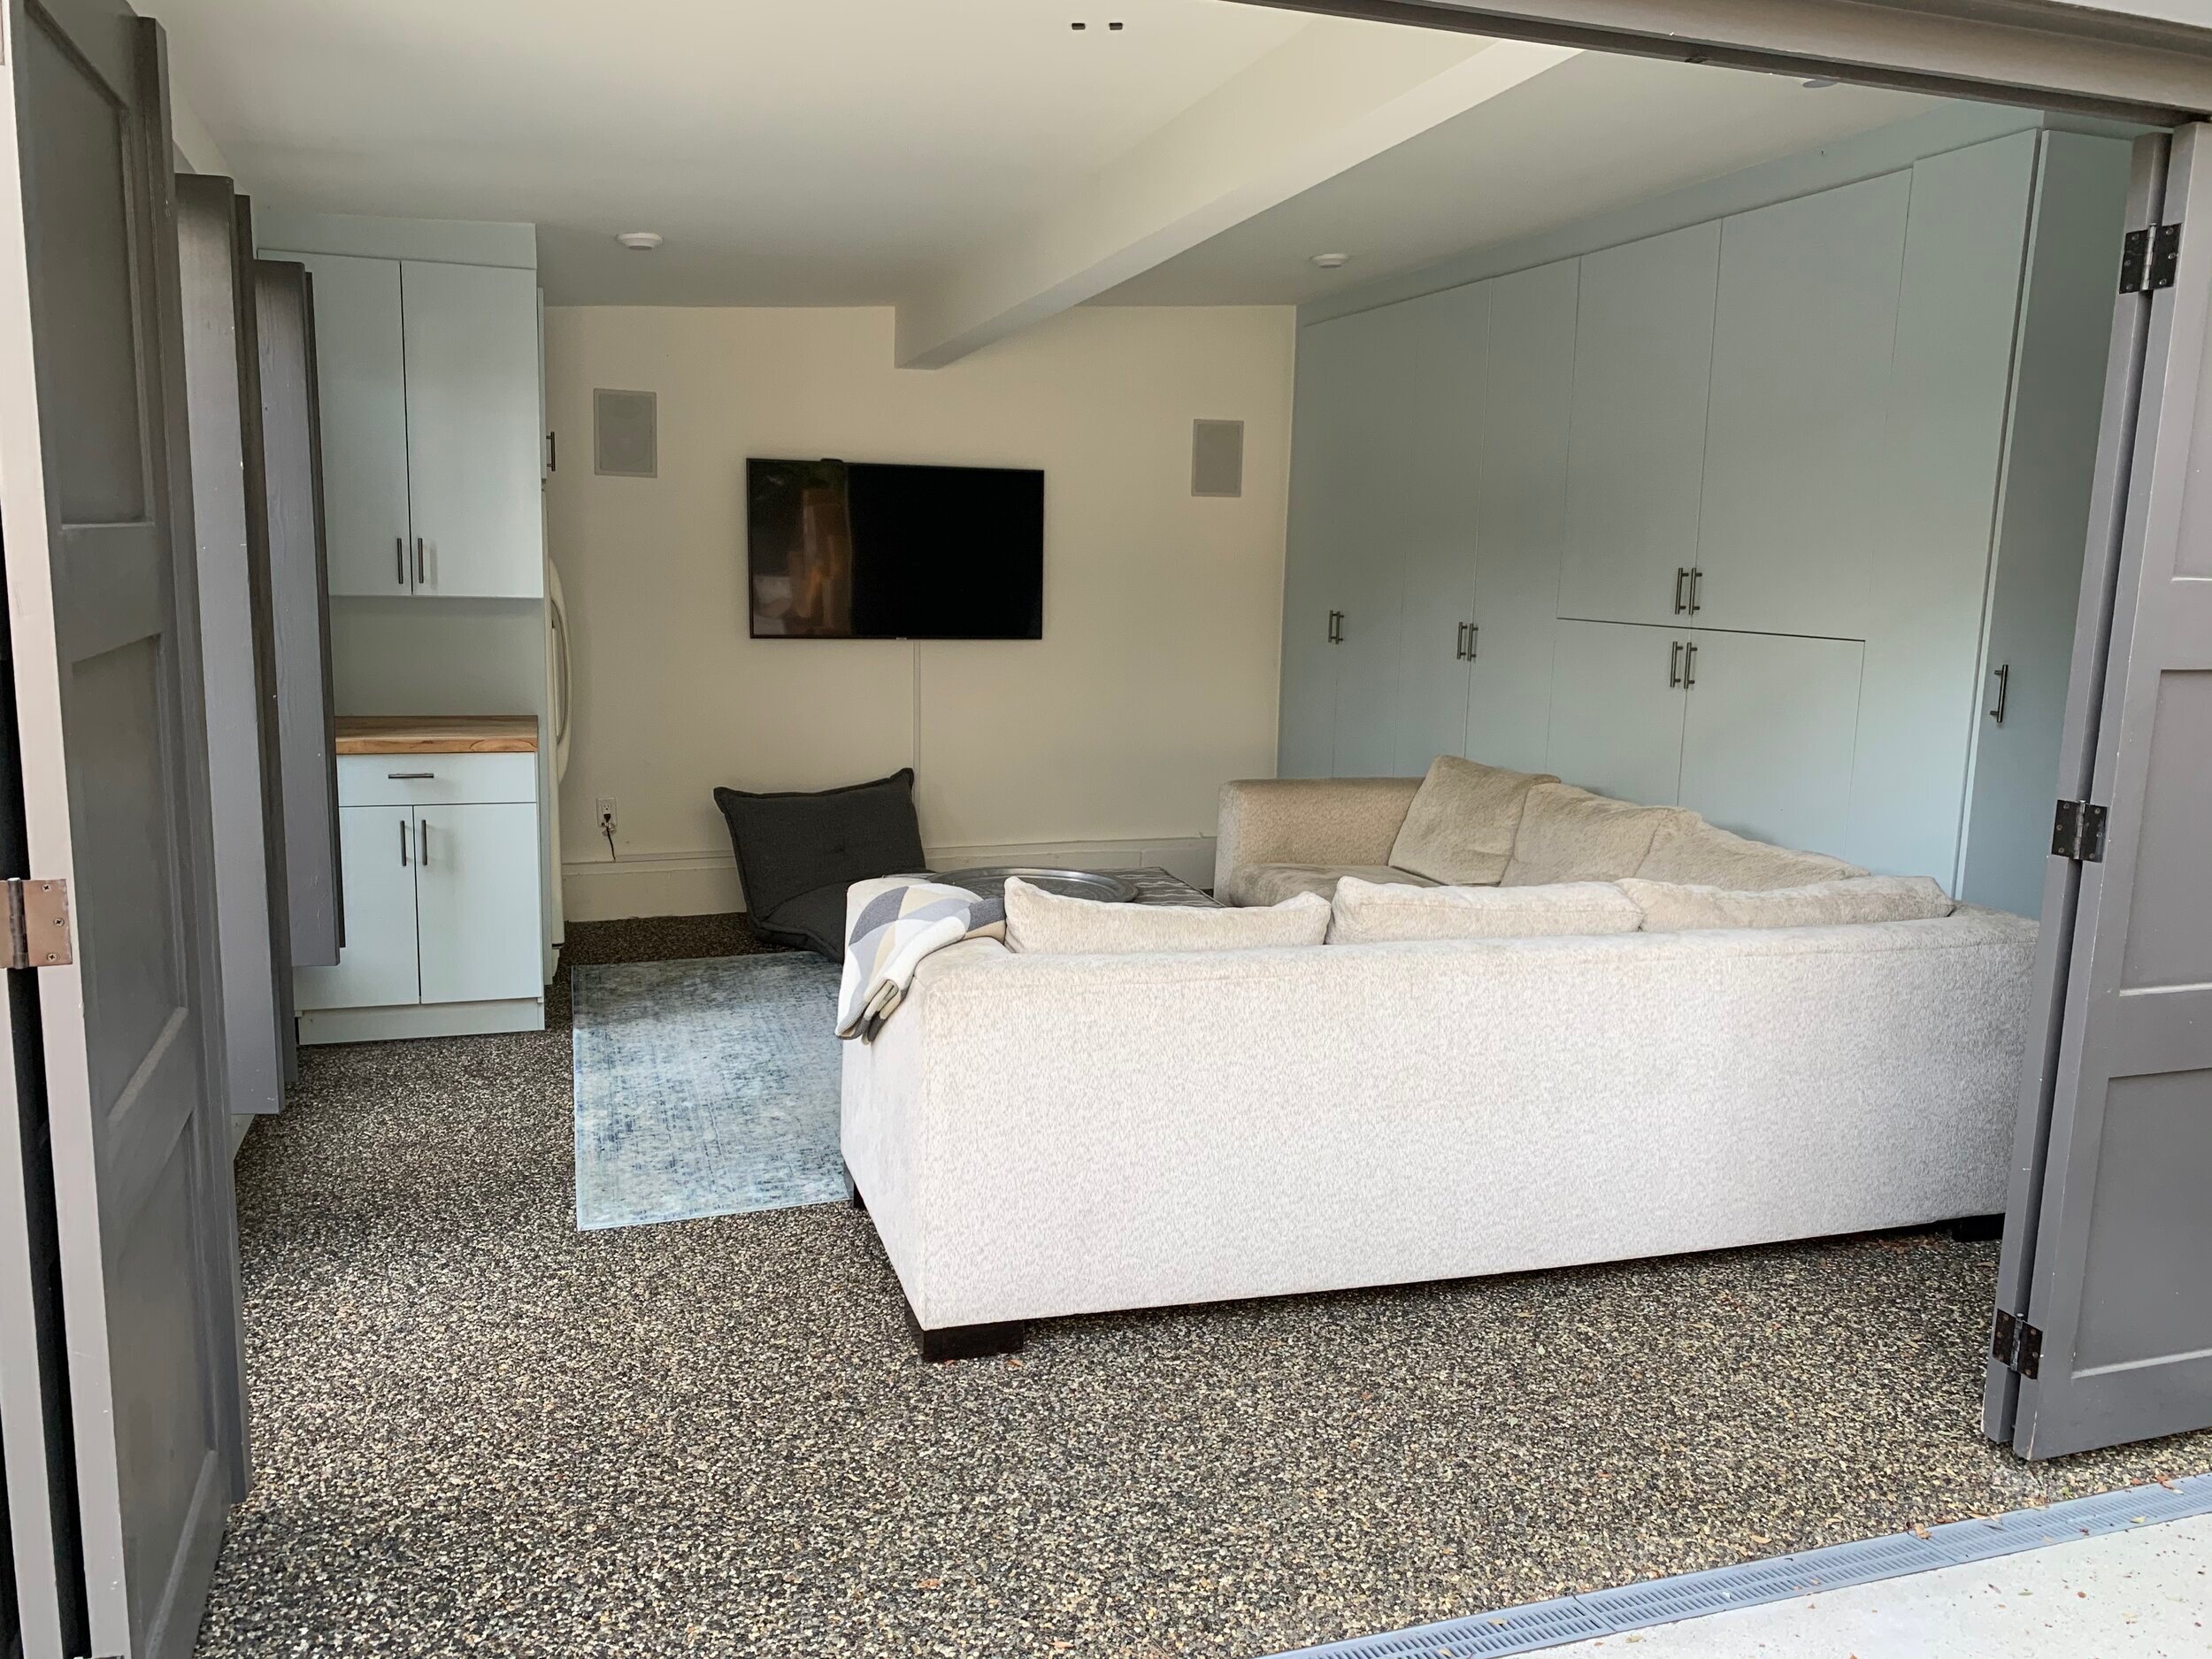
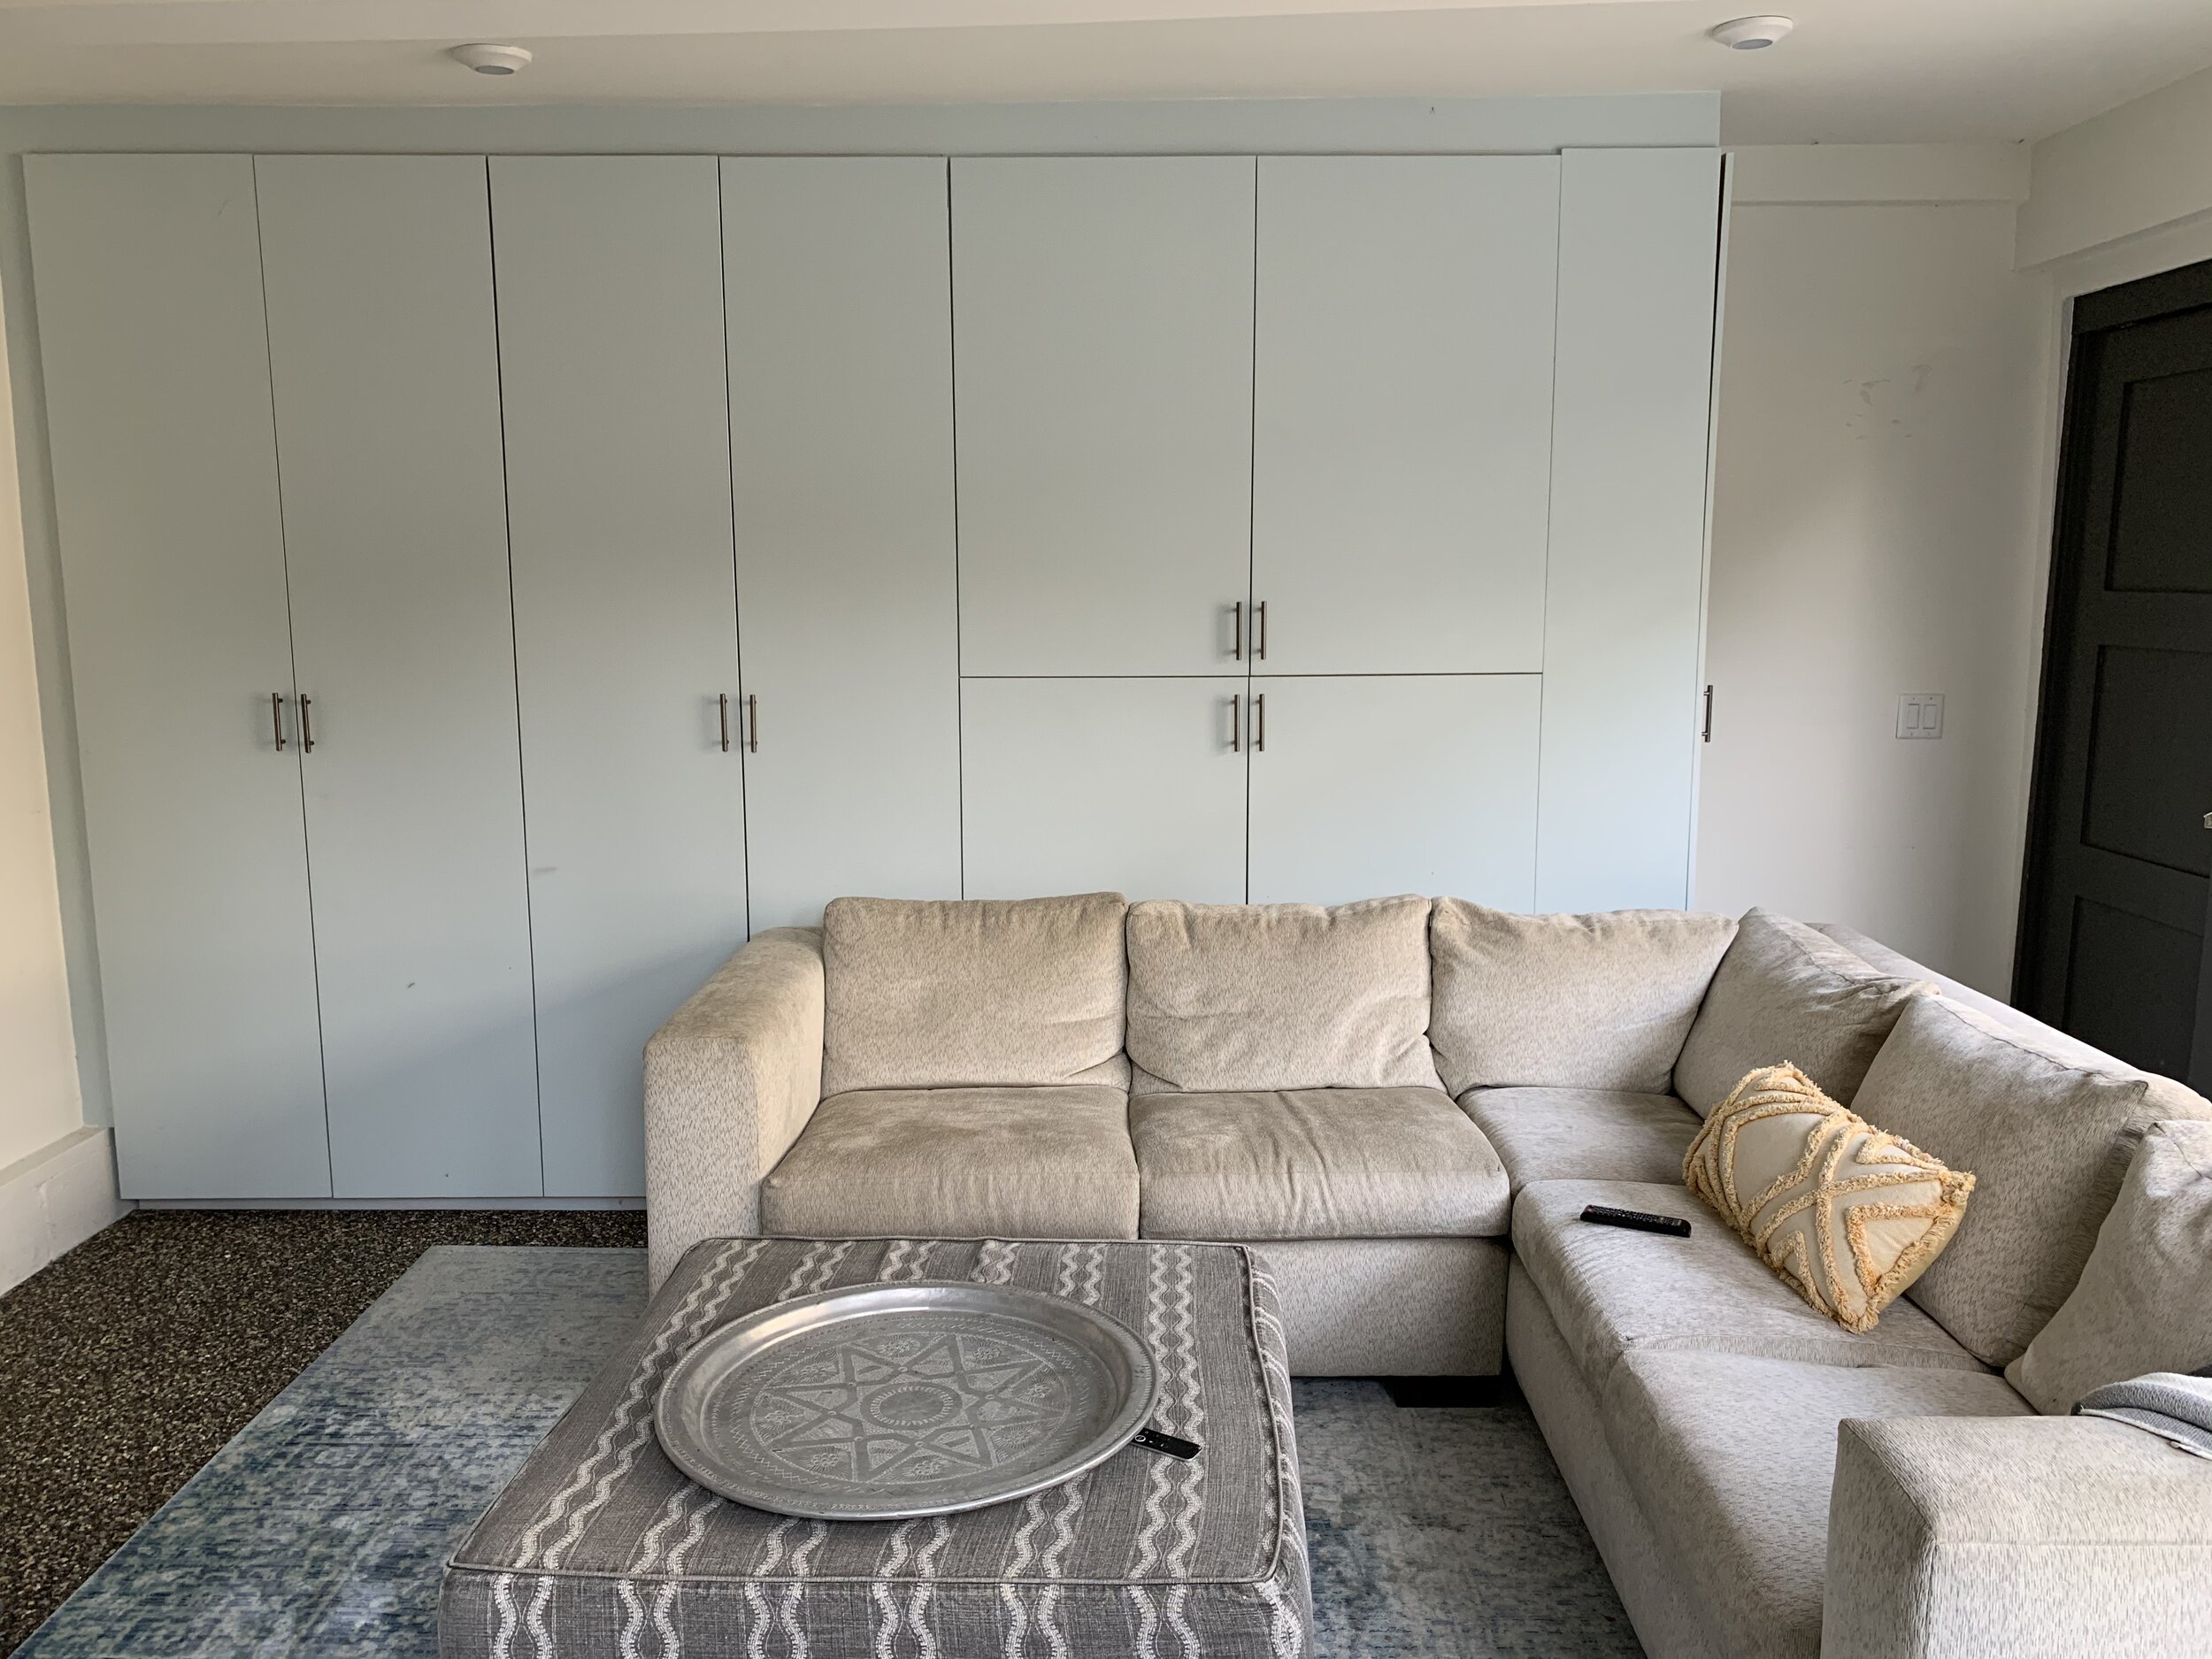
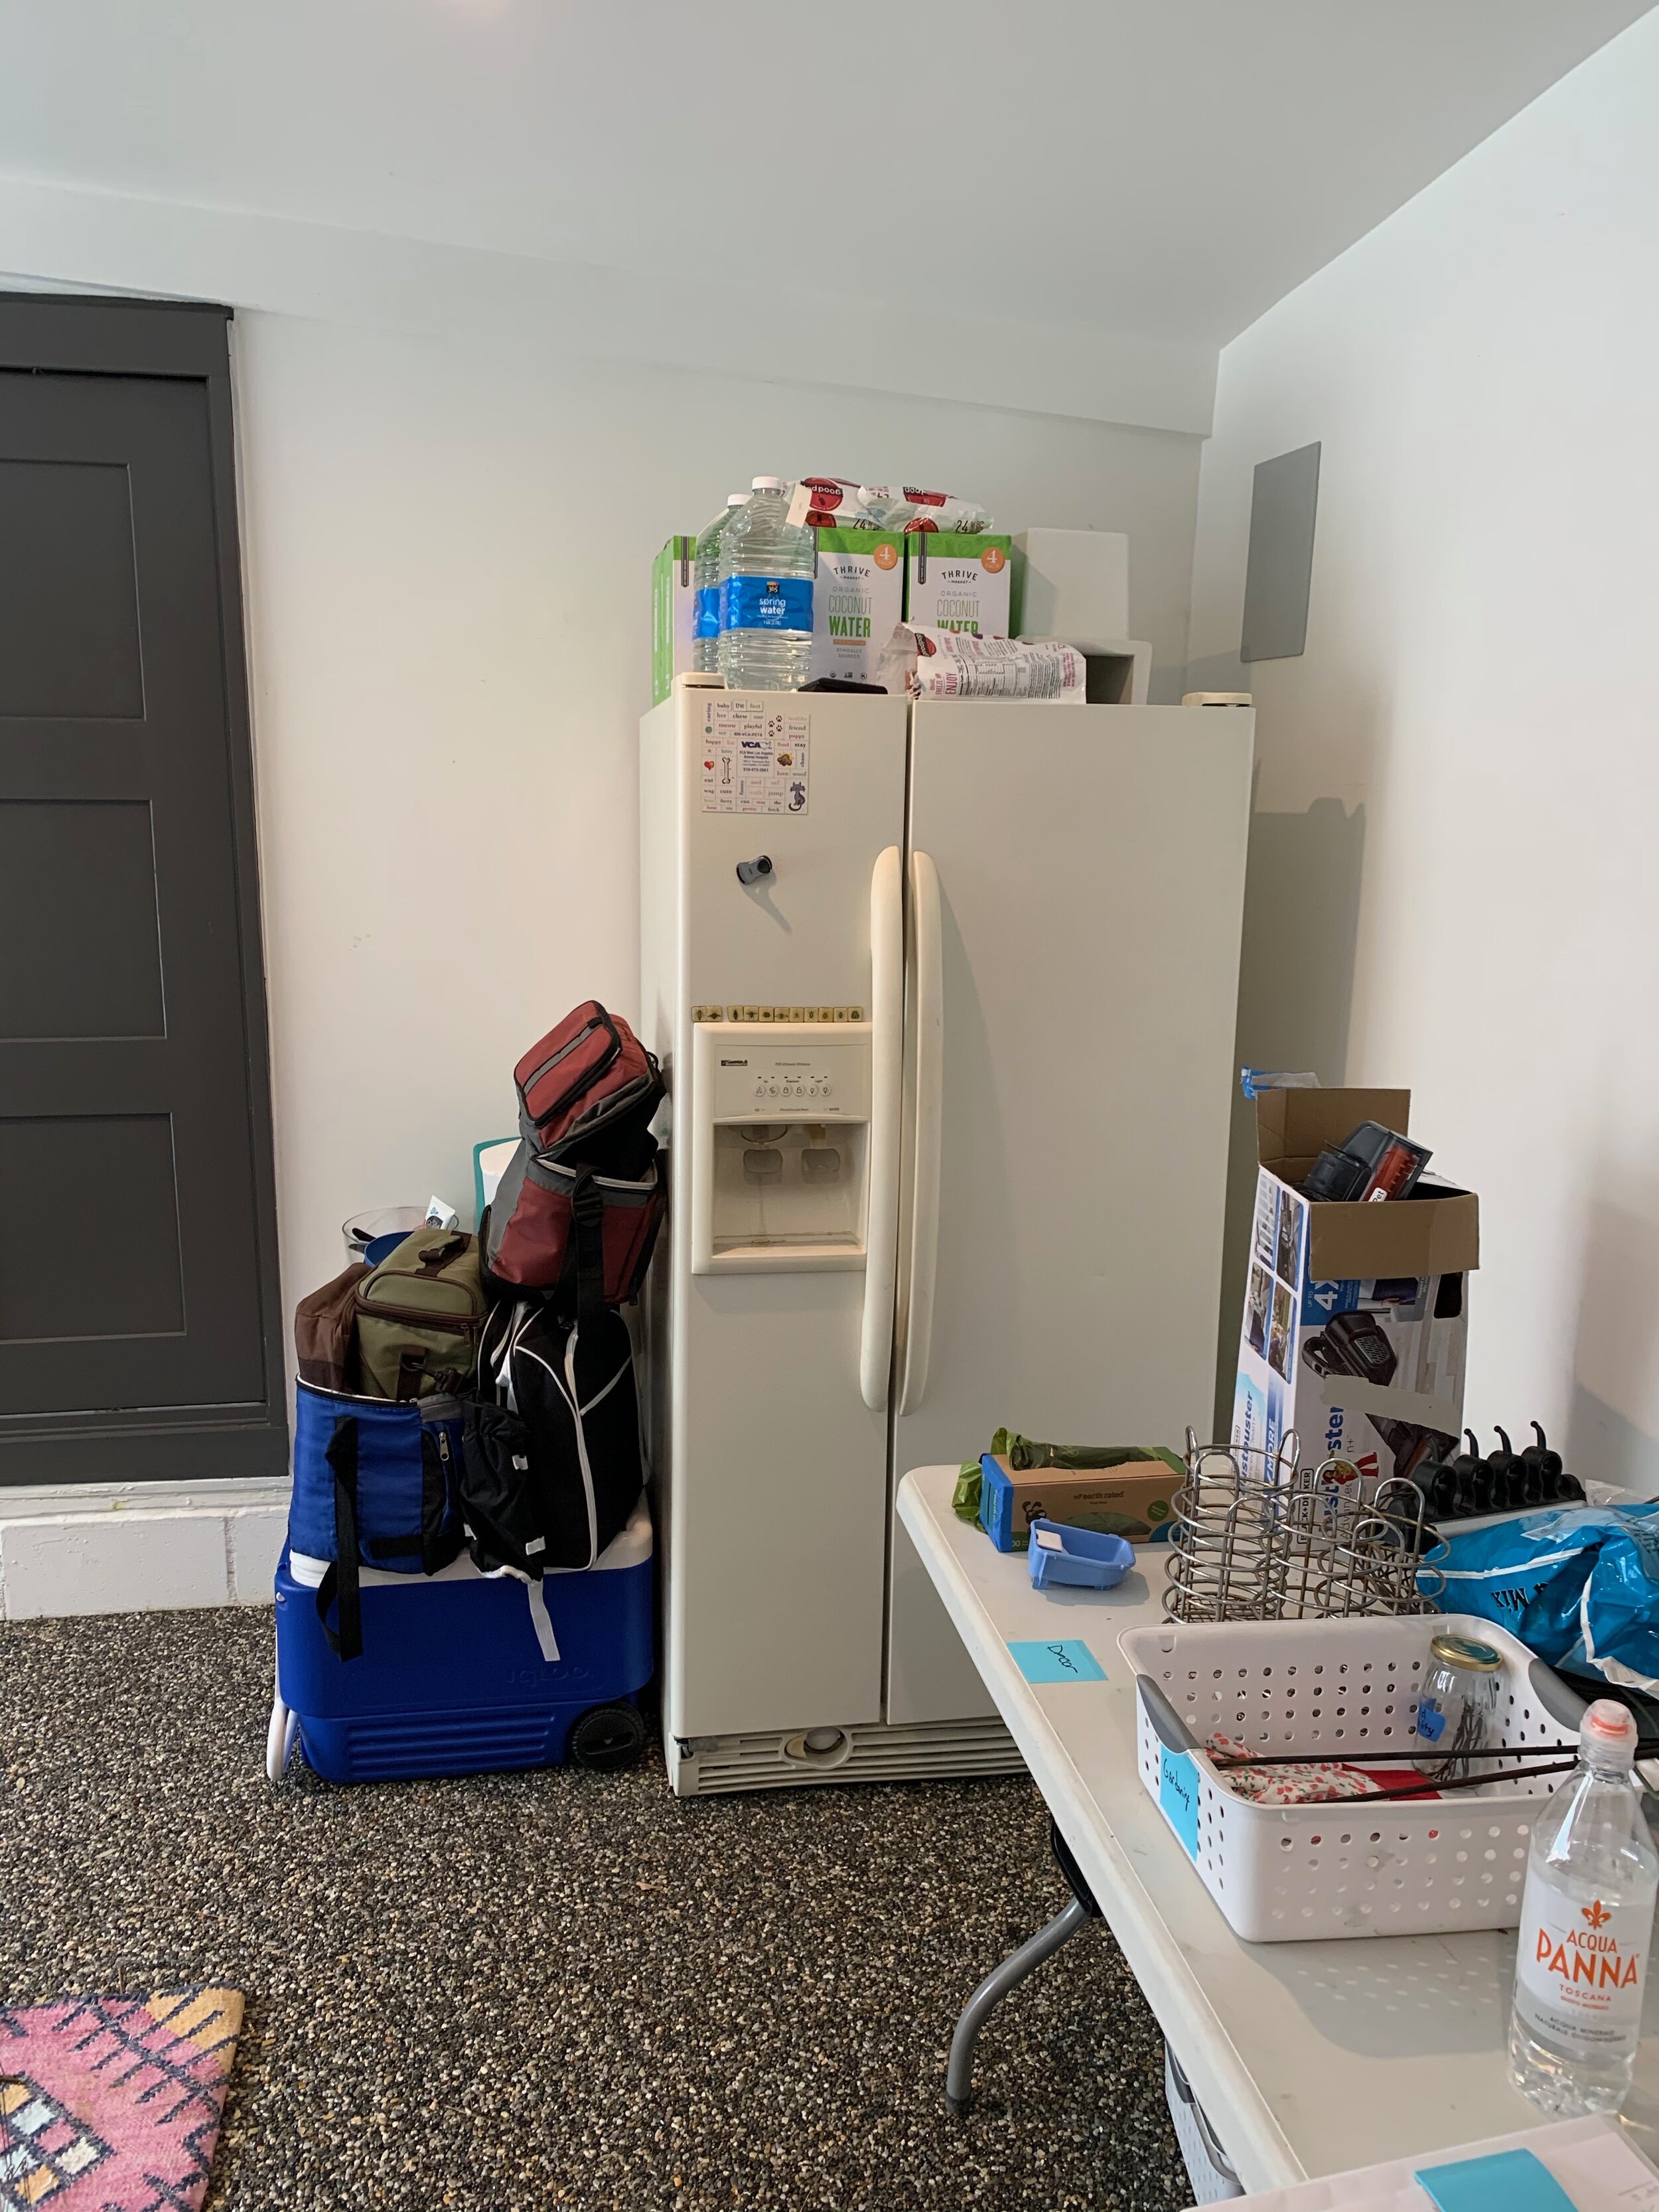
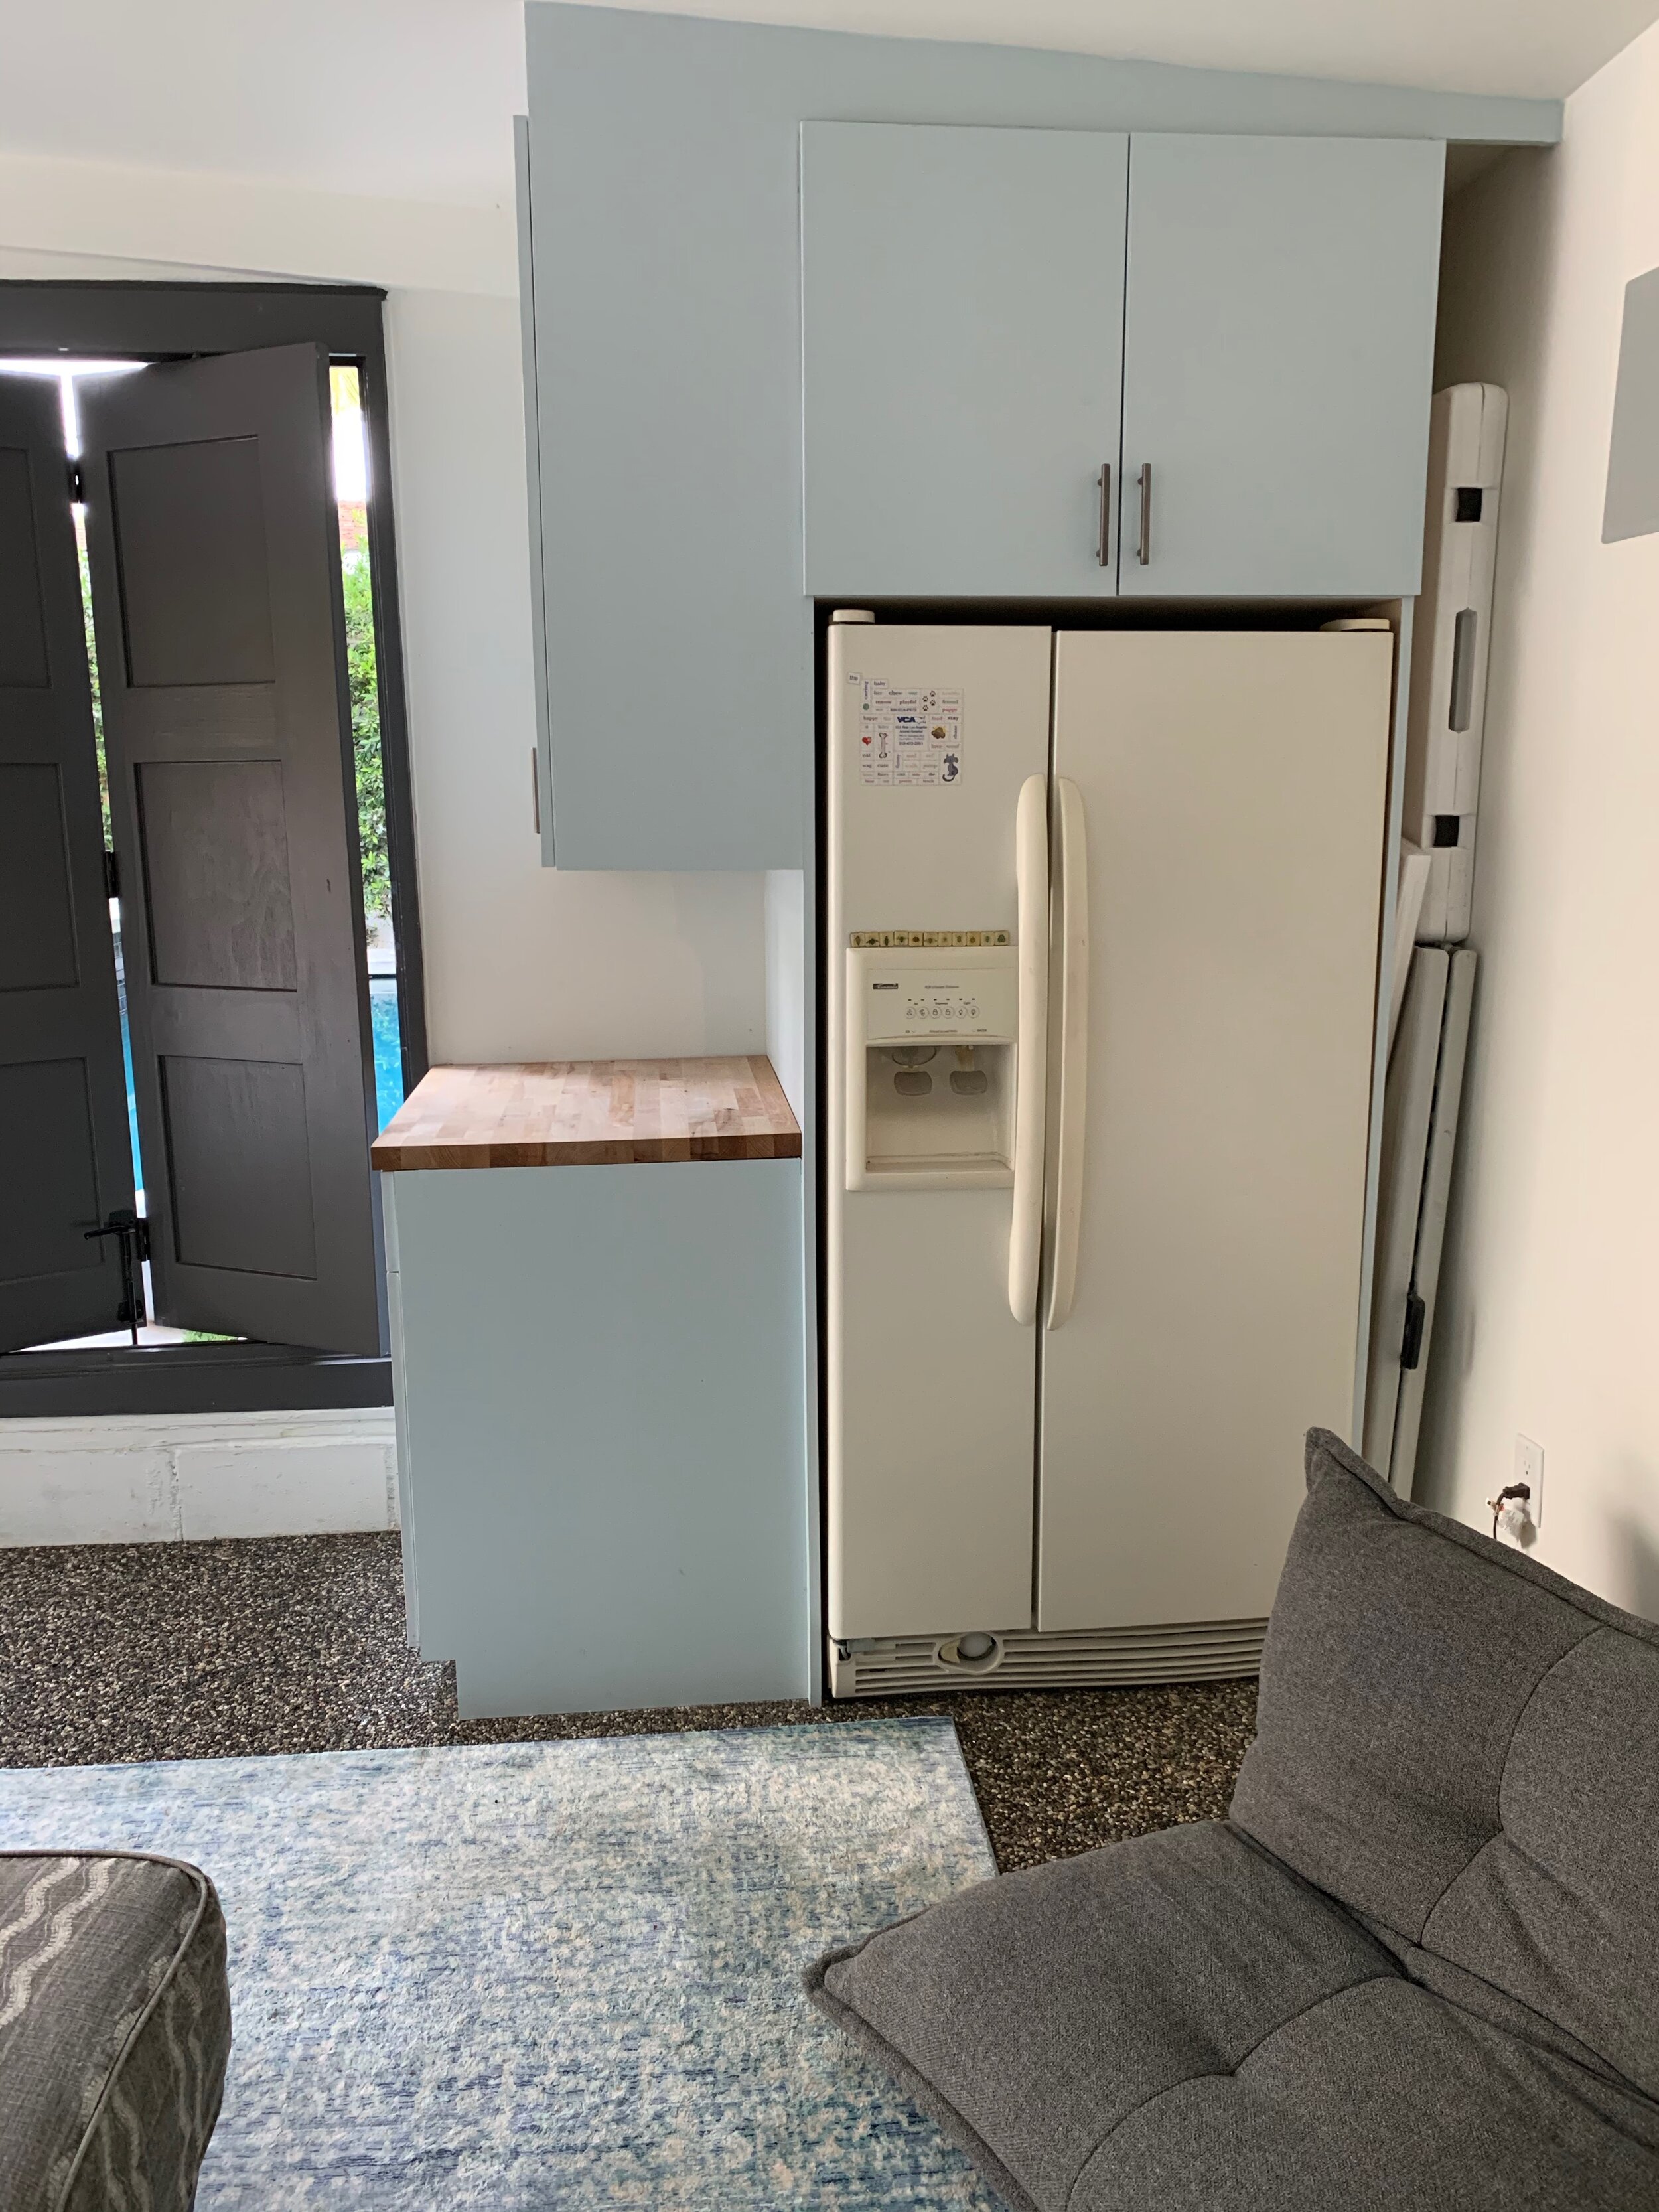
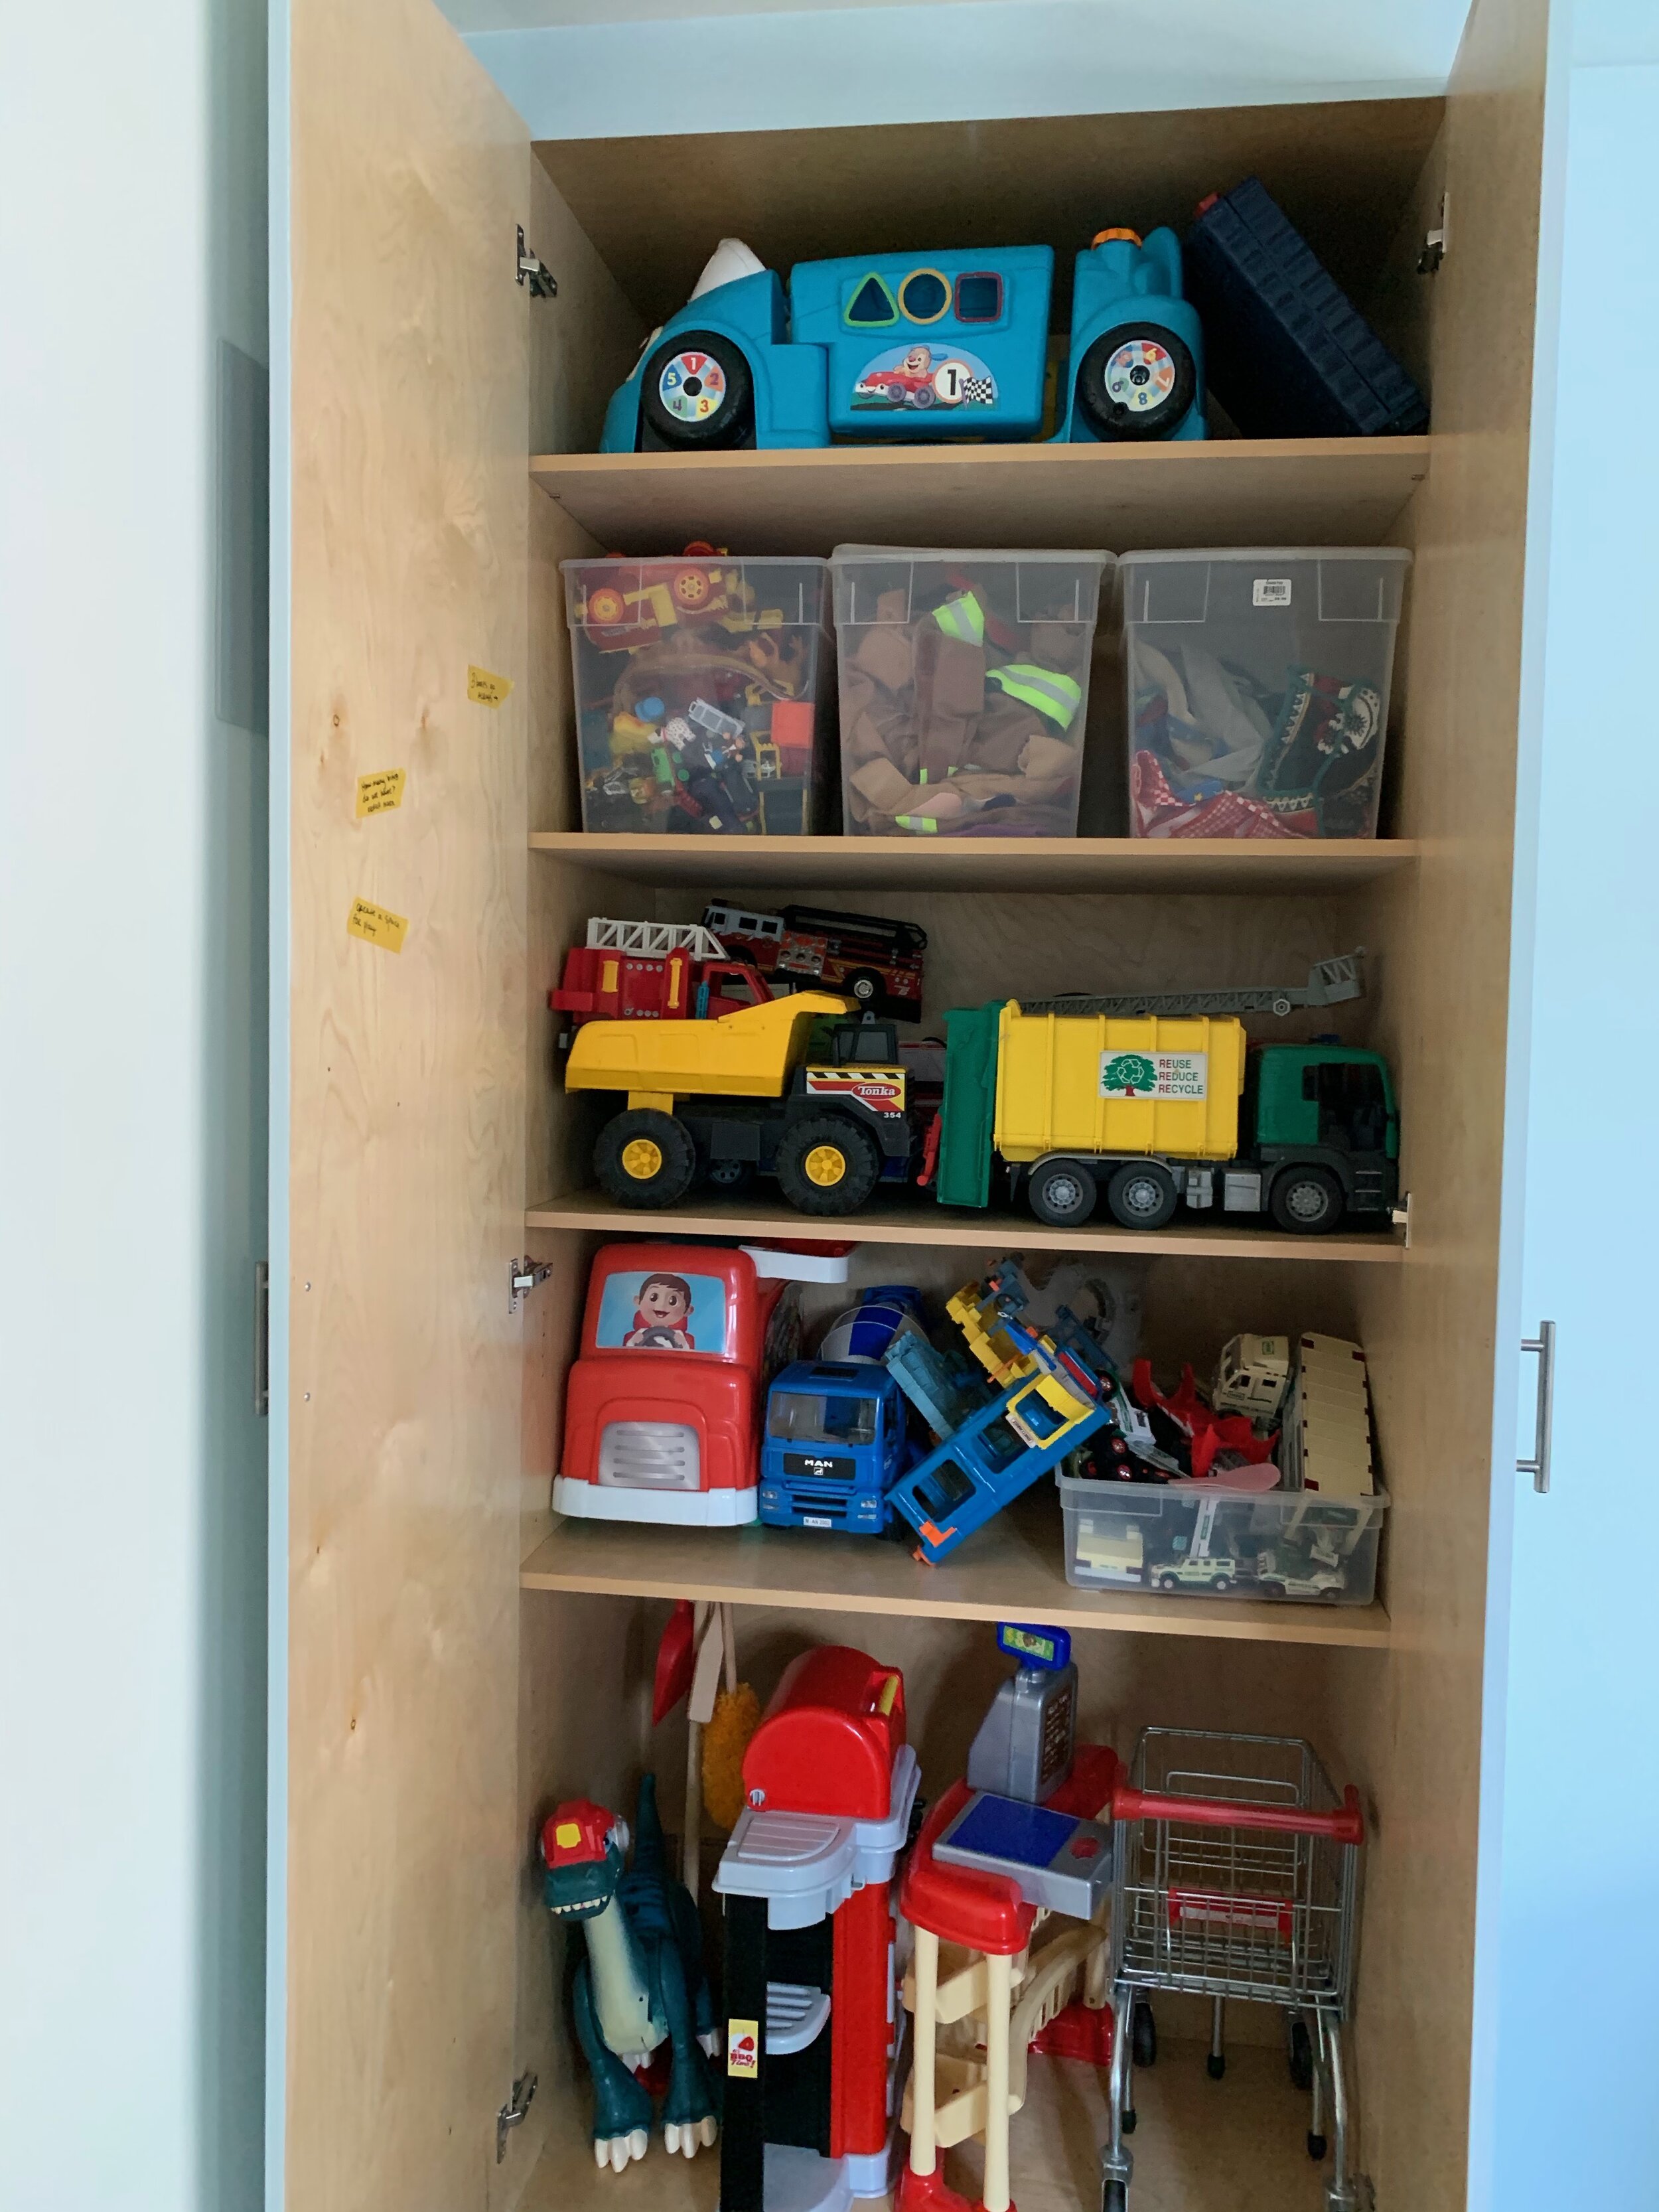
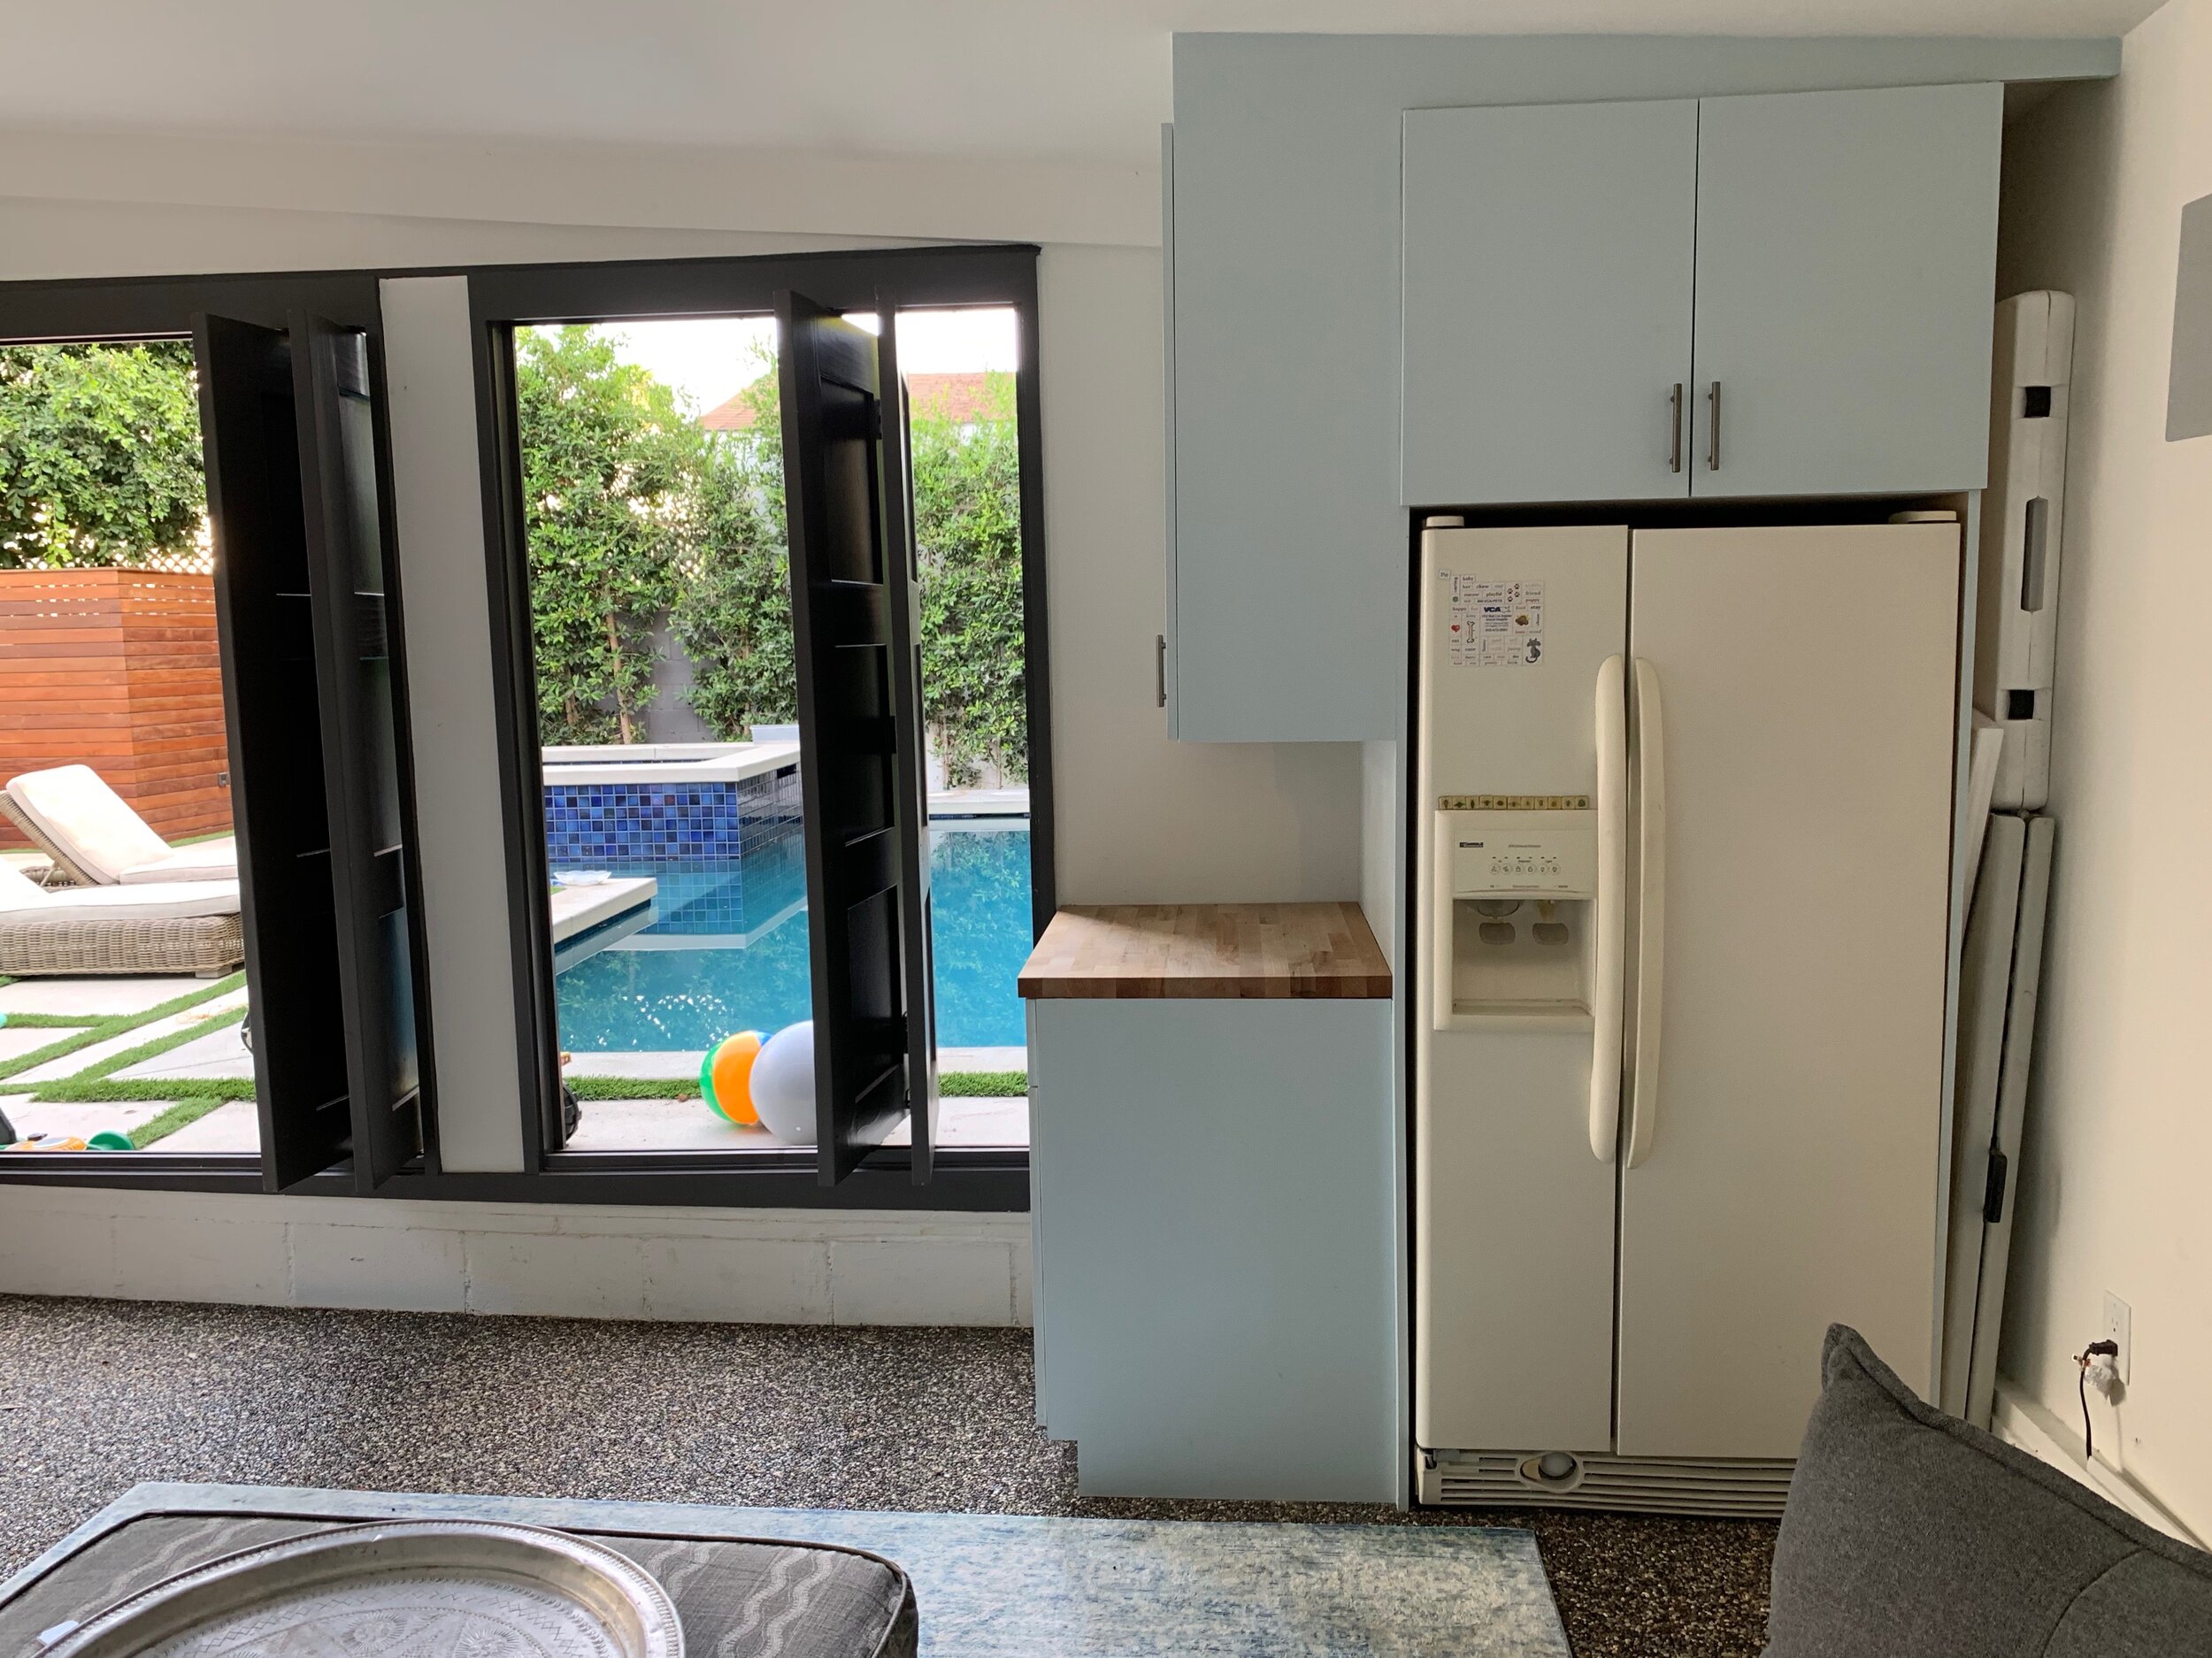
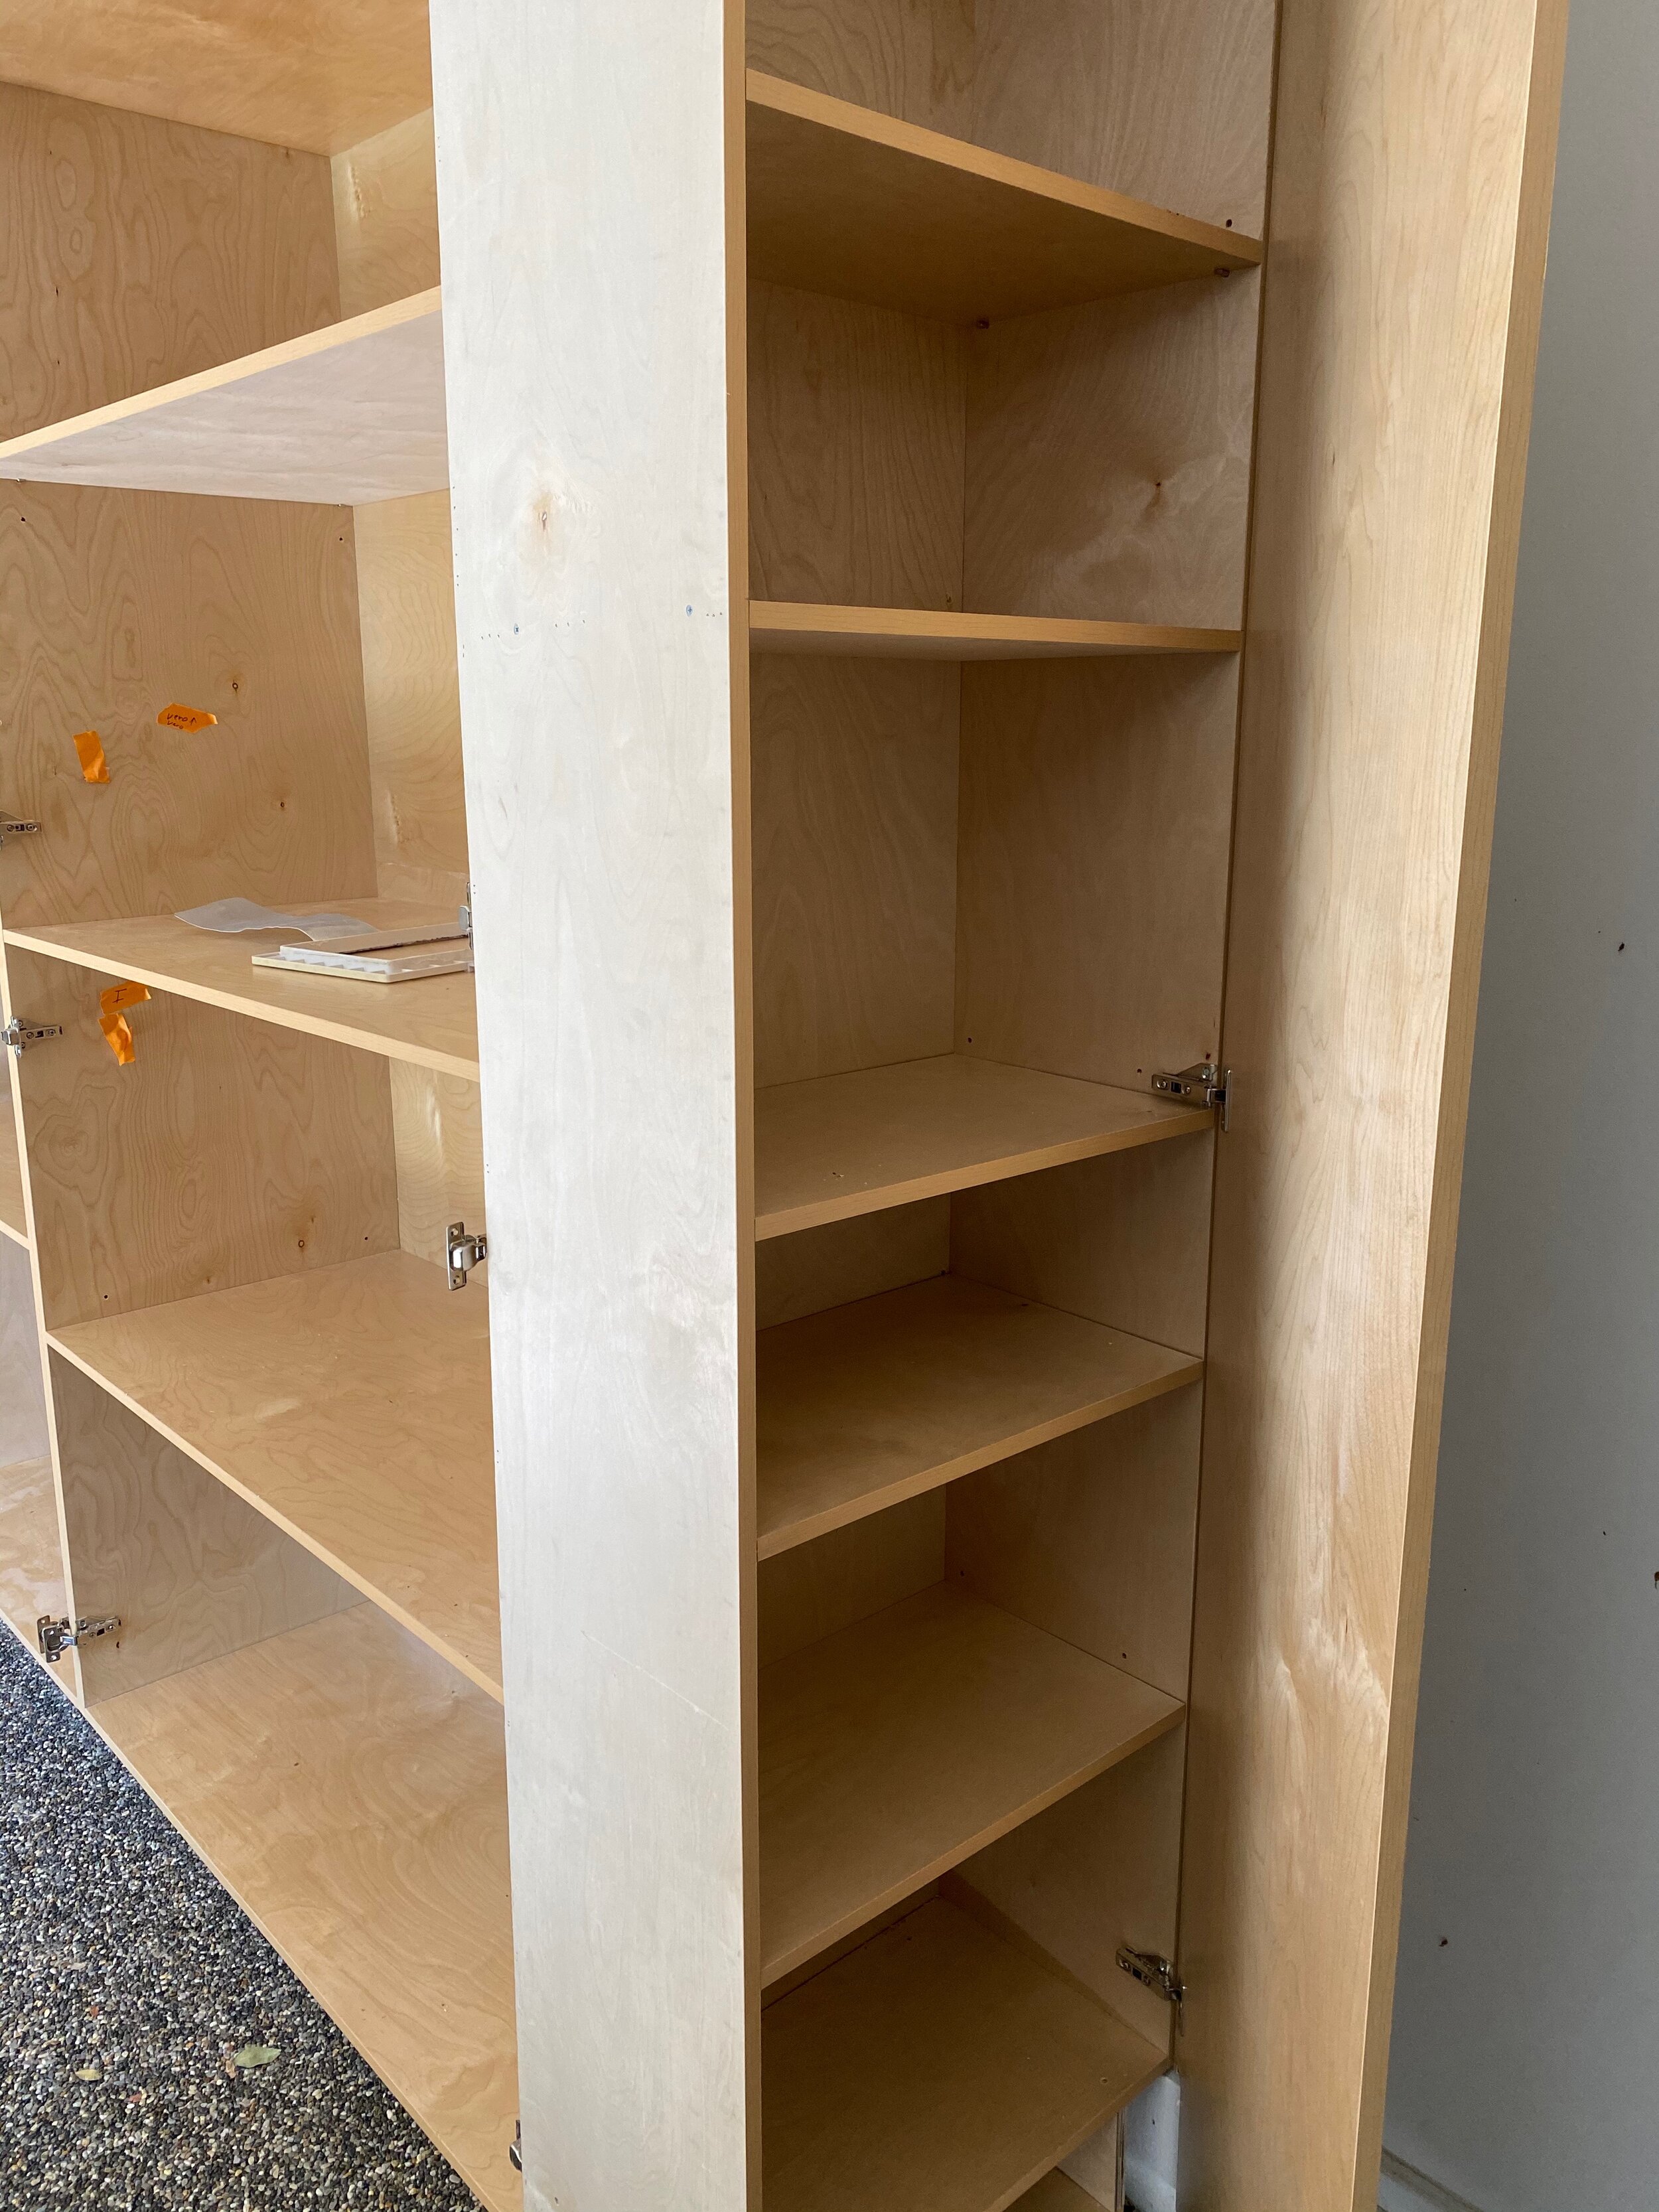
I can’t tell you how exciting it is for an organizer to get to create a custom space for their clients. I was able to make the cabinets wide enough to fit all their luggage and outdoor cushions. All the tall awkward toys had their own shelves. I really couldn’t have done this alone. They had an amazing carpenter on hand that was ready to put all this together. He was very patient with me as I went over every detail, even some odd ones…spiders are pretty bad in LA so I wanted to make sure that there were no openings on top of the cabinets for an Arachno-Ville to happen. He customized the top panel to accommodate the sloping ceilings and closed them off. It was important that all the shelves were adjustable and could be changed as their needs changed. Storing fold-up tables can be problematic, so being able to create a gap between the fridge and wall just wide enough to fit their tables was very satisfying for me. Overall I love the way this project came out and my client couldn’t be happier with the end results.