Tween to Teen Bedroom Makeover

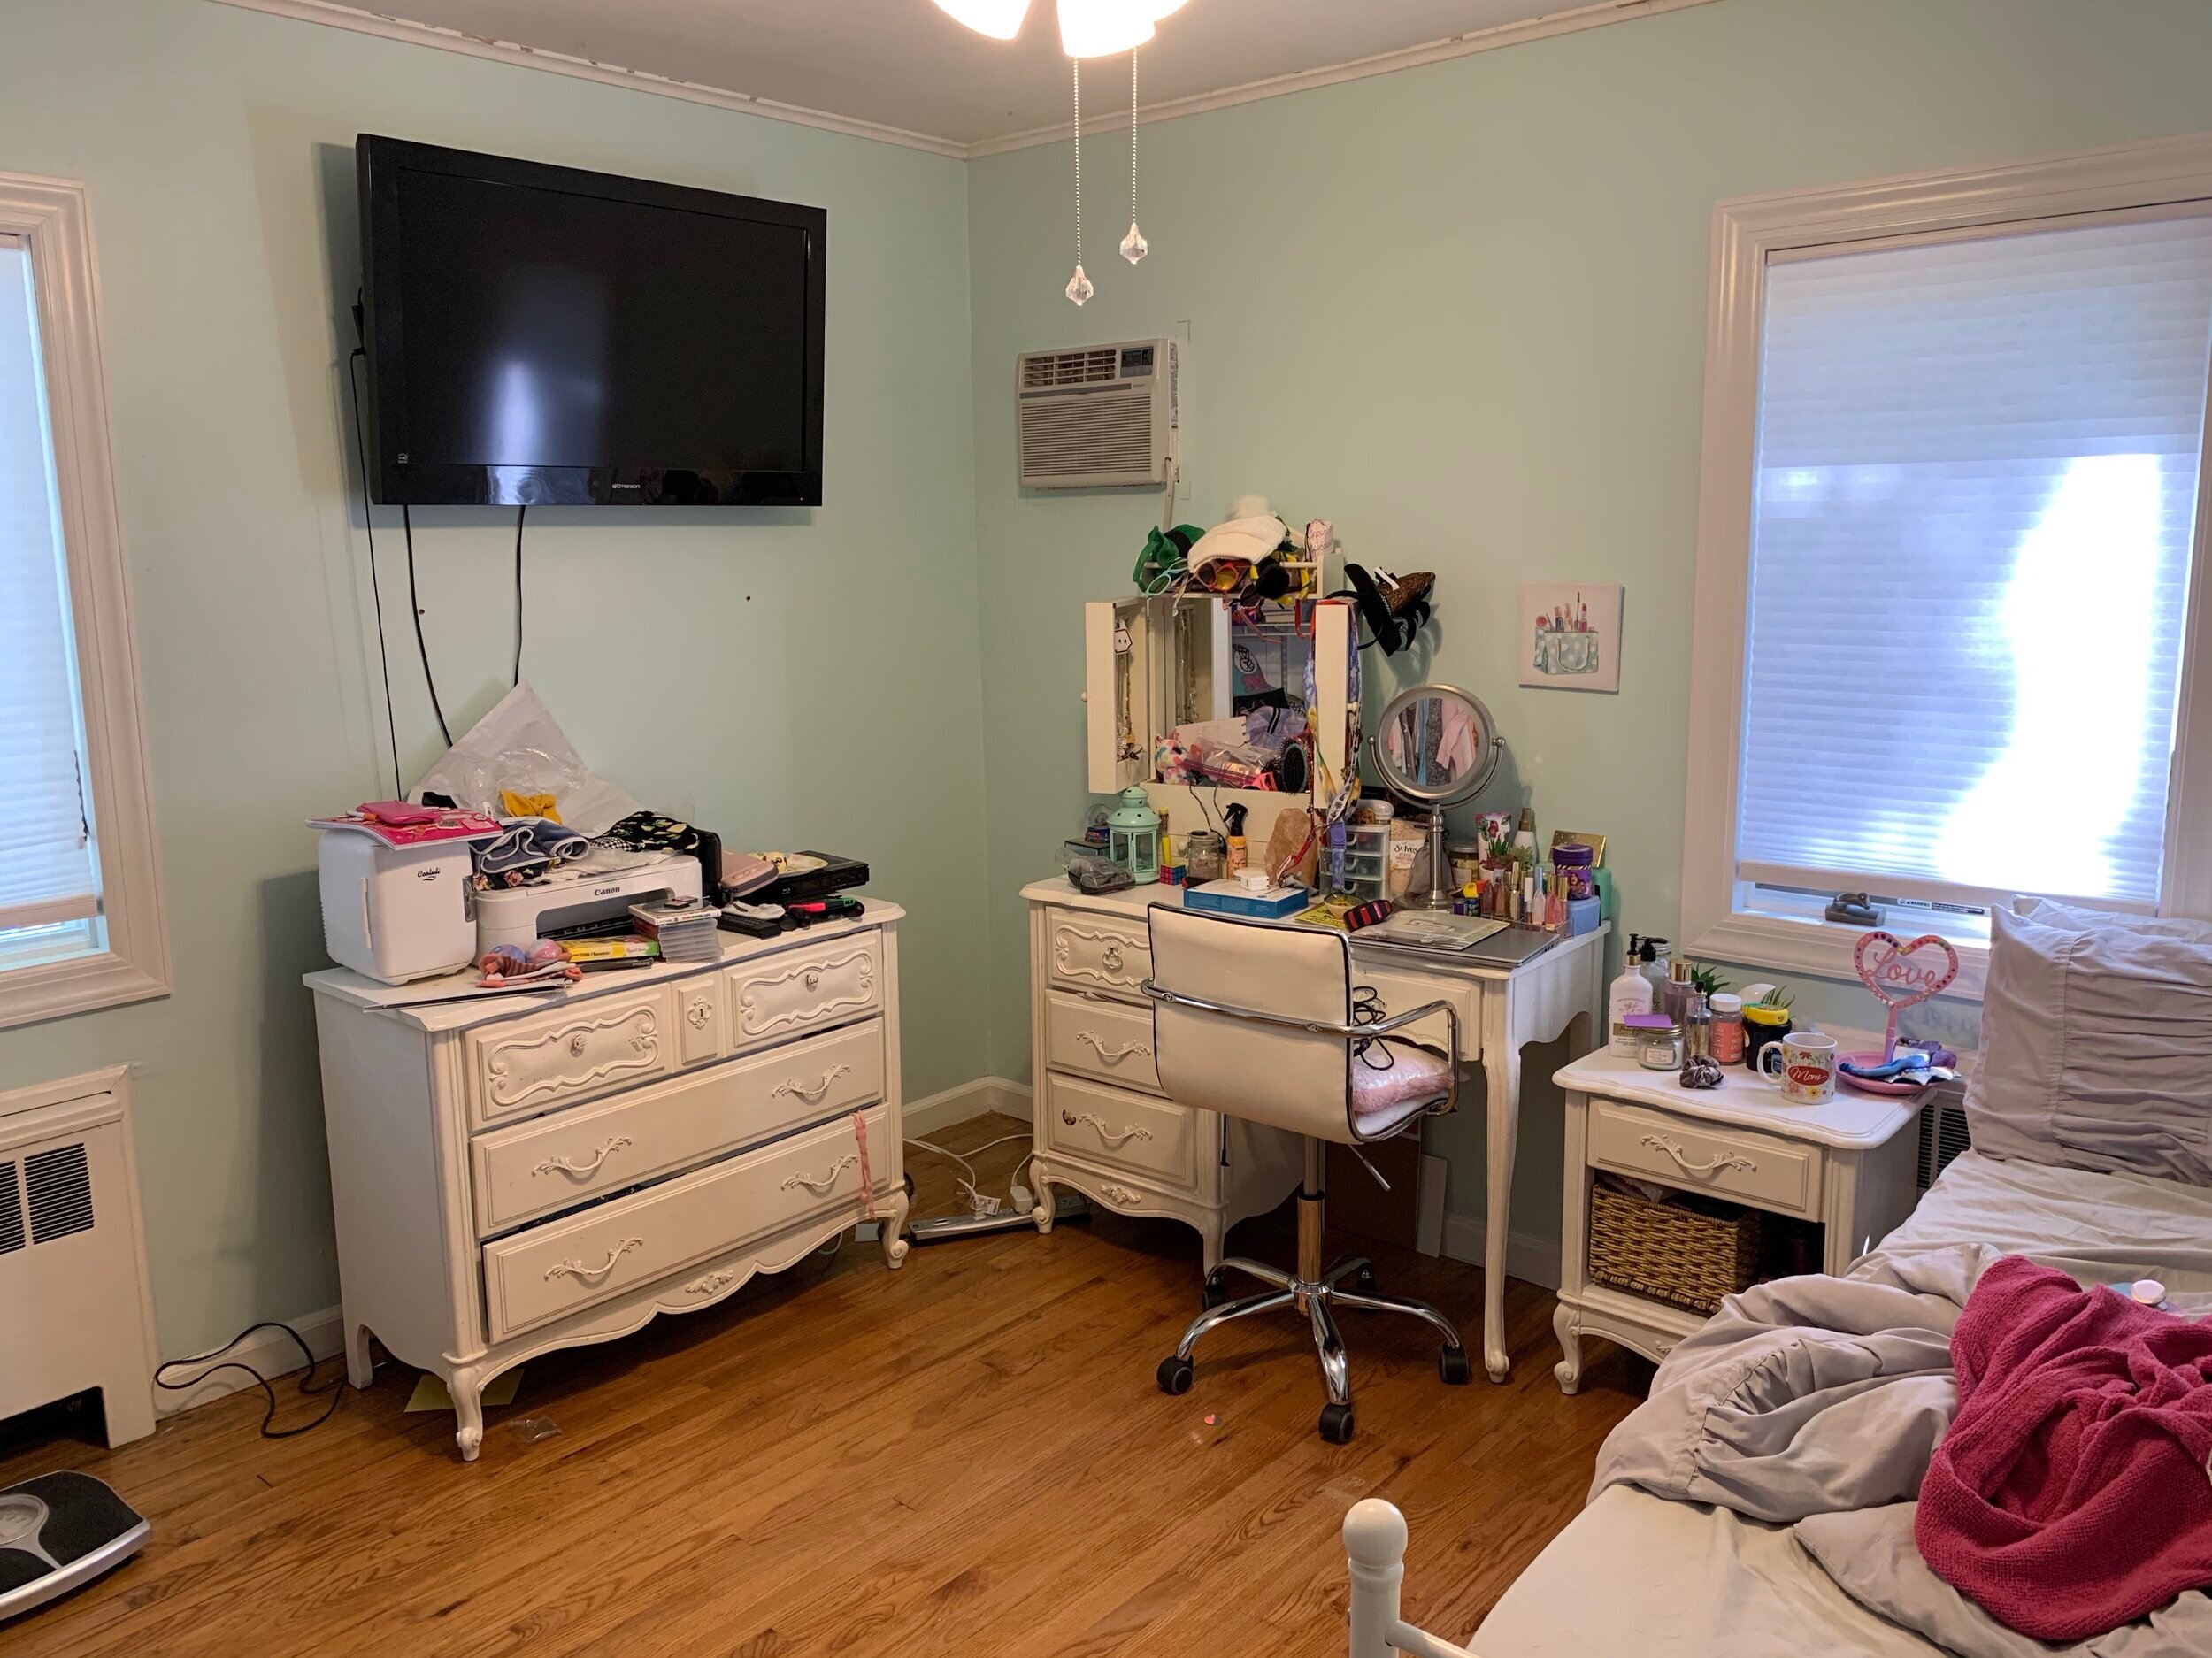
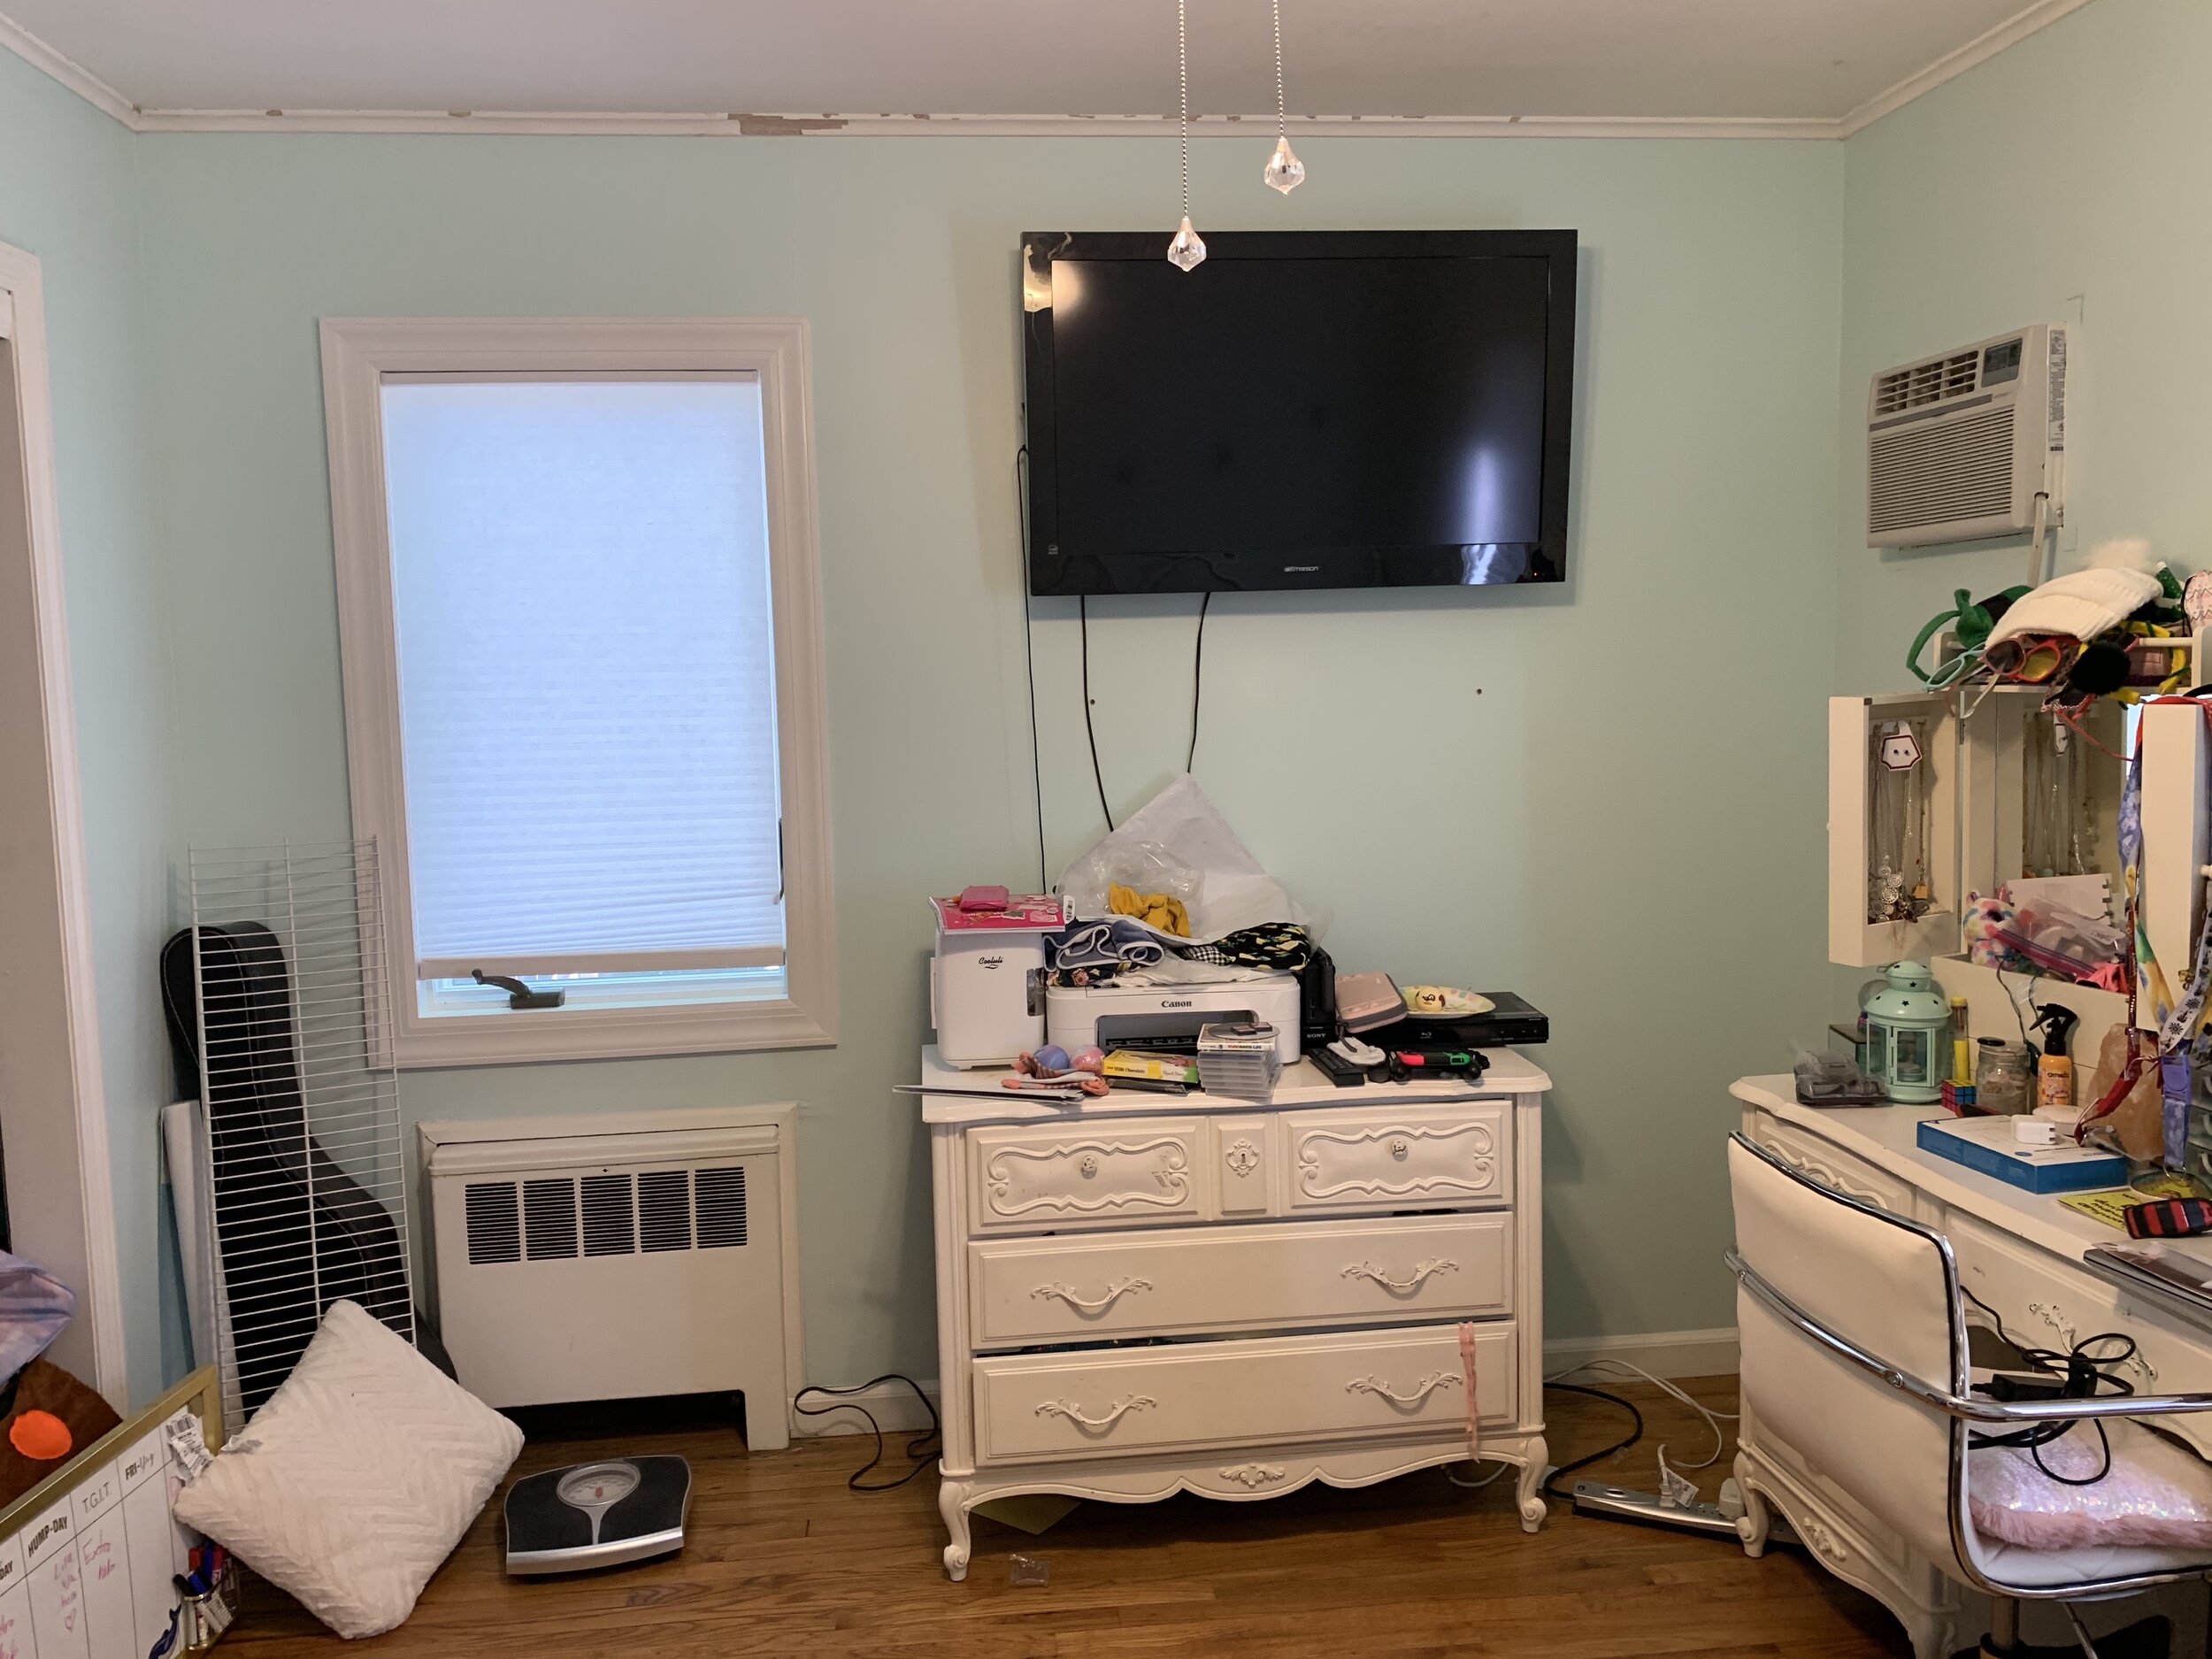
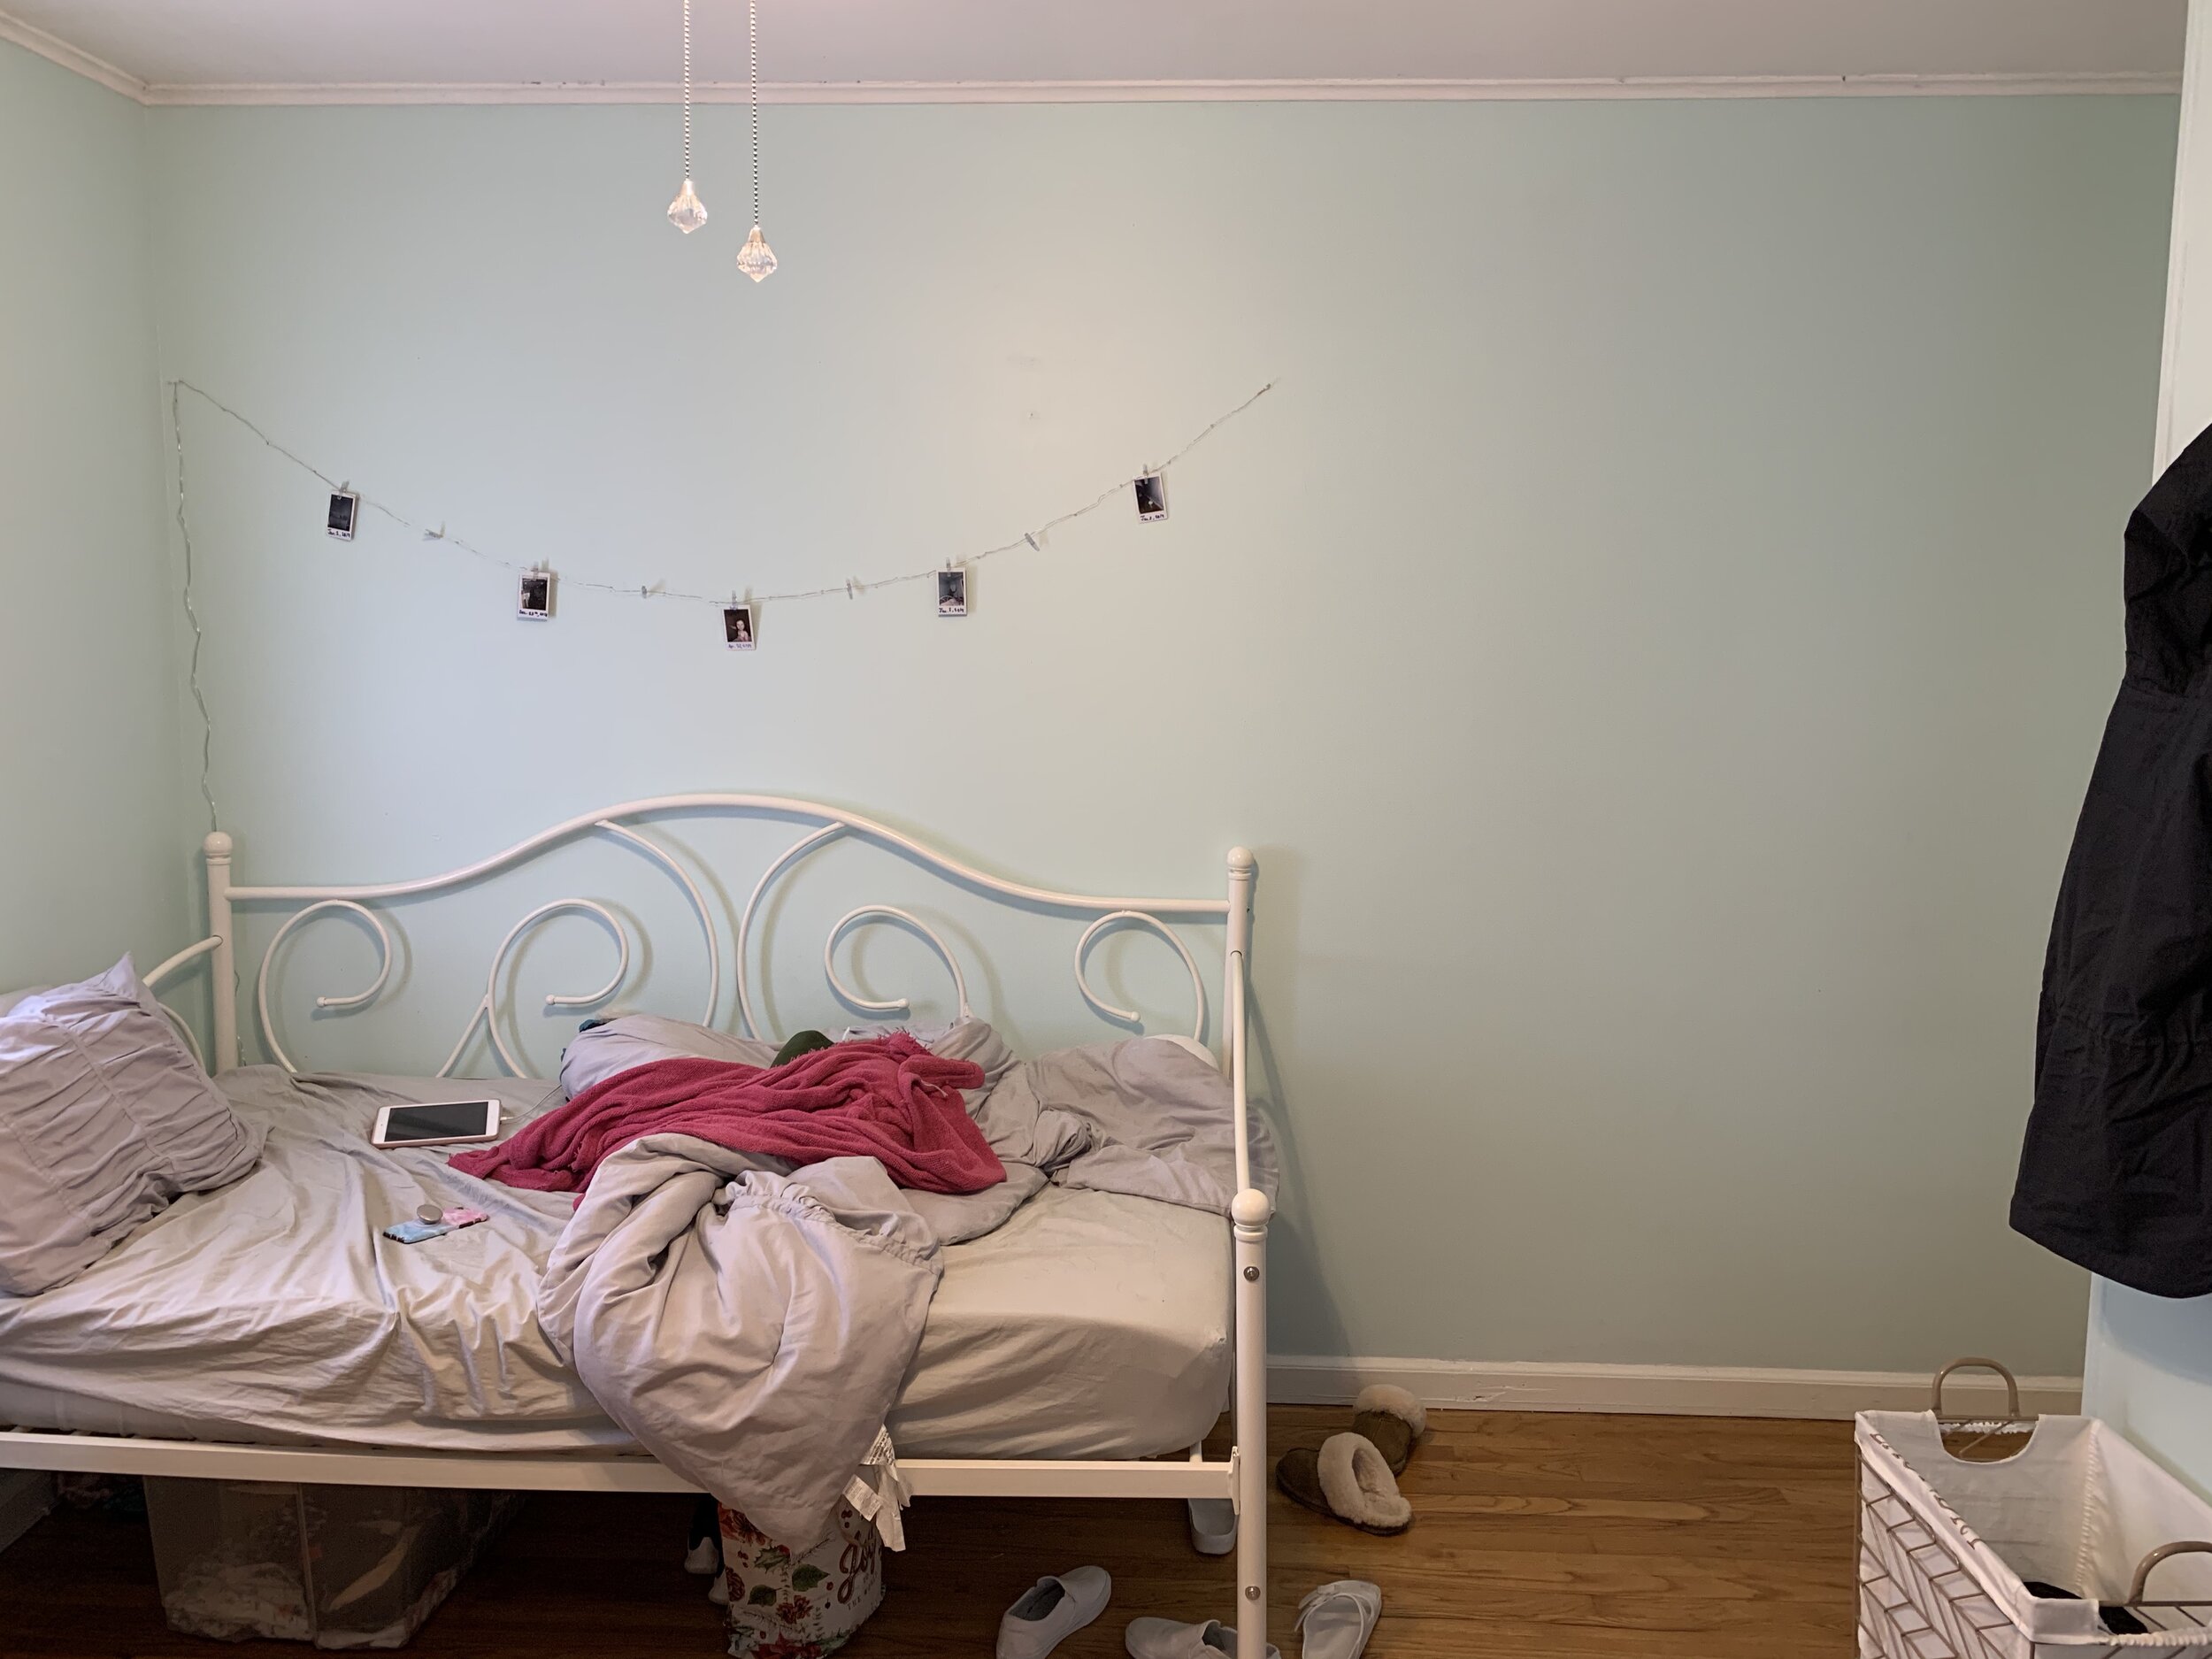
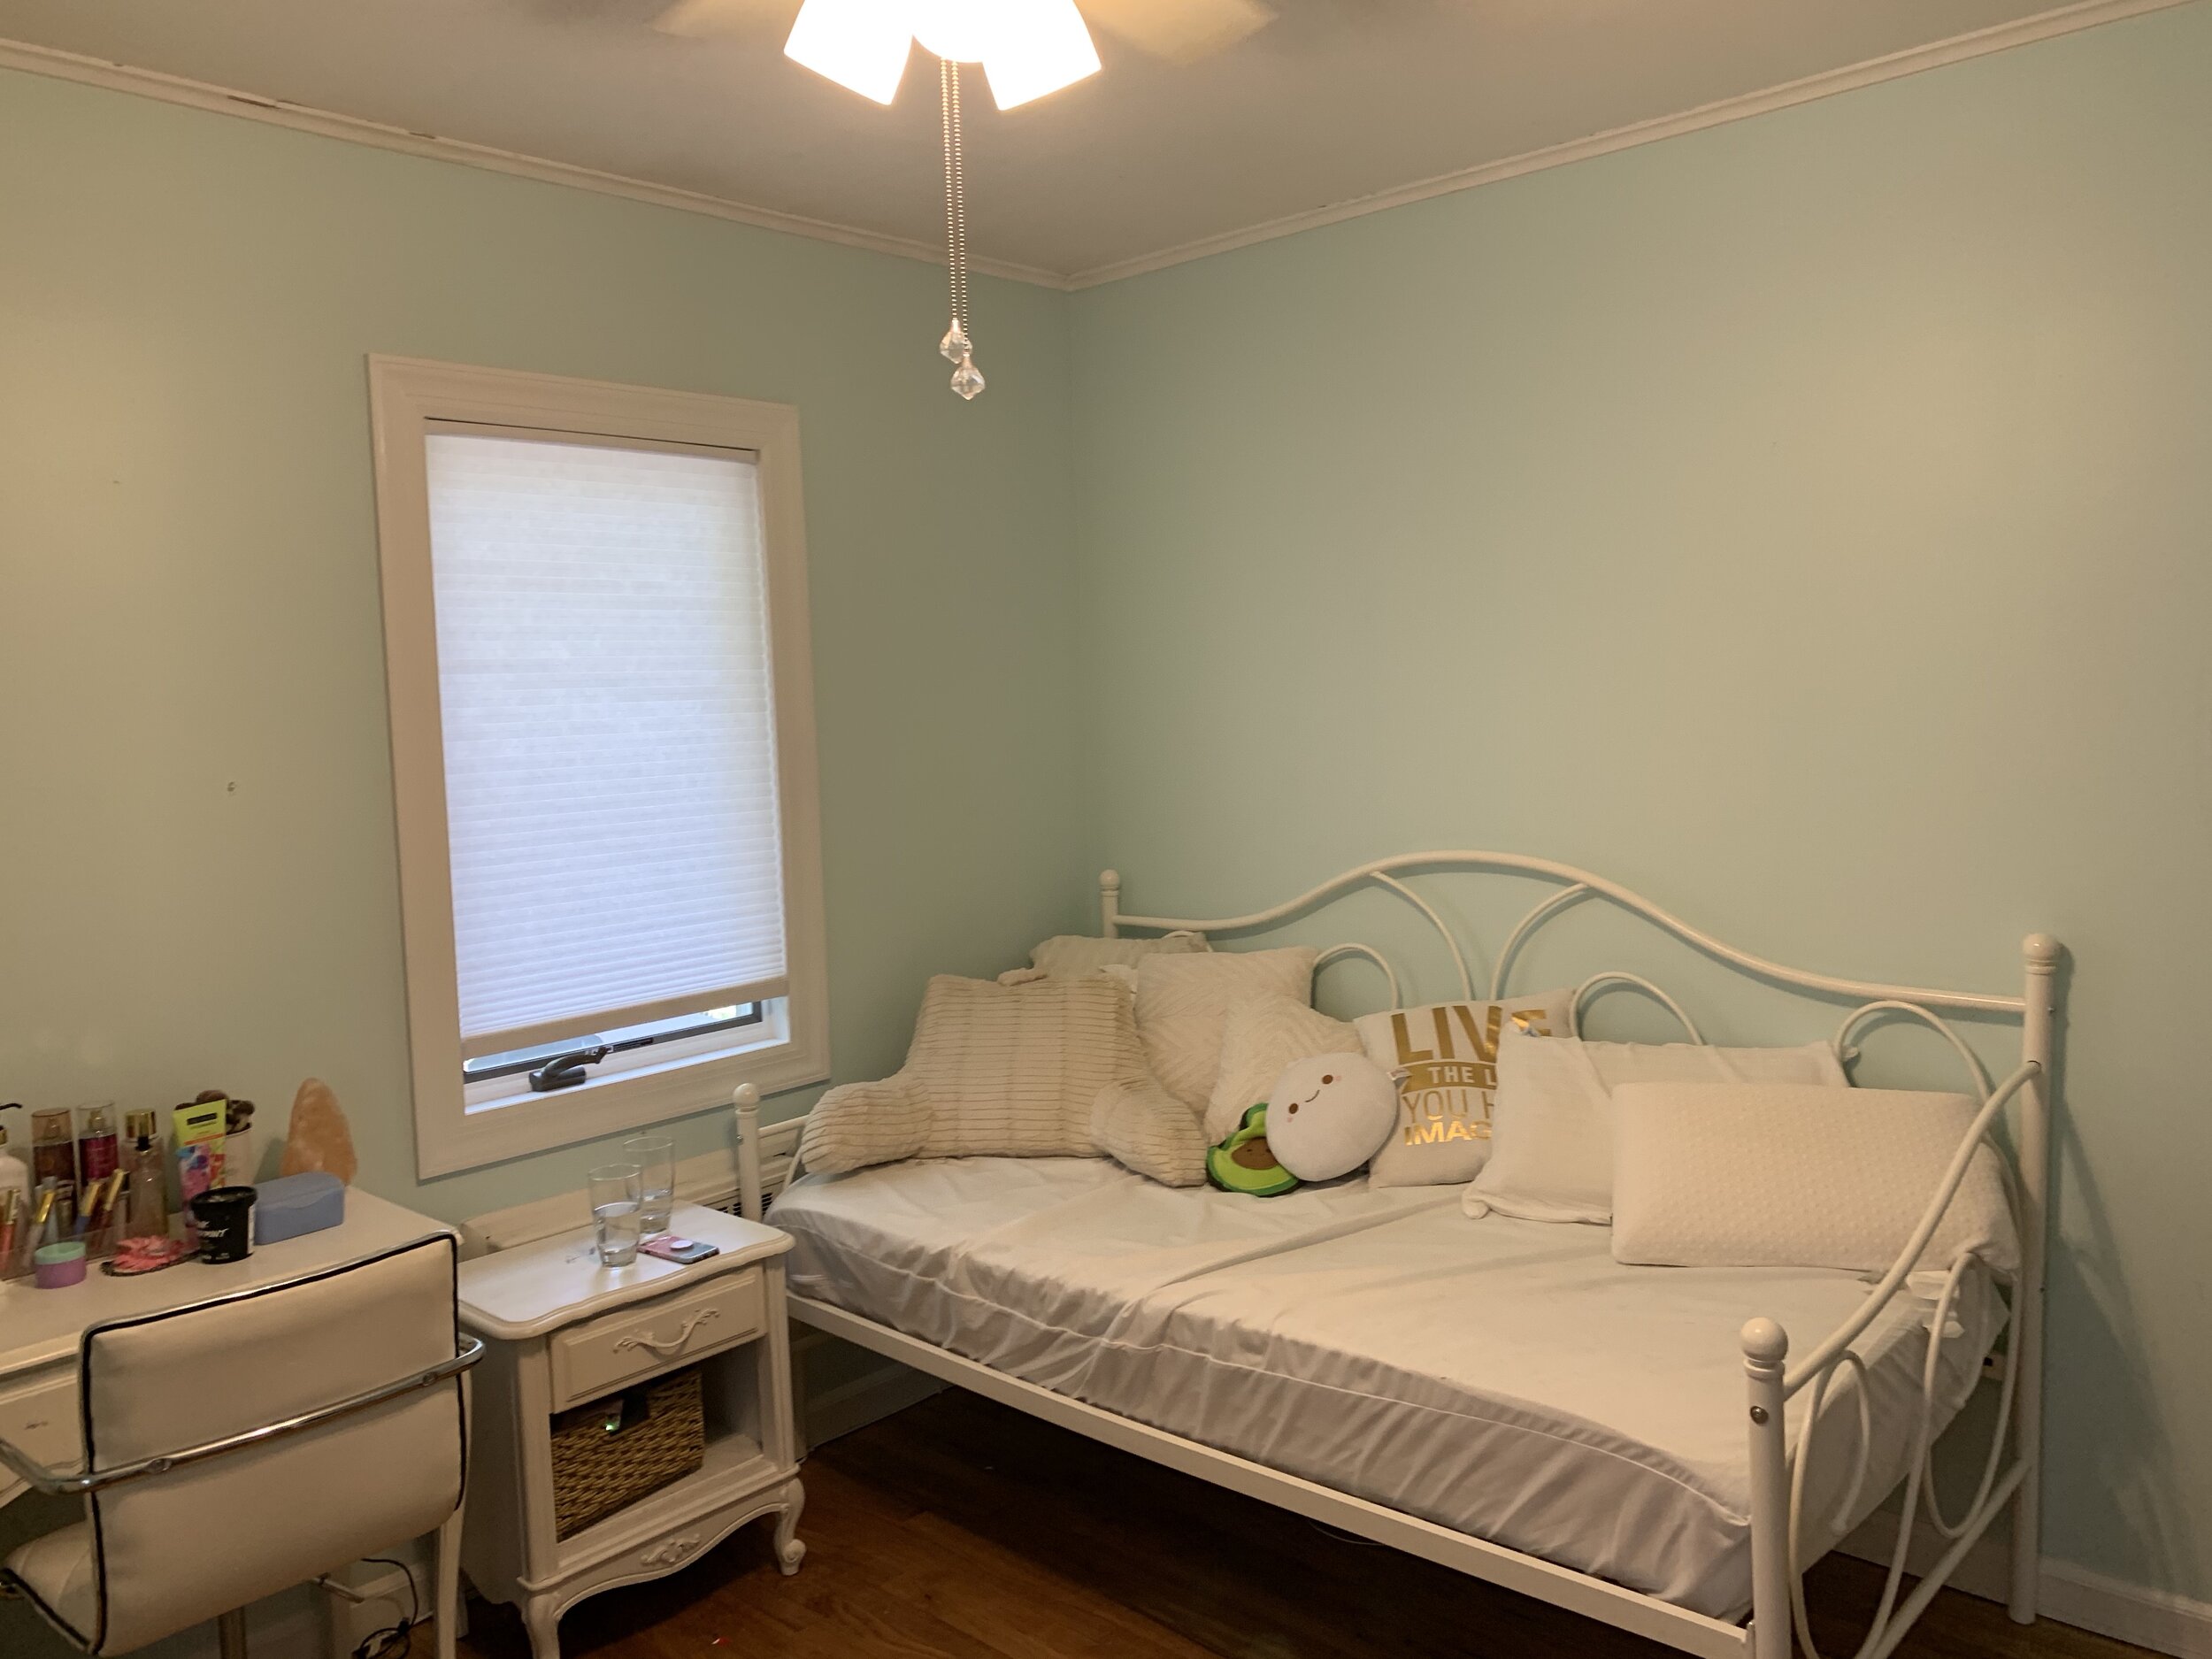
While working here in New York I had the privilege to makeover my friend’s daughter’s room. She turned 13 last year and wanted her room to reflect her more grownup self. They grow up so fast! However, at any age, using the Space to Love® 5 step method: Setup, Sort, Select, Sanitize, Stylize™ is easy to help anyone achieve their goals to create the room they visualized and to stay organized.

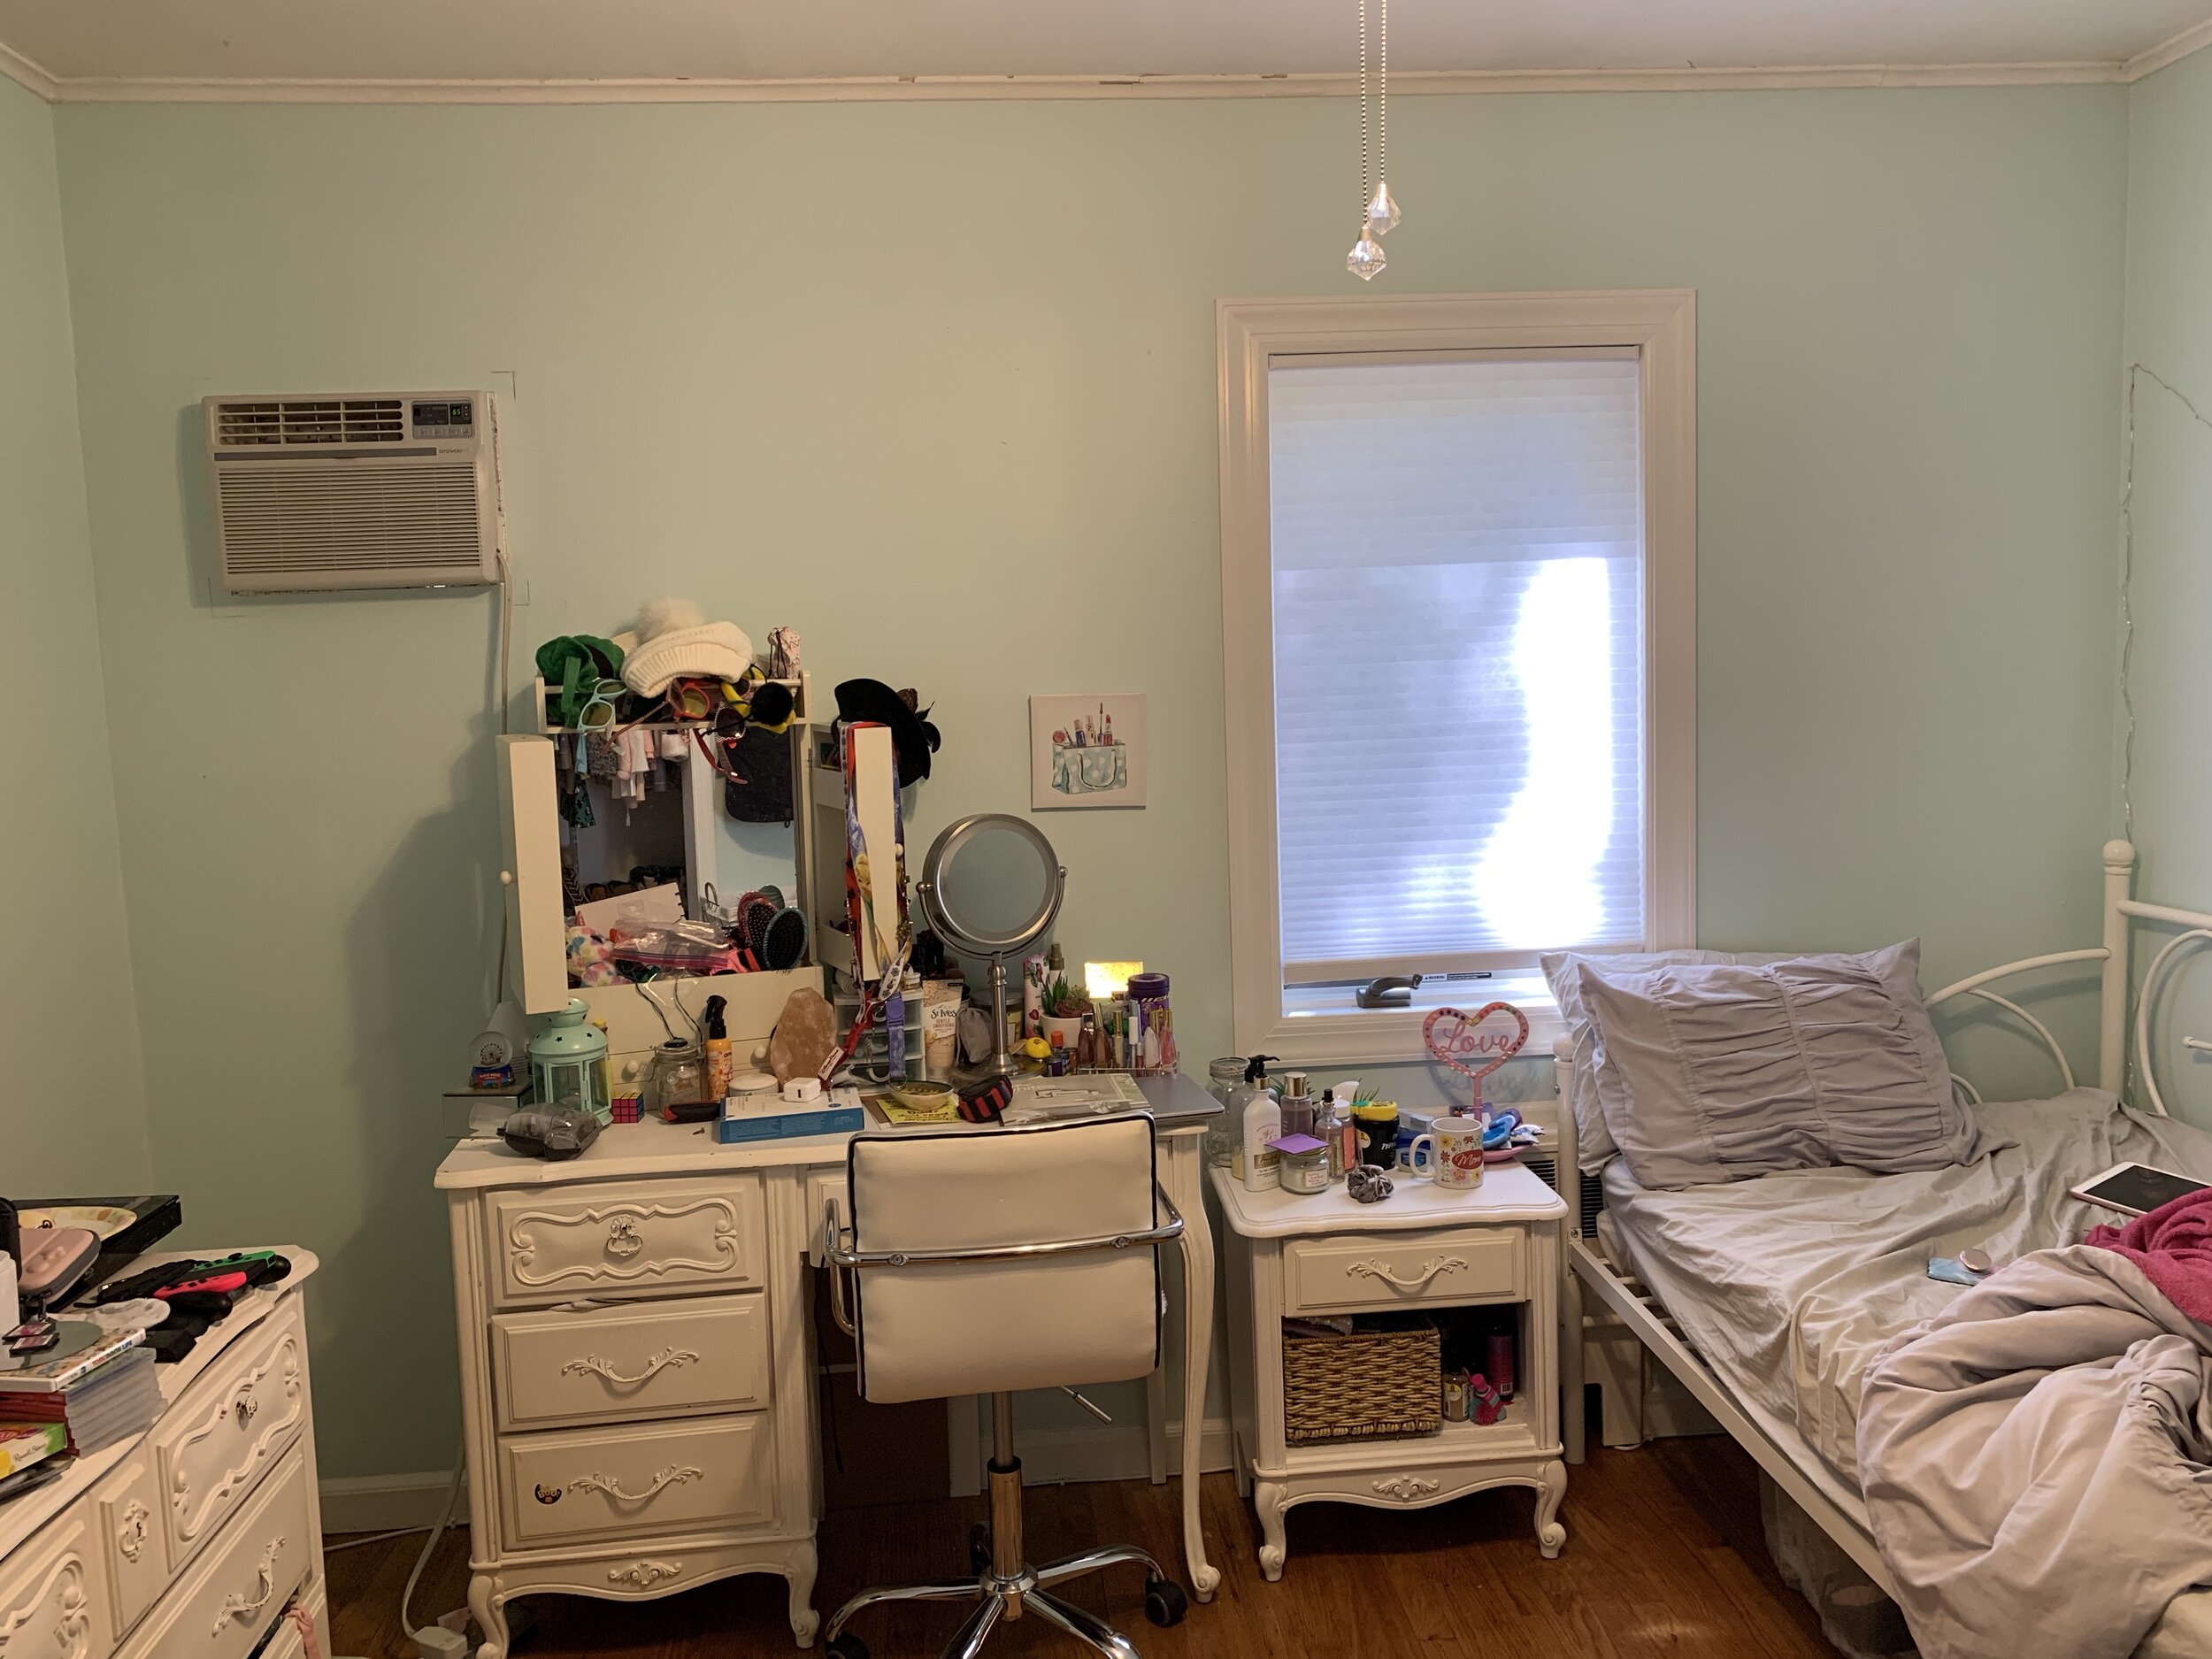
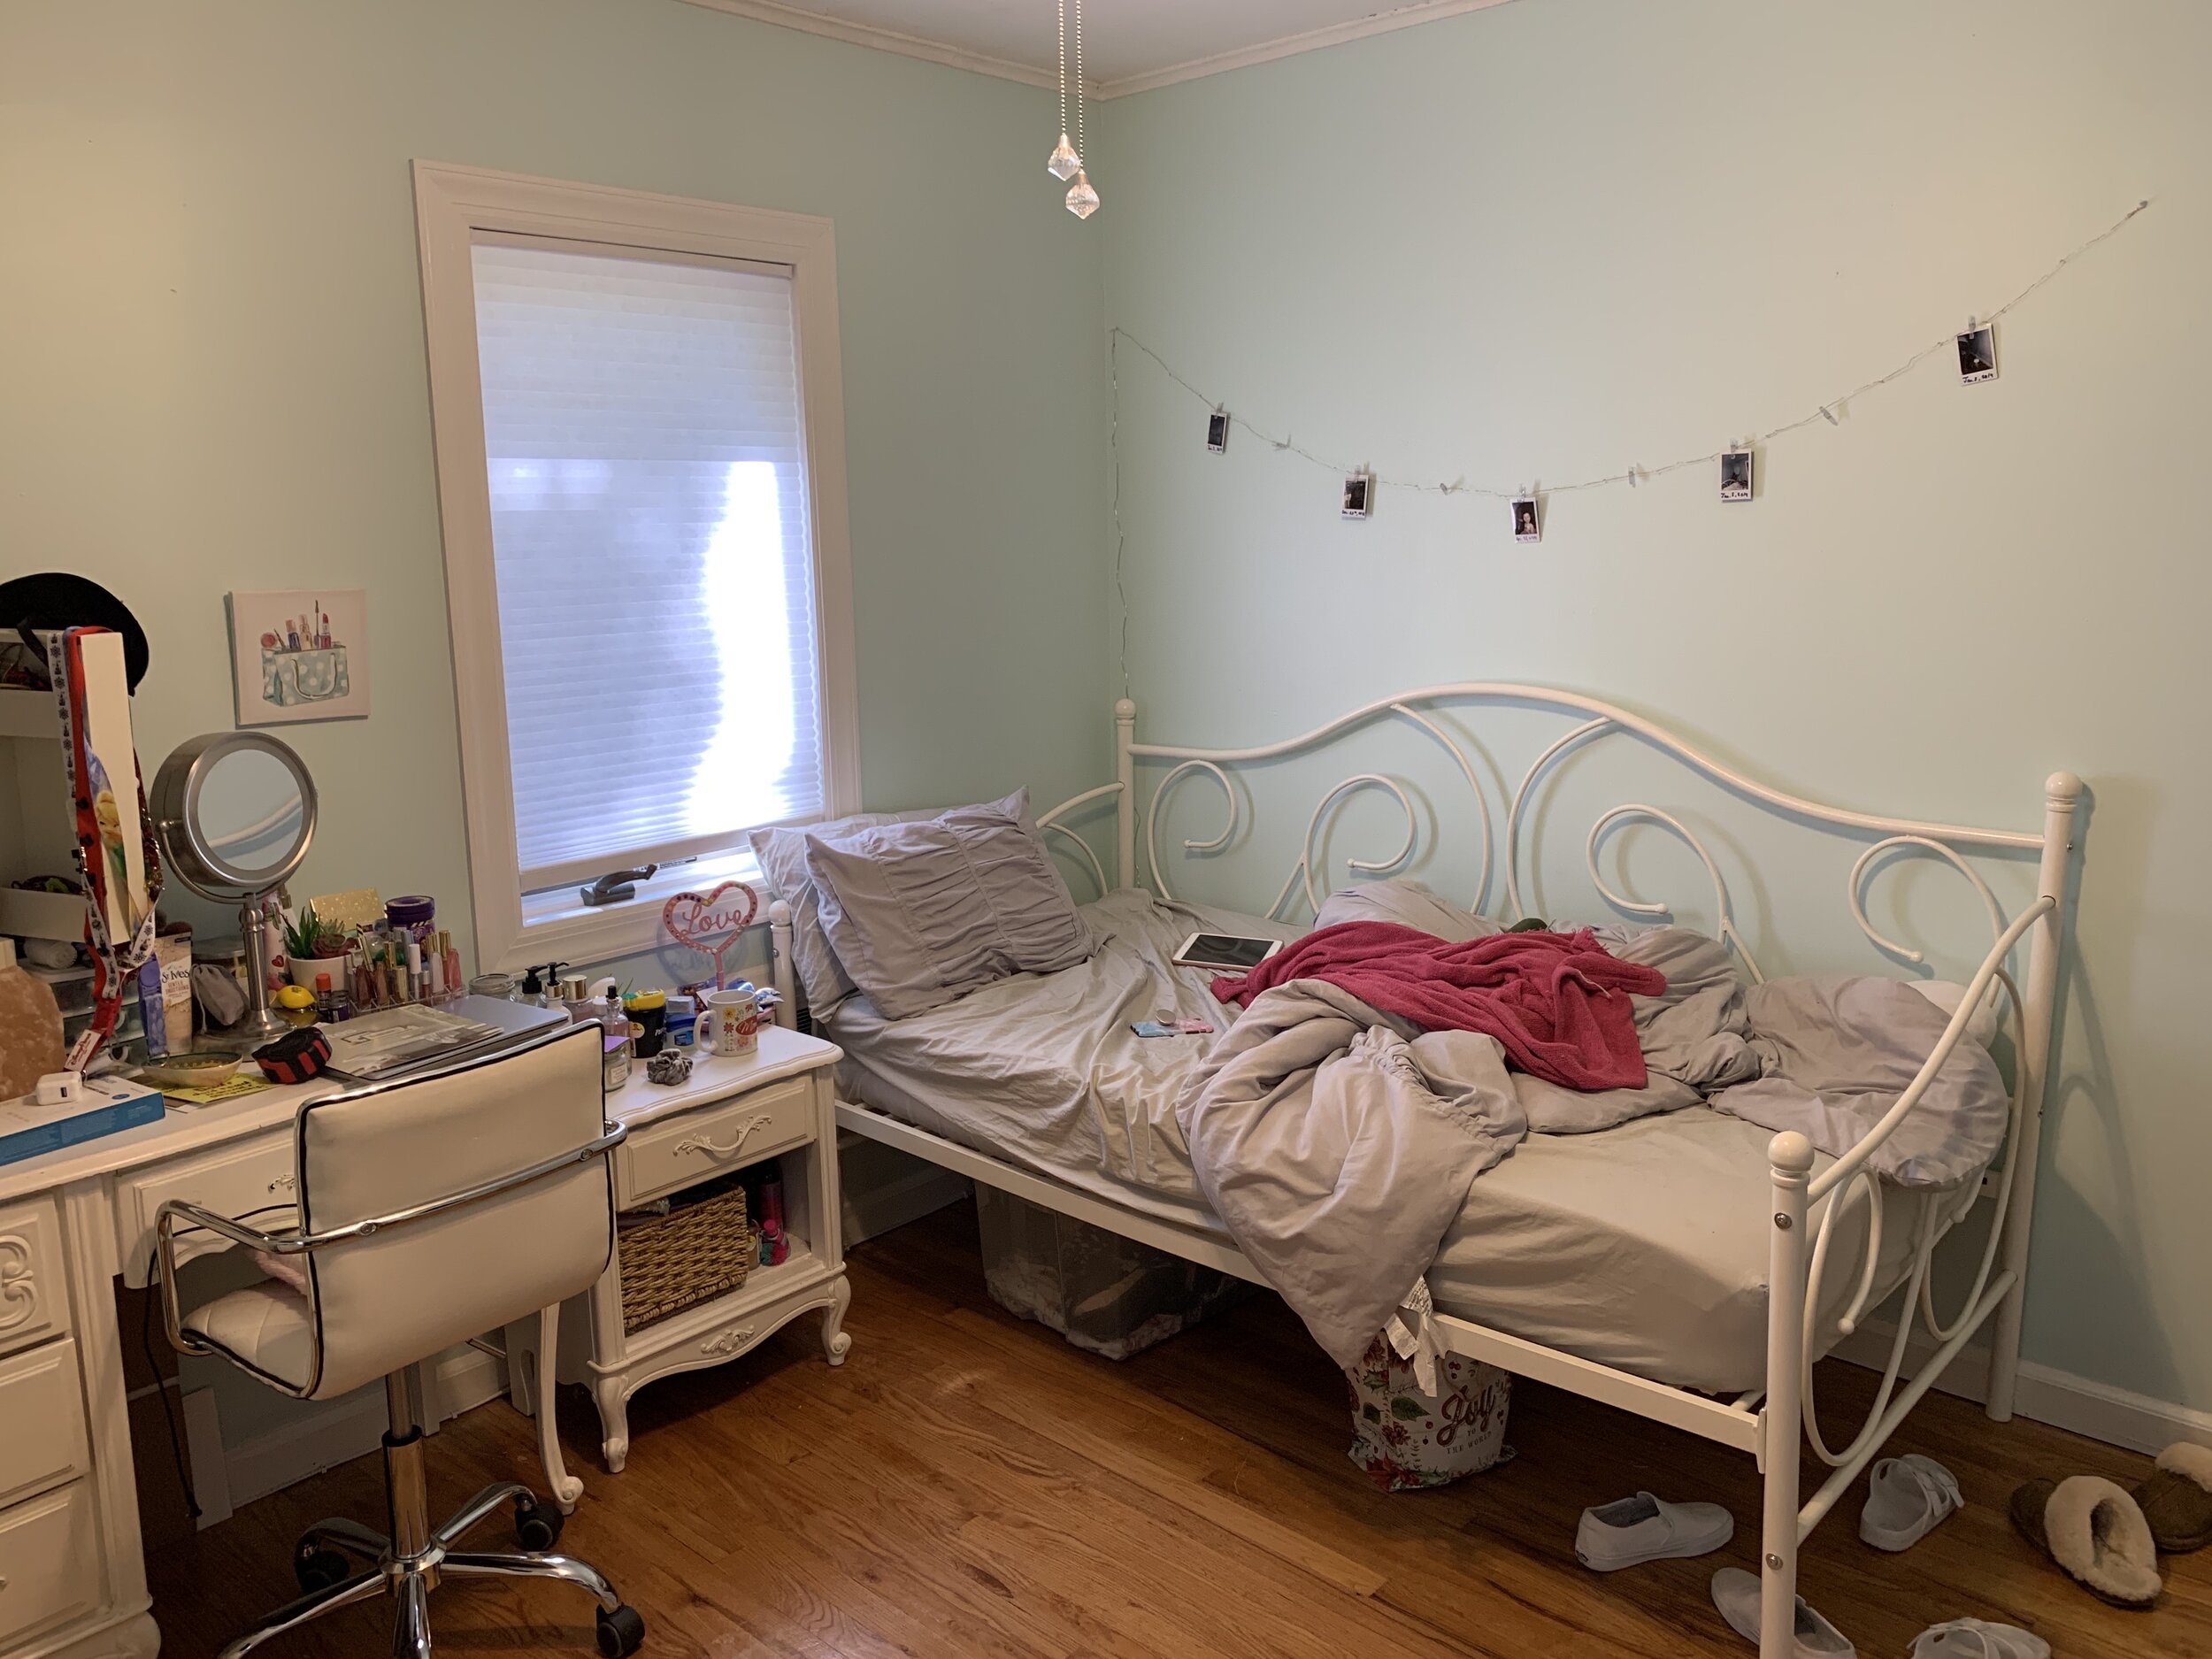
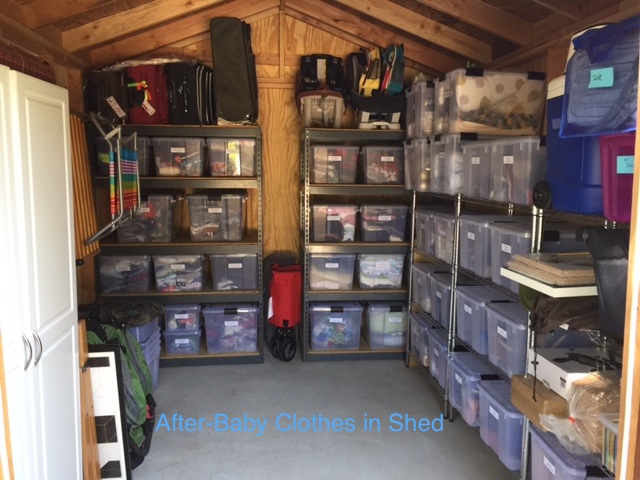
We started with step 1, Setup. I made sure we had room to work and spread out. You need space to organize. We agreed on using the bed and the top of the dresser to sort items. If this wasn’t an option I always have a folding table on hand. I also have ready in my organizing kit: garbage bags, post-its, markers, scissors, box cutters, and cleaning supplies. Keep these items ready whenever you are taking on any organizing challenge. Continuing with the setup process we established specific areas of the room where items would be placed. Donations in one area and other areas for what she’s keeping, maybes (what she’s not sure of), recyclables, and trash. These are the common categories to start with and you may come up with other categories in step 2, Sort, so have your post-its and marker ready. We then customized categories that tailored to her specific needs, ie, blankets, memorabilia, family games, and products for her soap-making business. I was thankful they had a newly renovated basement with extra storage for these items because she doesn’t need access to them on a daily basis.

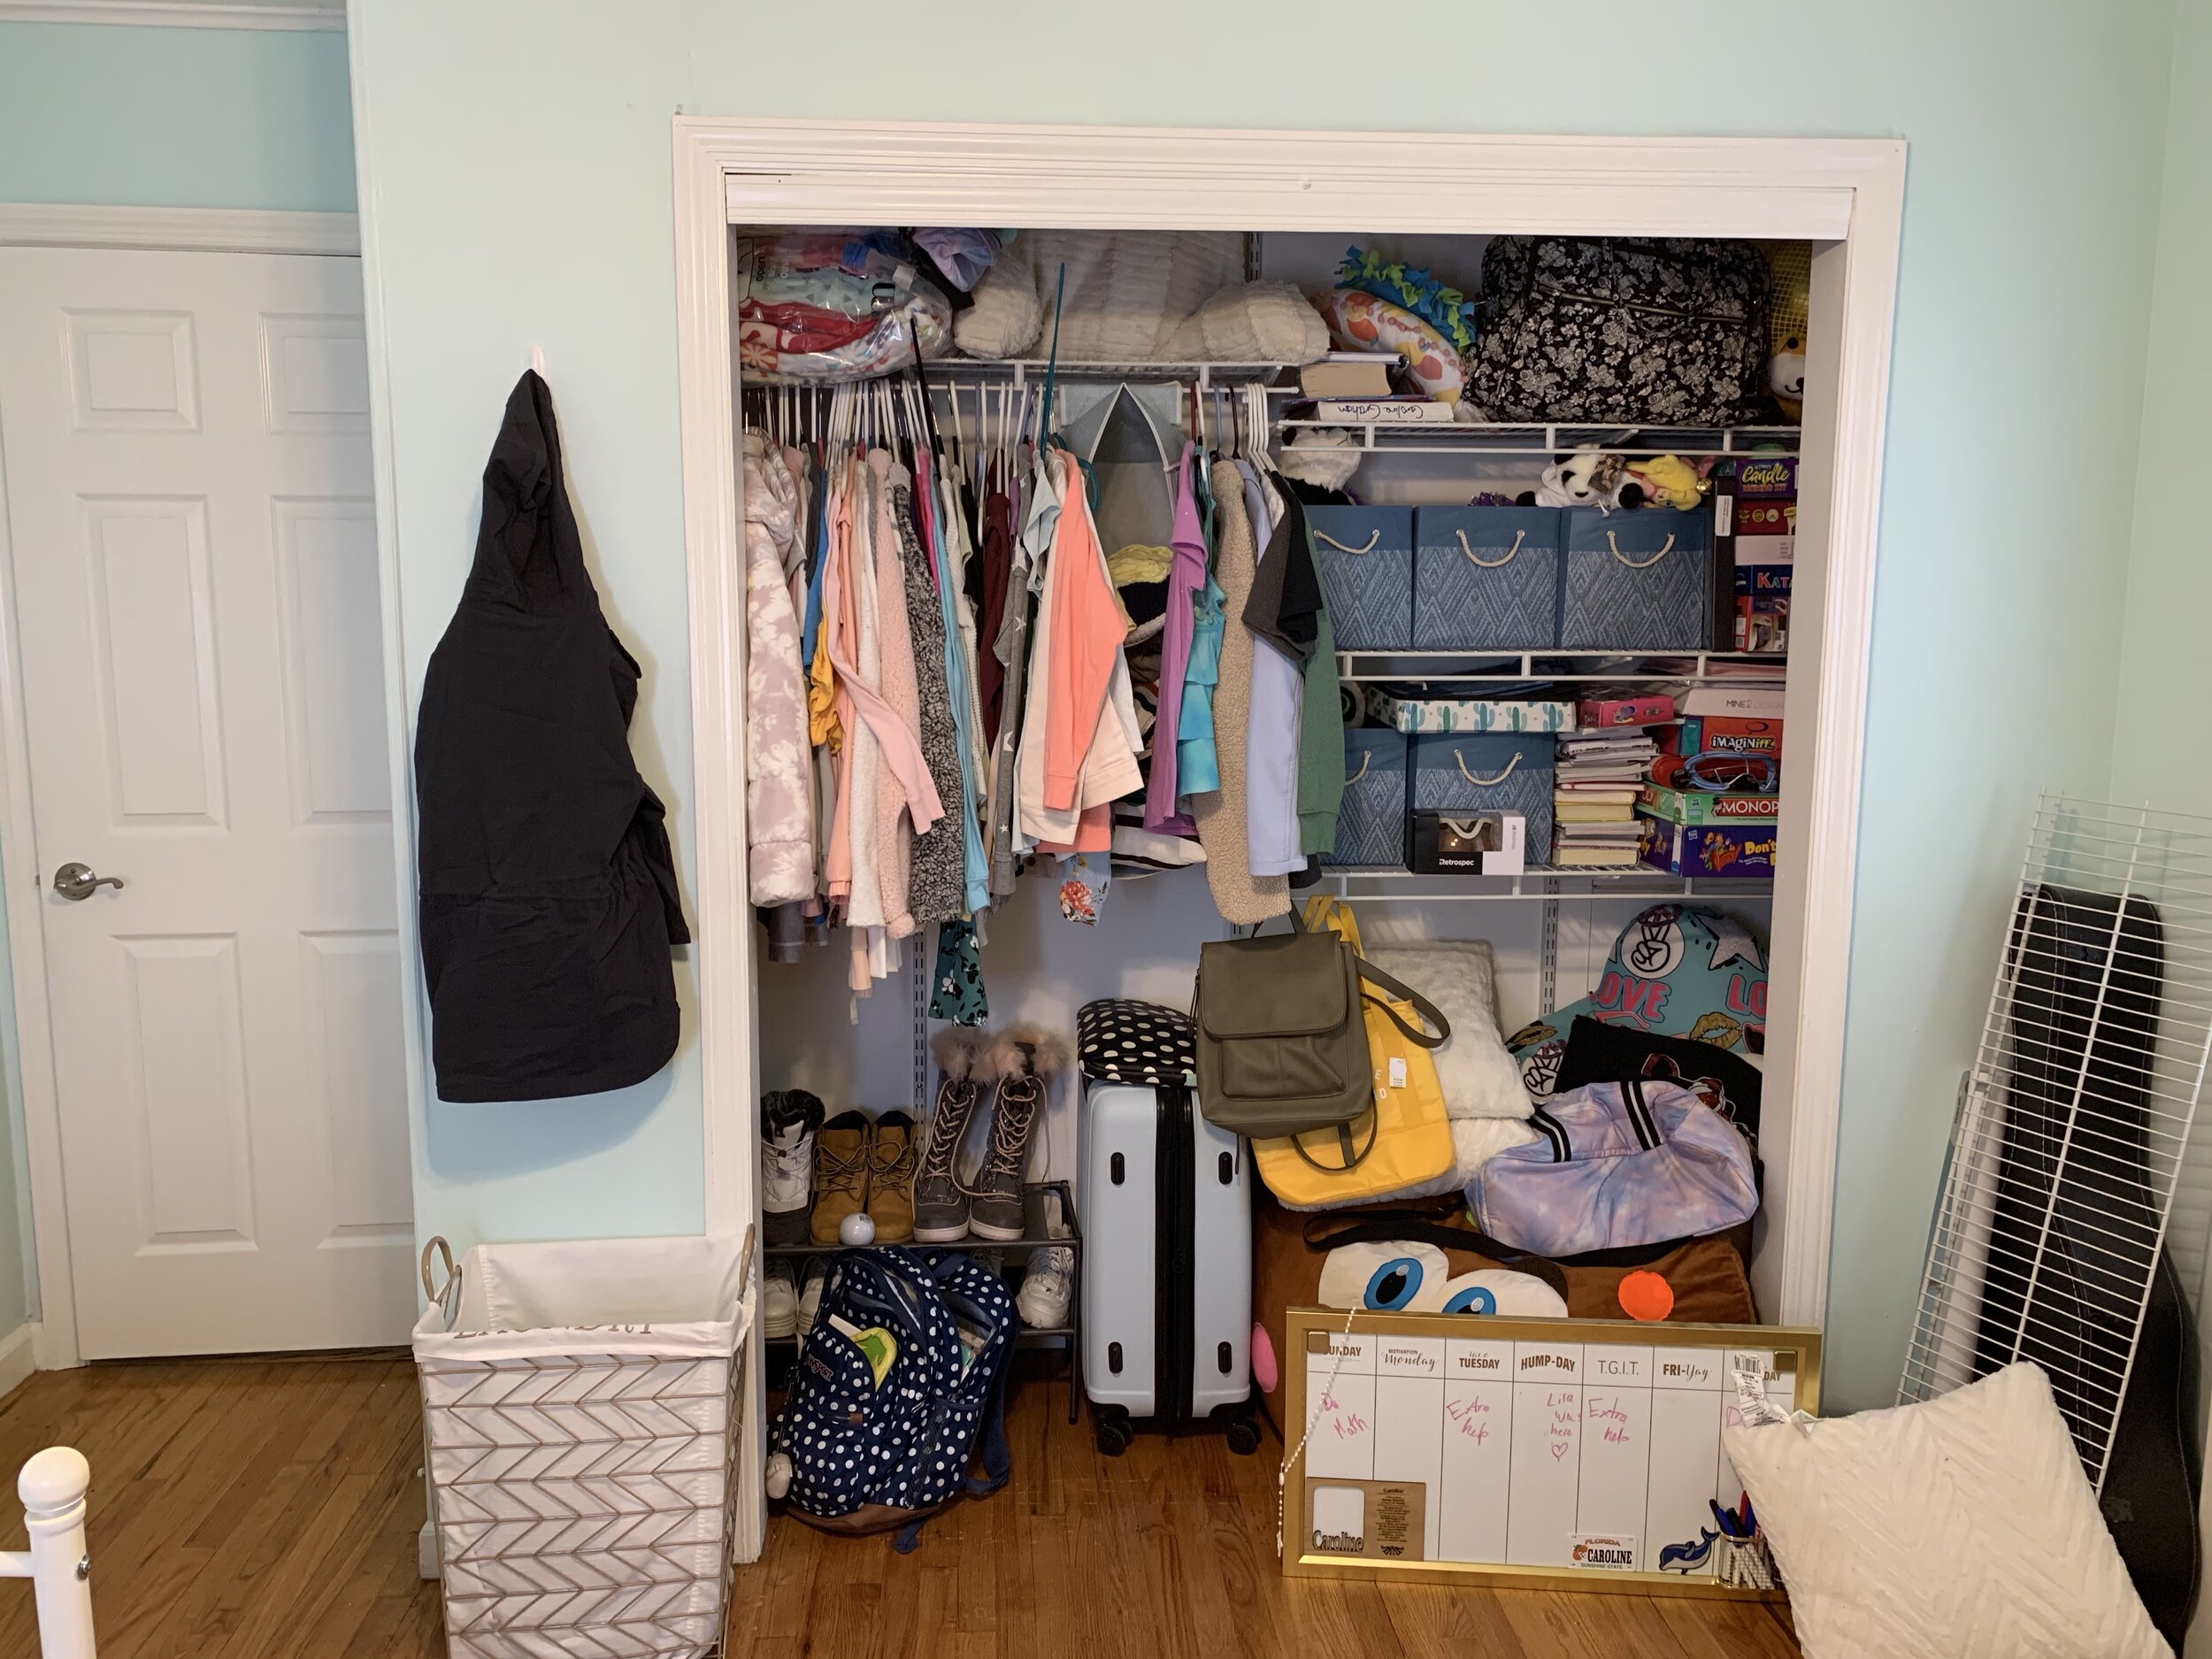
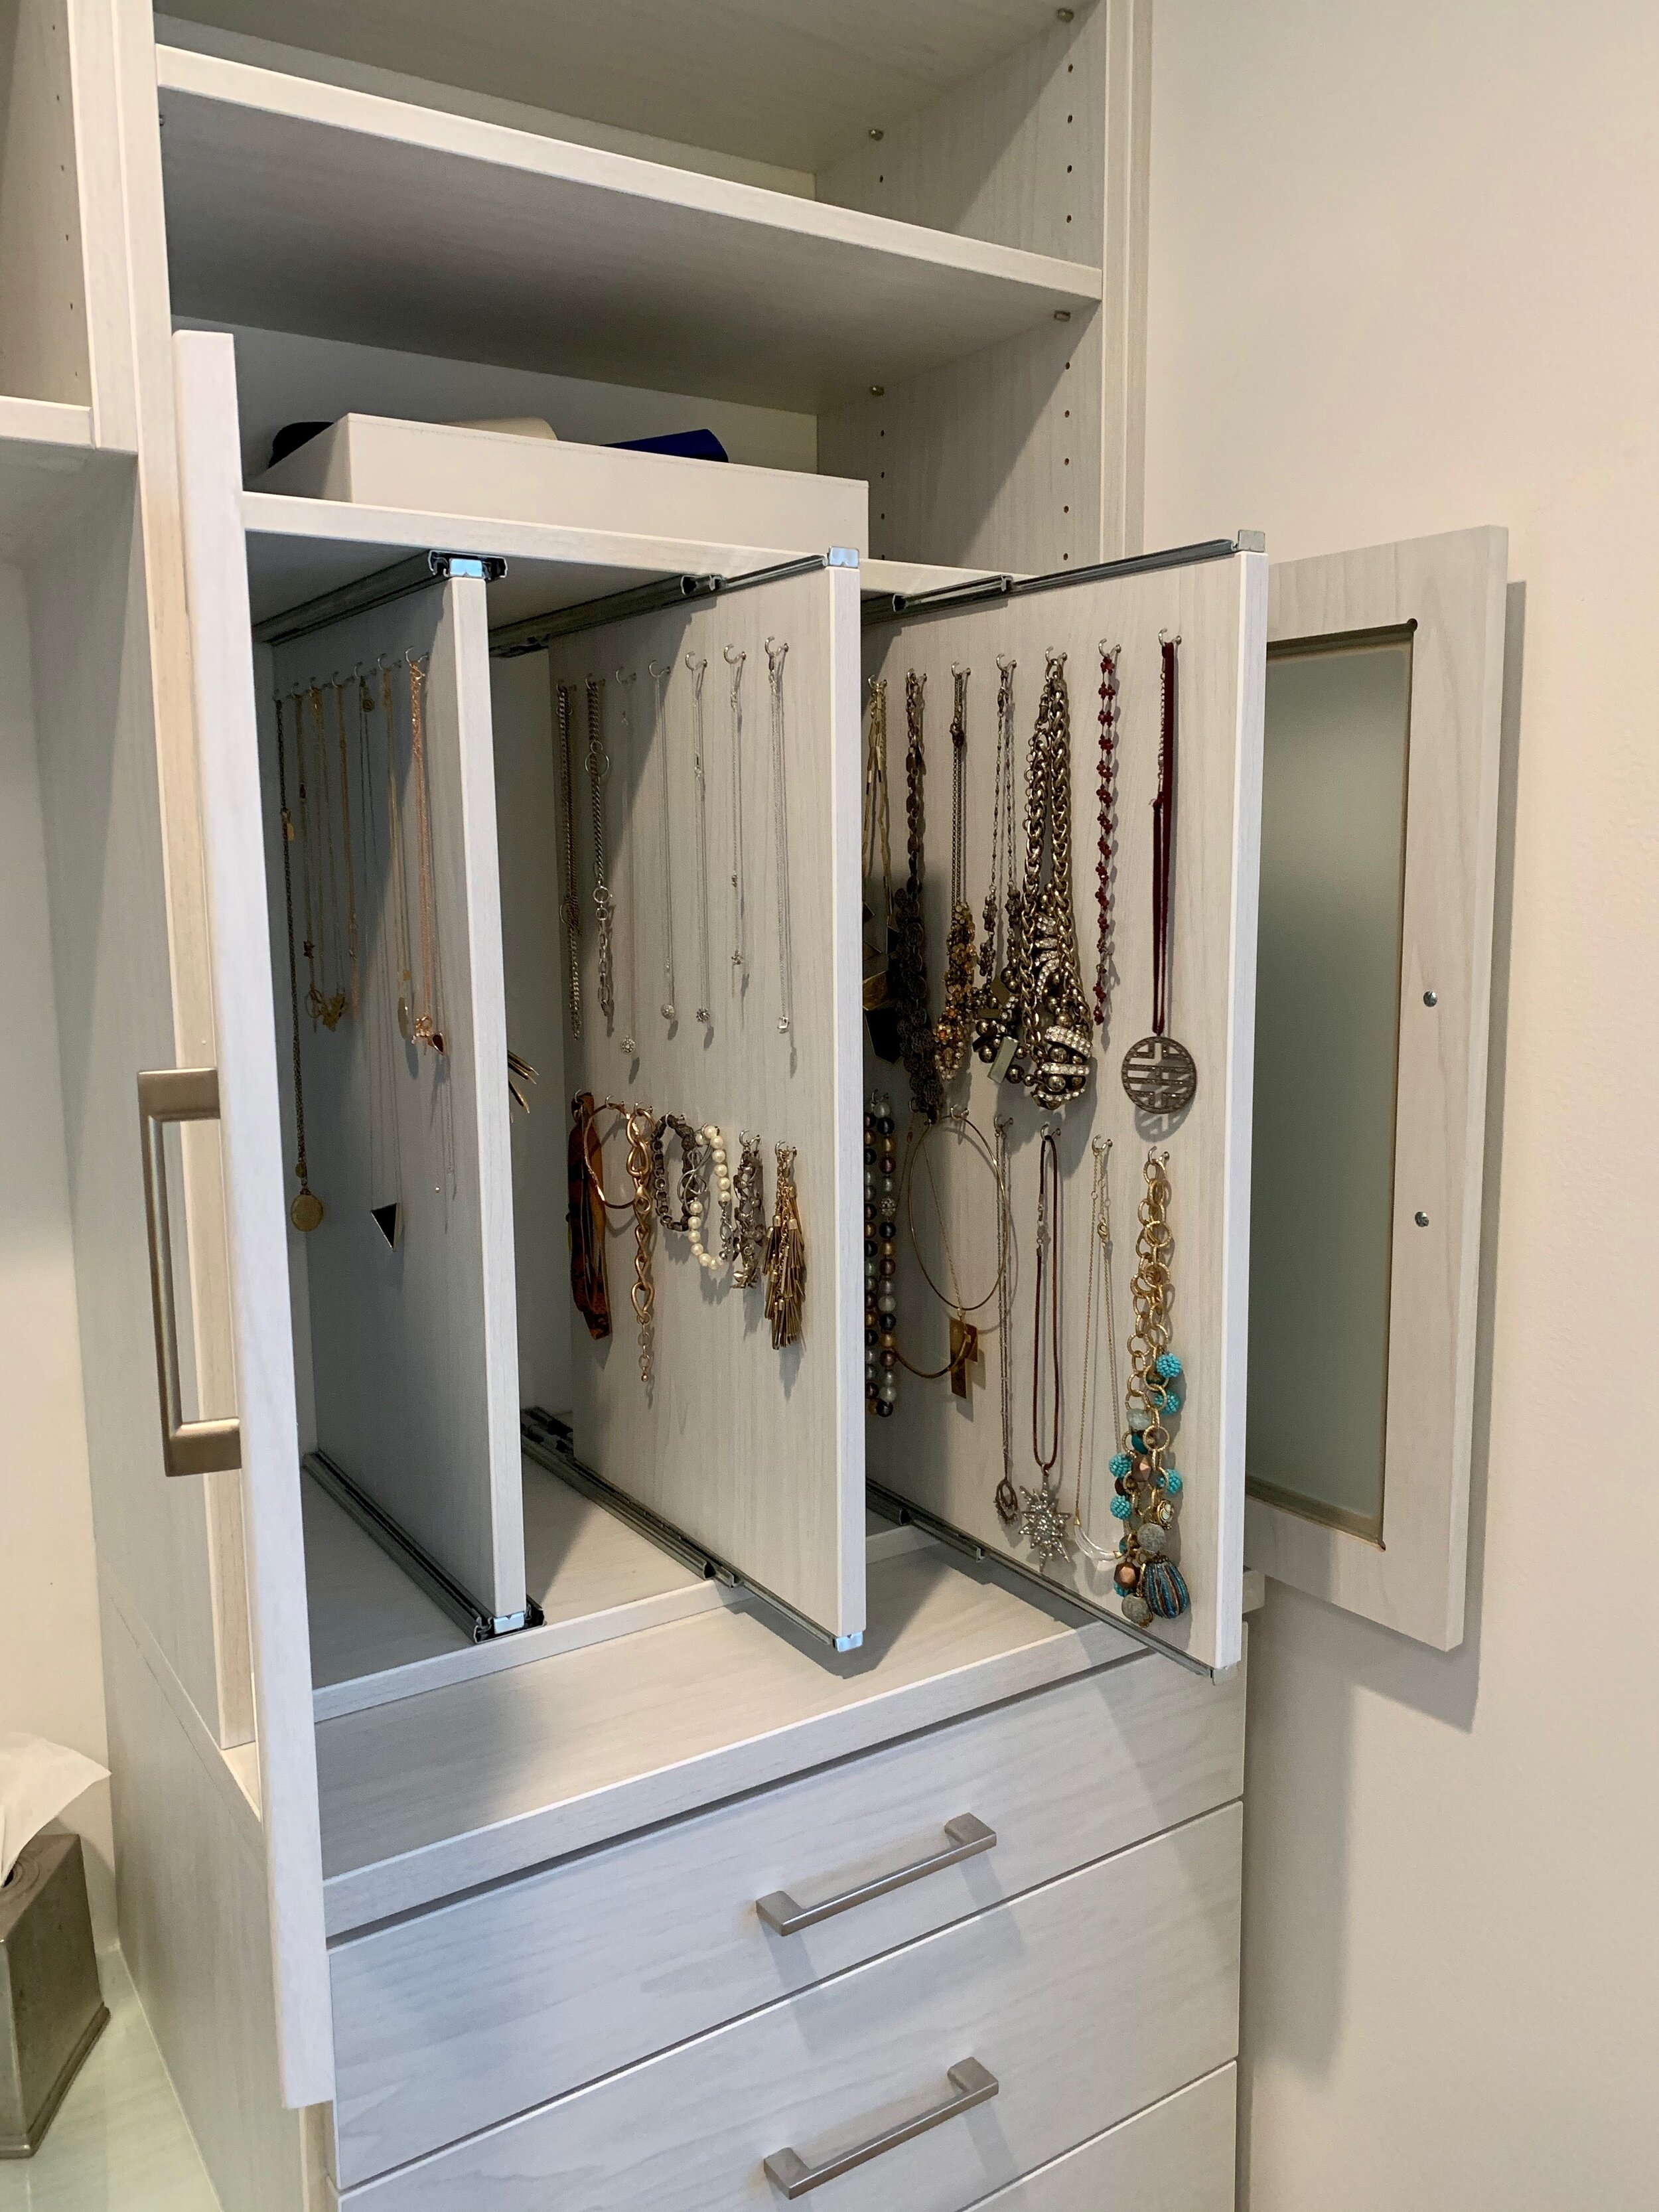
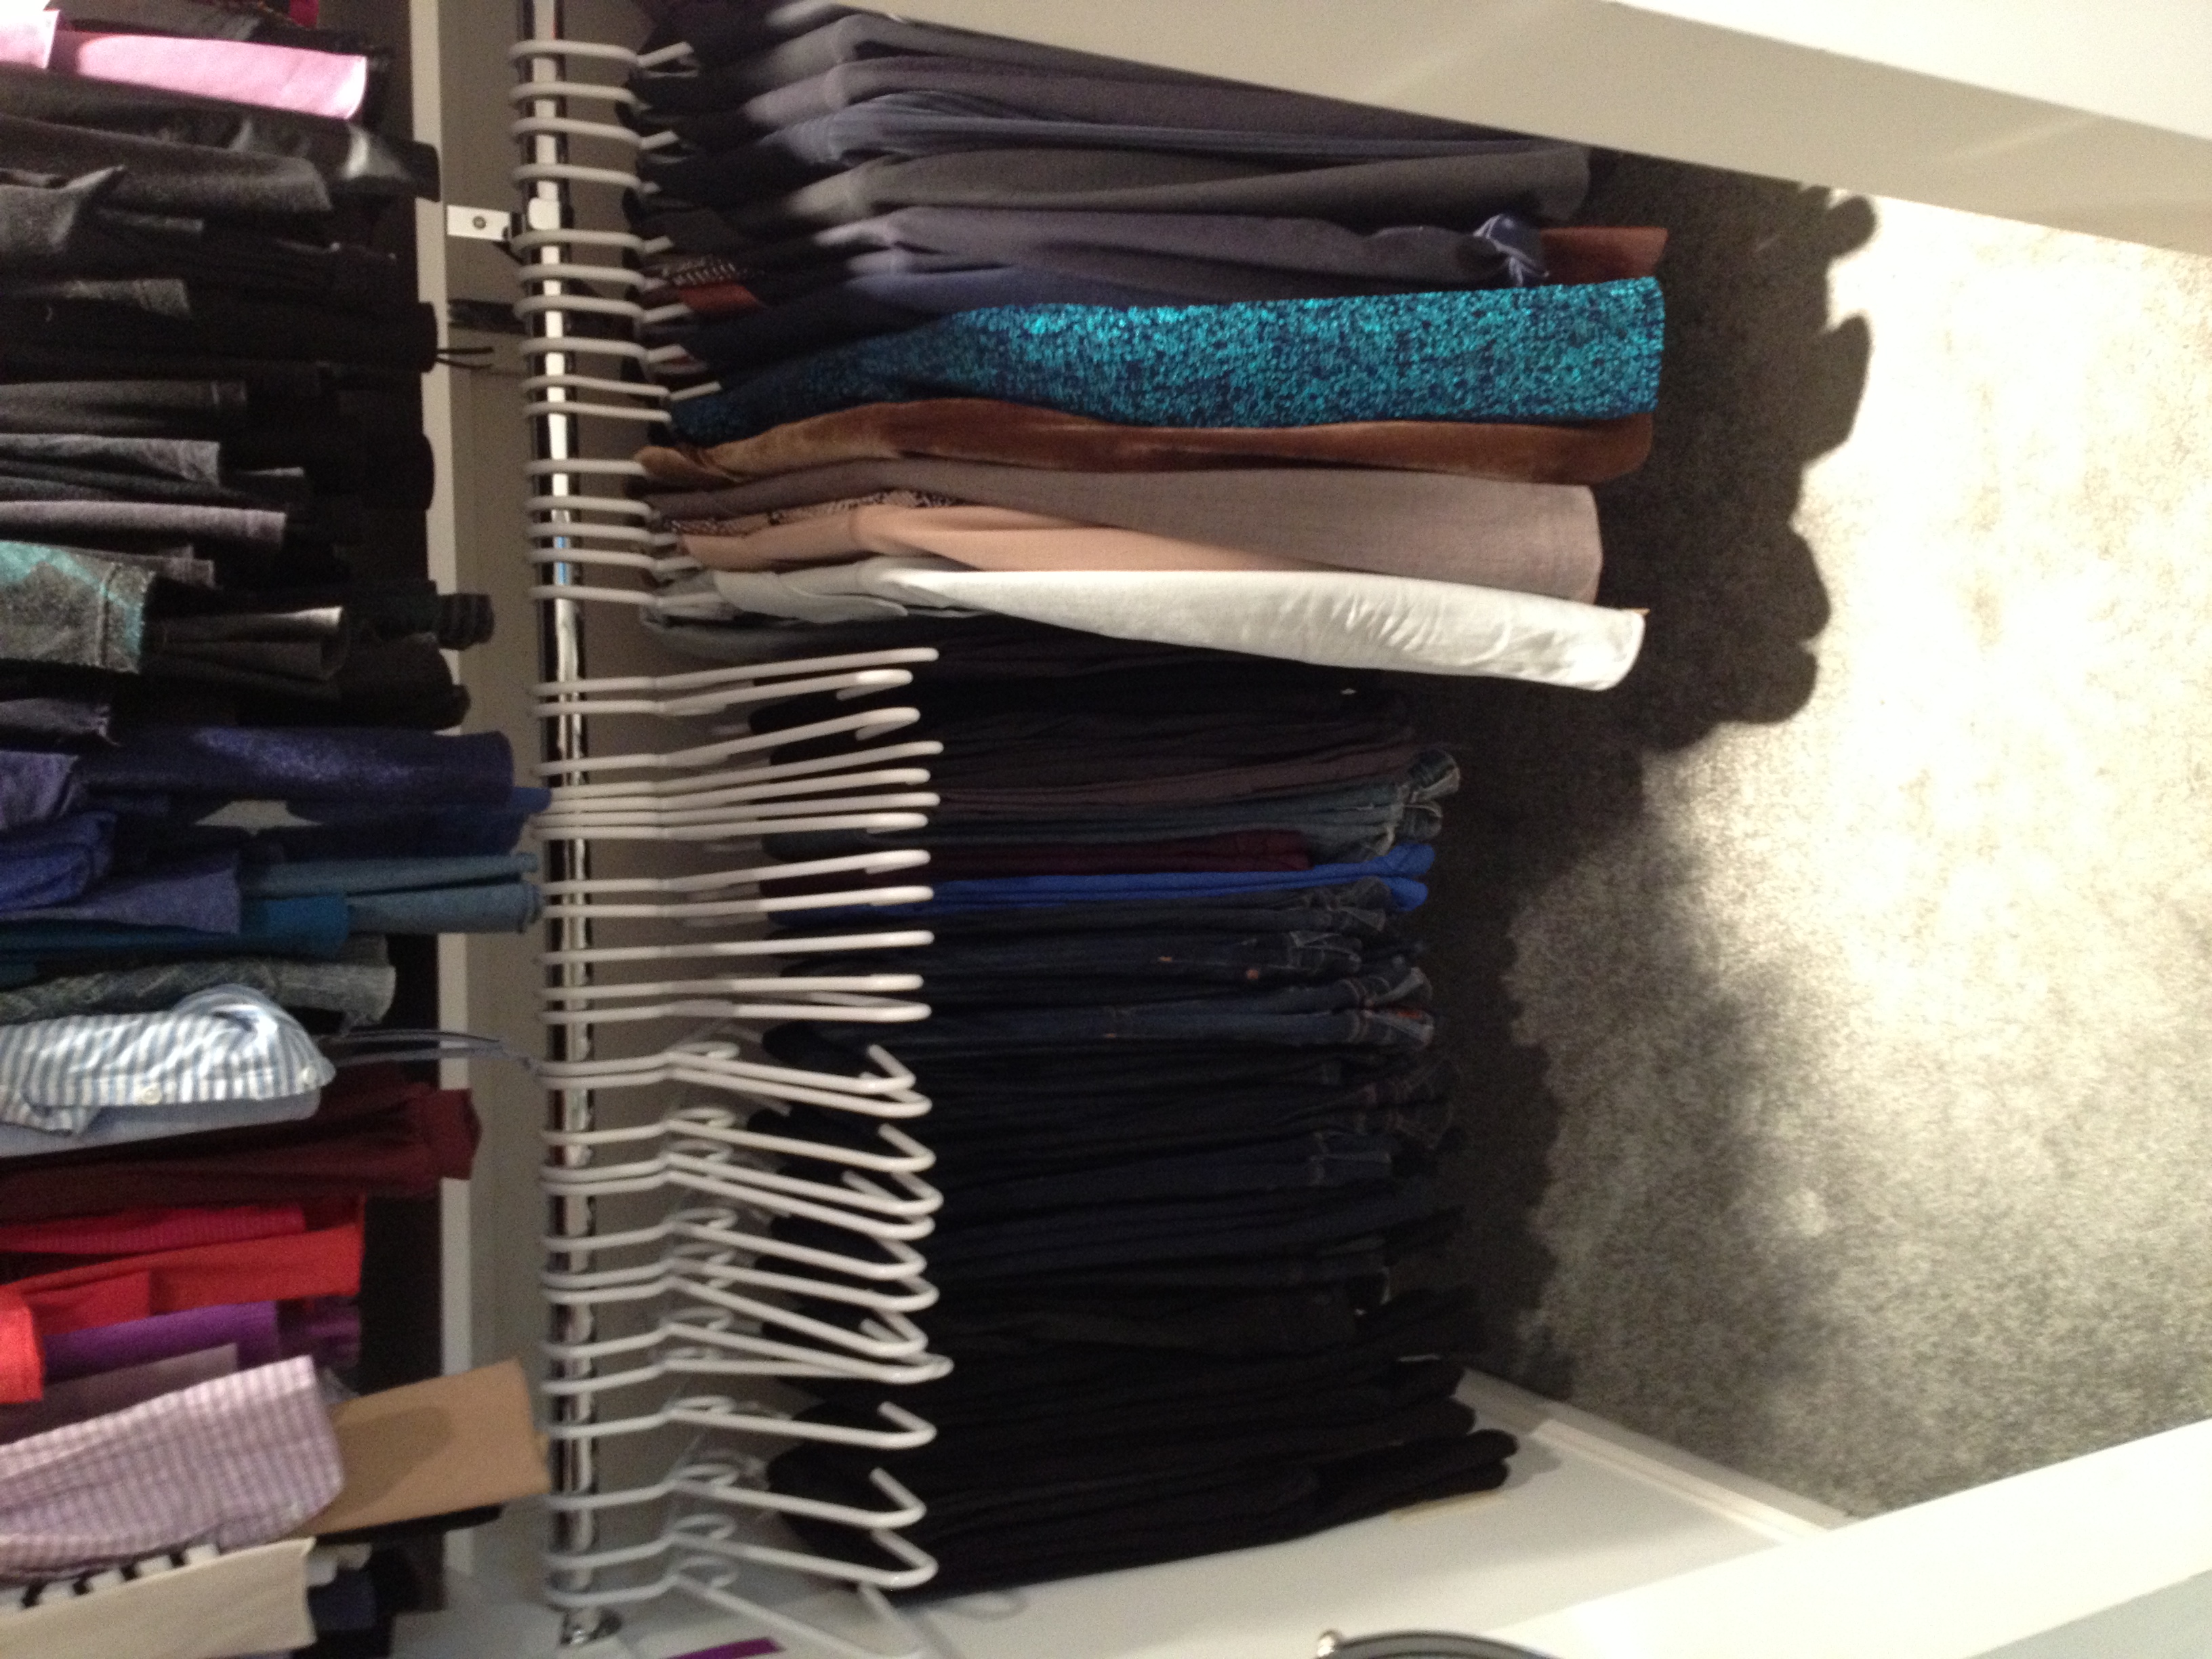
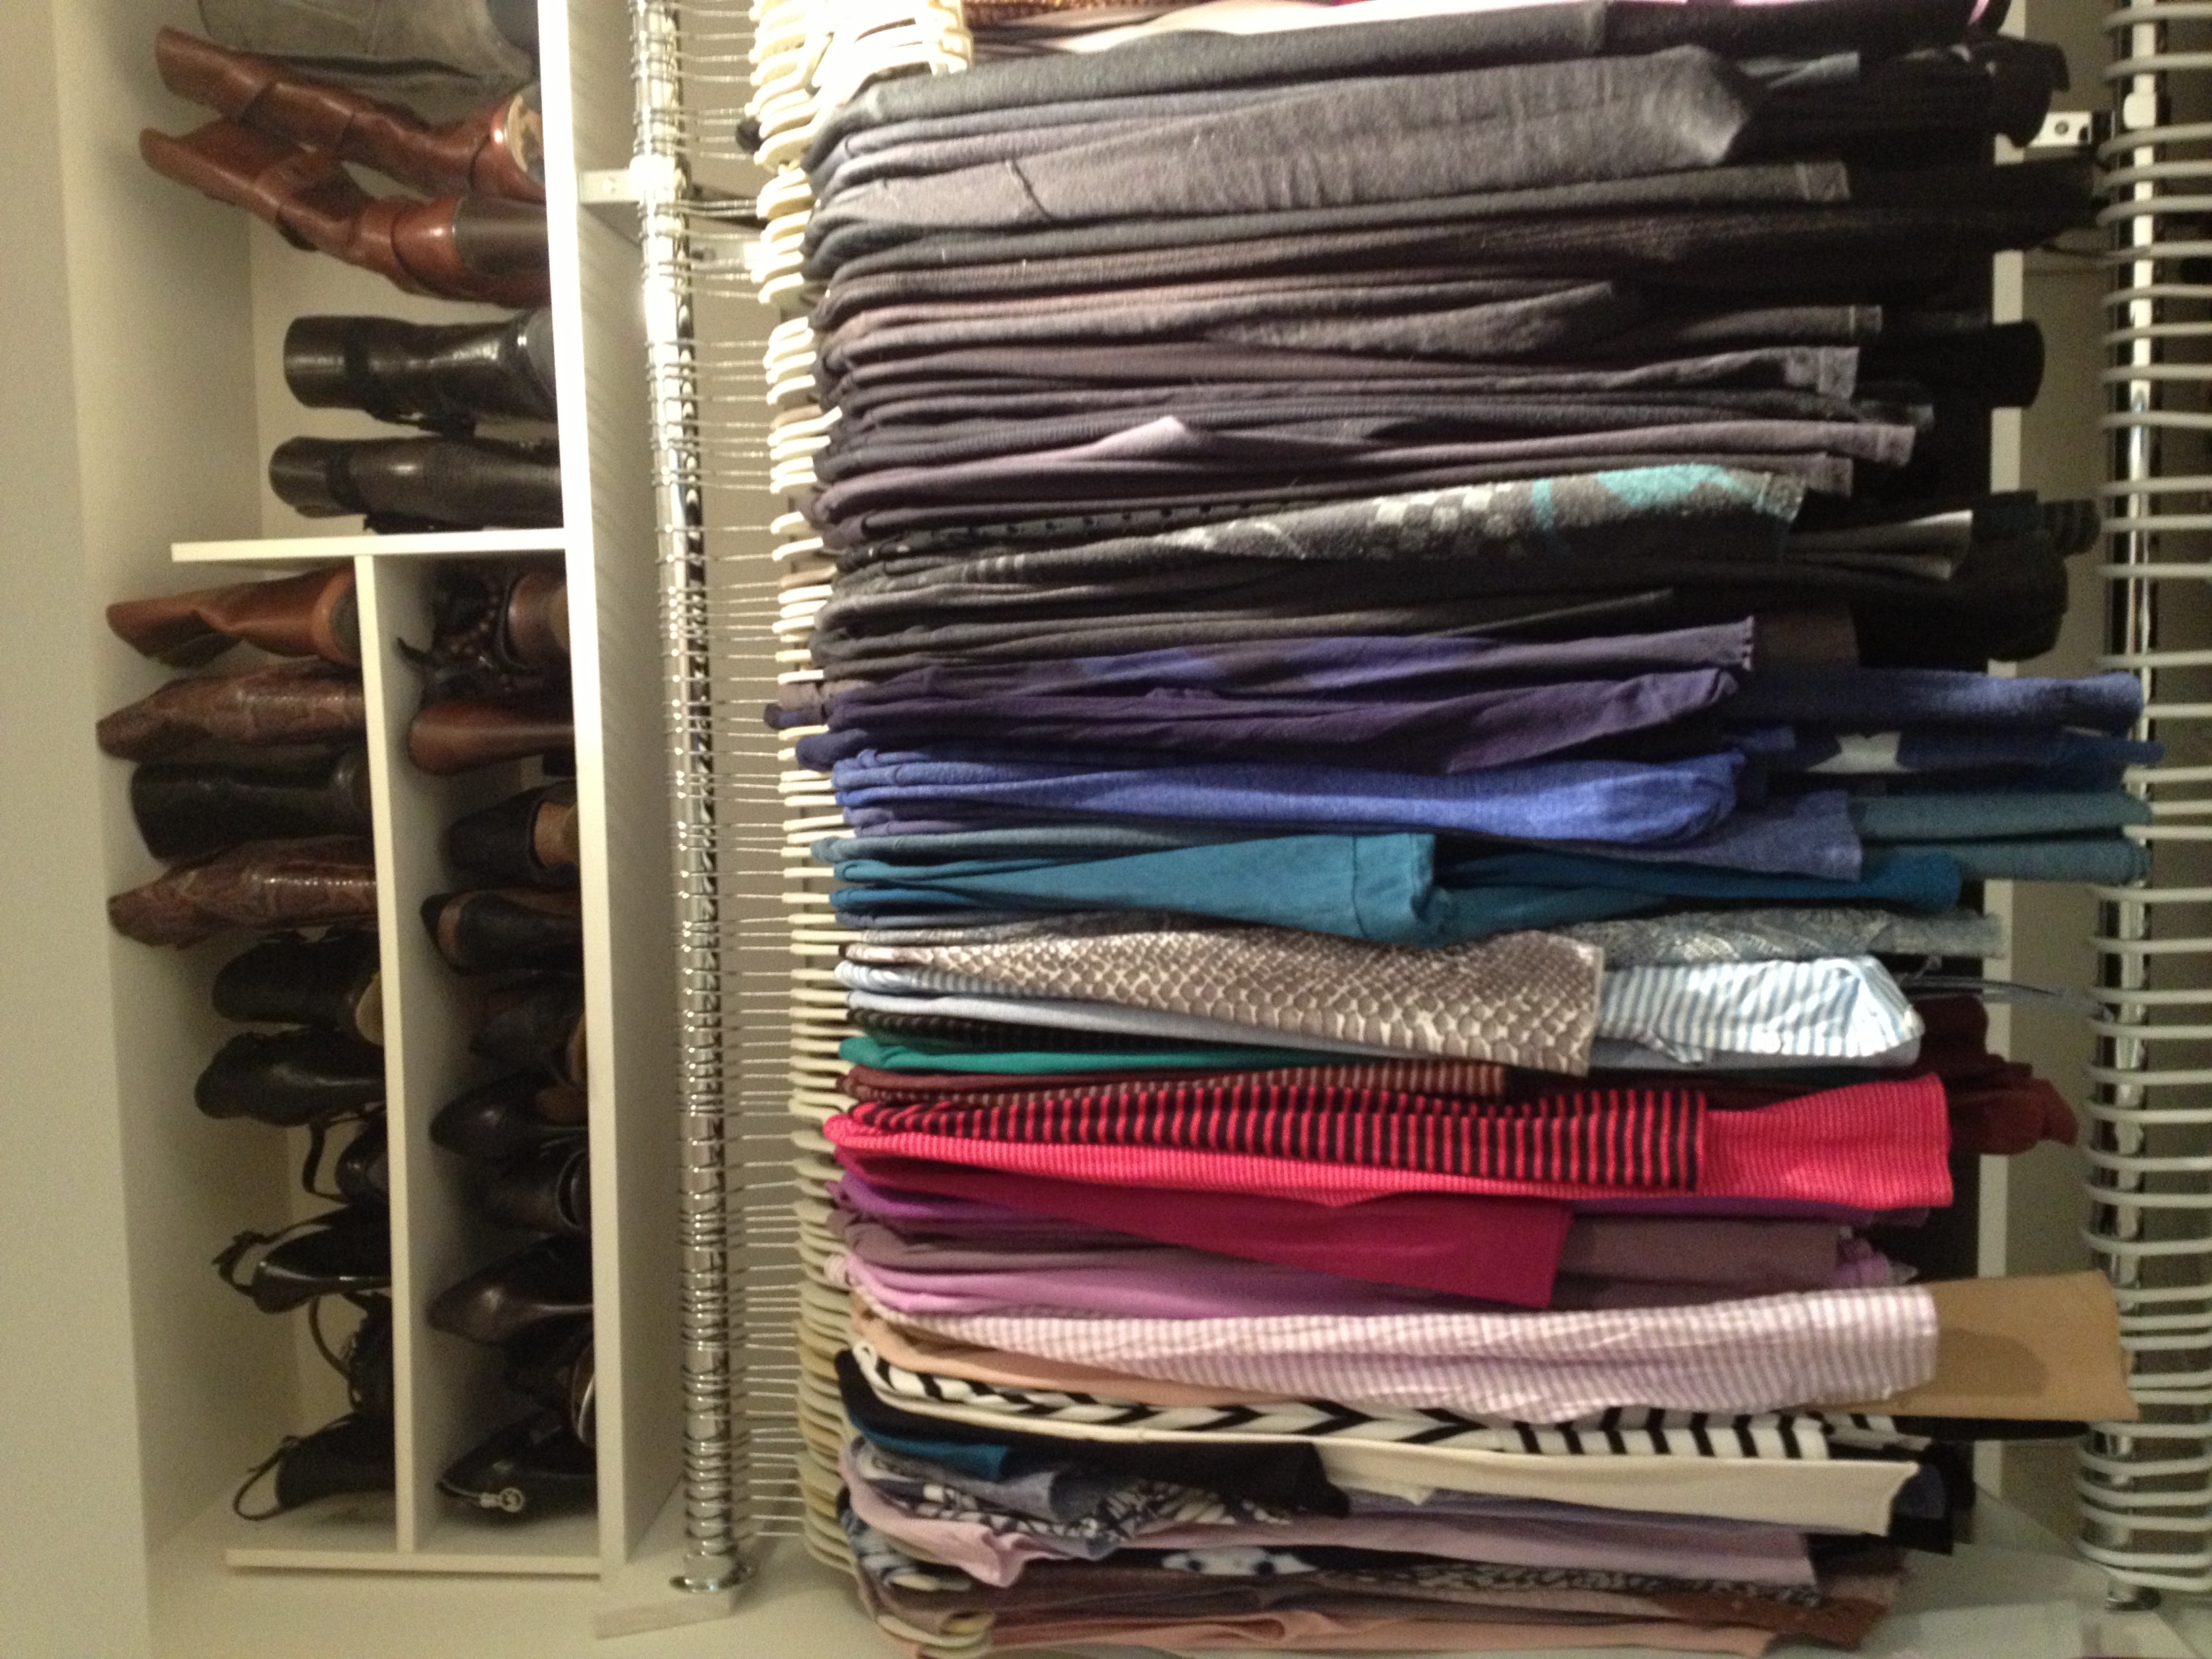
Once we had our Setup in place we moved on to step 2, Sort. When starting this step it is so important to remove or take out all the items from the closets, drawers or bins you are working on. Here we began with her makeup drawers and started sorting like items together. This may seem like a tedious step but it was so much easier for her to make a decision on which lipsticks/glosses to keep when they were separated from her eyeliners and blushes. We also sorted the cosmetics by color. Know that as you break the clutter down from a big pile into smaller ones, it streamlines the decision-making process when like items are grouped together.

Which brings us right into step 3, Select. Now that items were sorted she could make decisions with ease by seeing everything separated. At first, she felt overwhelmed until she started seeing like items grouped together. This made it clear to her that she had many duplicate items. At that point, she knew she only wanted to keep two light pink lip glosses instead of five. As we moved on to other areas she could easily tell me which hair products she wanted to keep and what stuffed animals she wanted to donate. By the time we got to her closet,  she was really getting the hang of it by keeping the best and getting rid of the rest. Her old t-shirts didn’t stand a chance.

Before we put anything back we completed step 4, Sanitize. We wiped all surfaces down including the inside of all the drawers. We swept the floor and cleaned inside the closet. The sanitizing process is so important, not only because of the current COVID situation but the idea that you are clearing out the old and negative energy. By sanitizing, you’re not only purifying your space but you’re allowing good things to come into your life. For these reasons it’s important to follow through with sanitizing before moving on to step 5, Stylize.

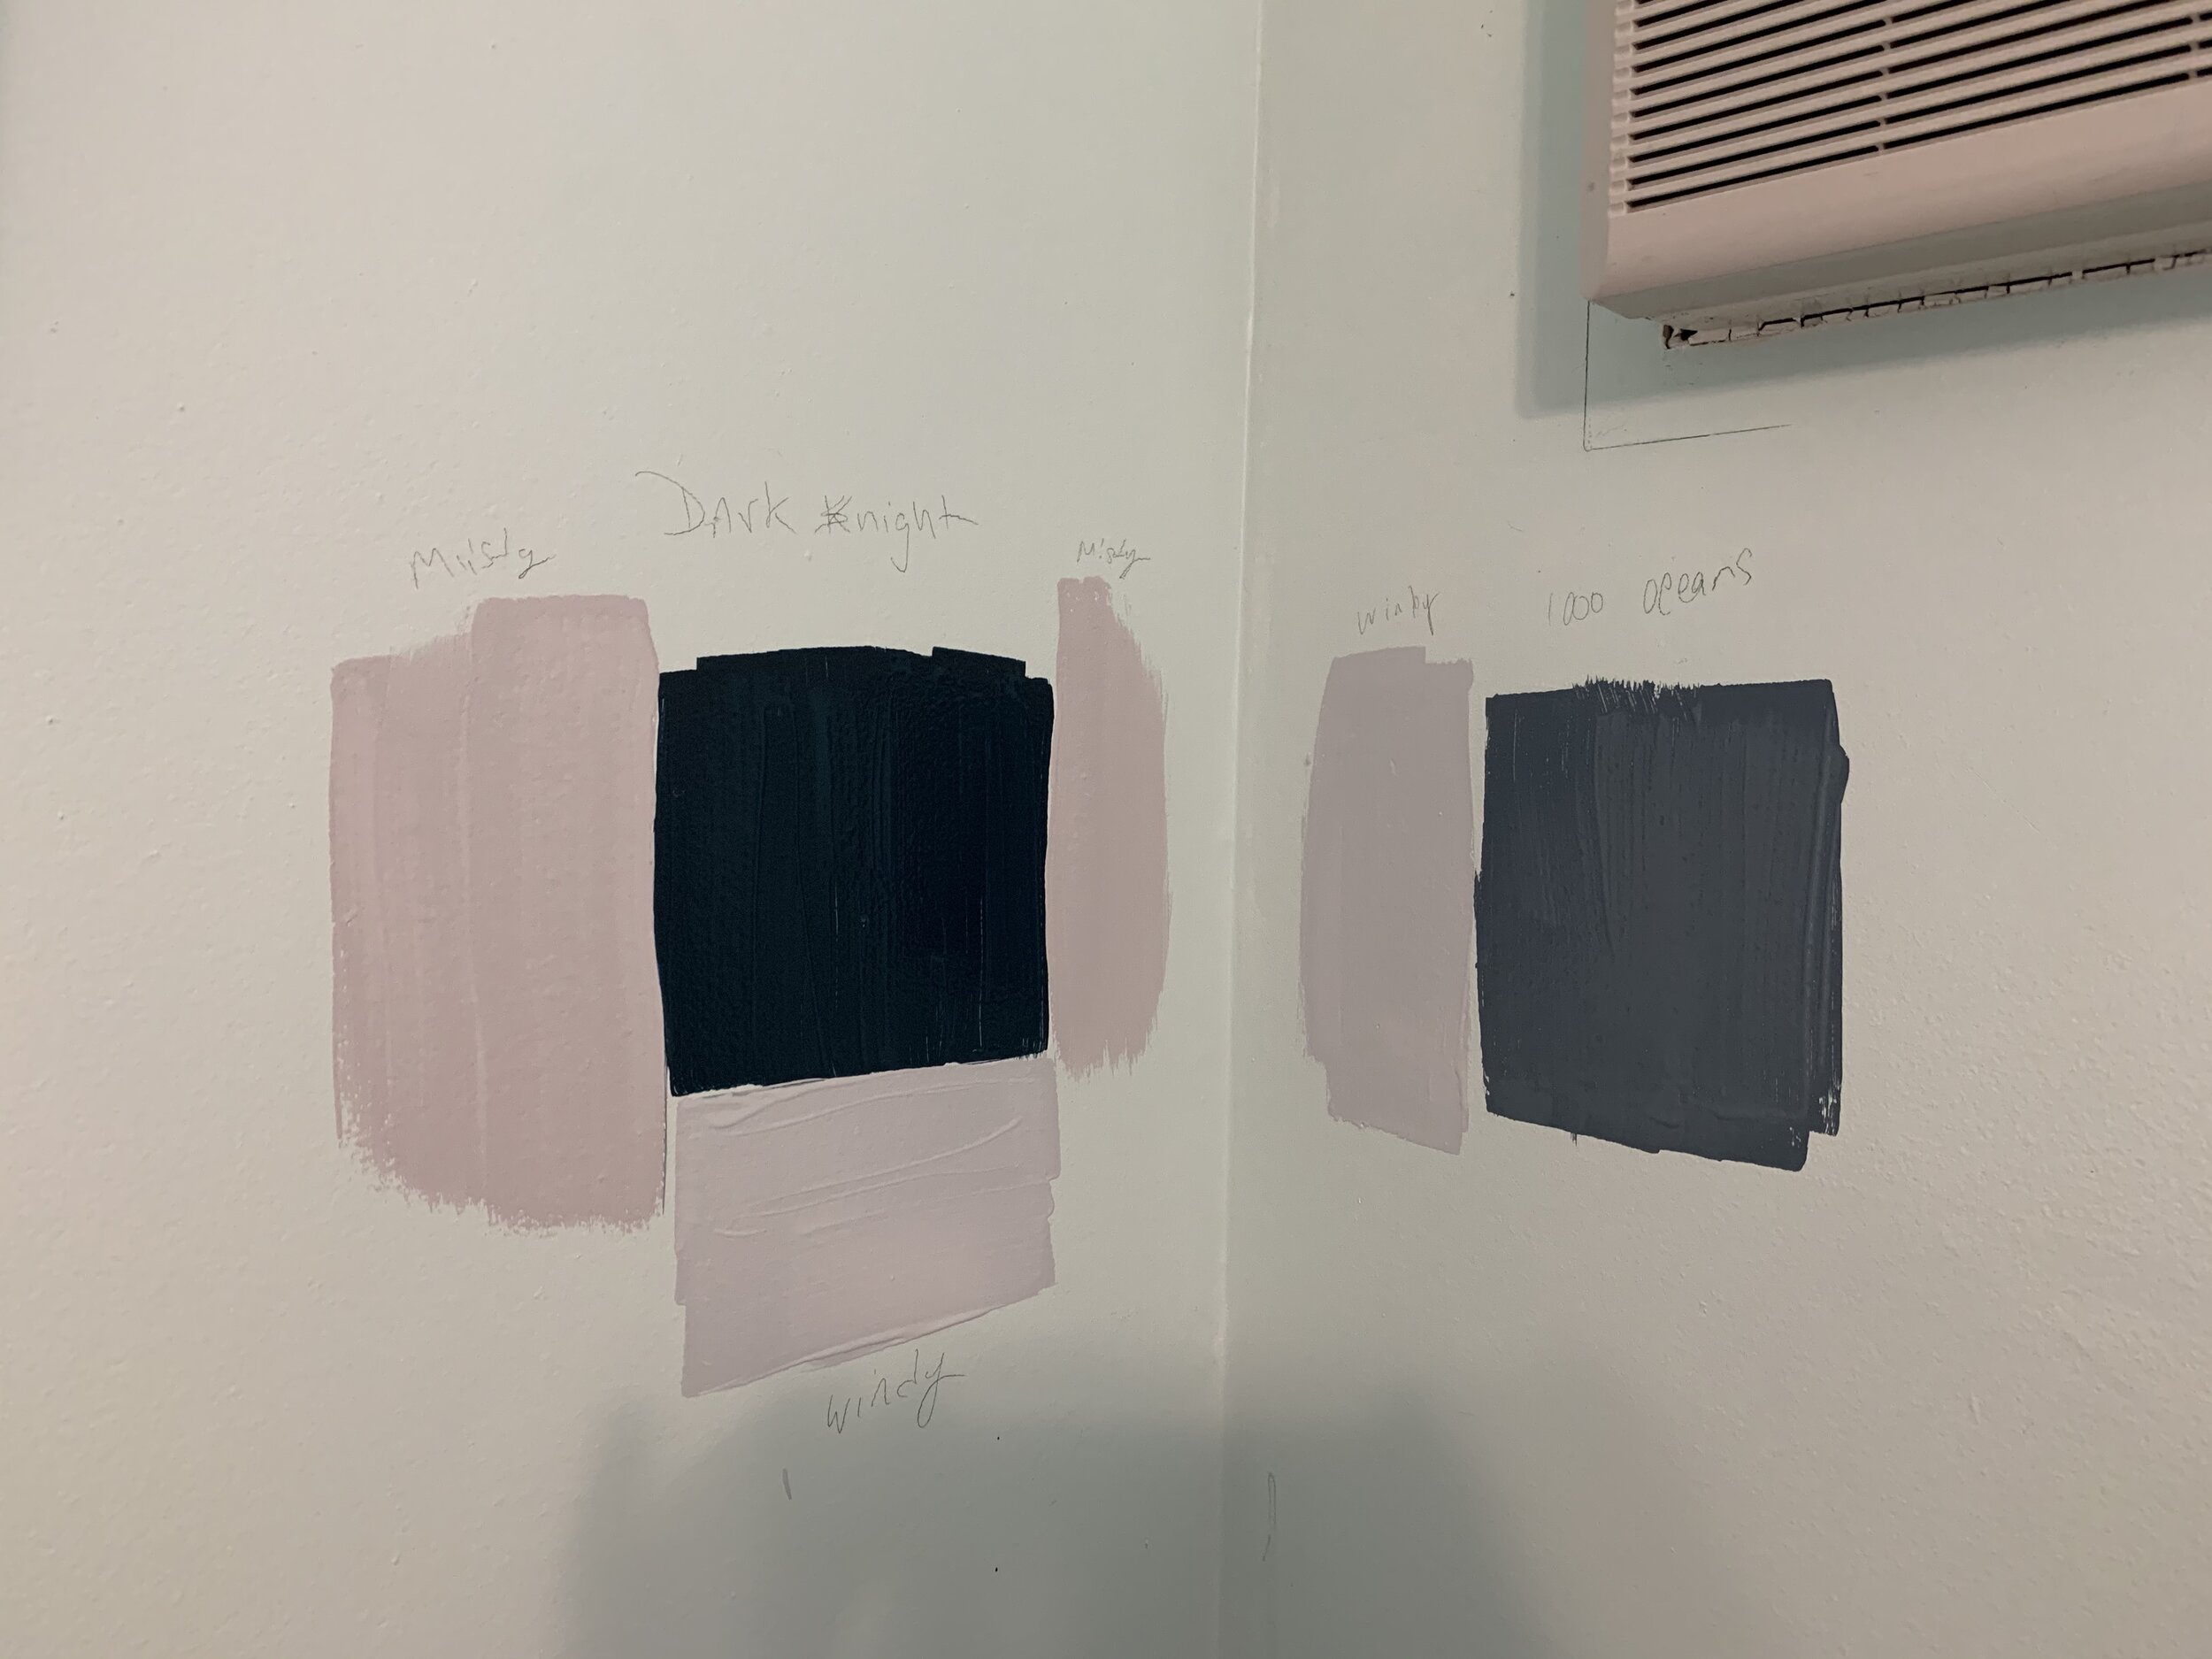
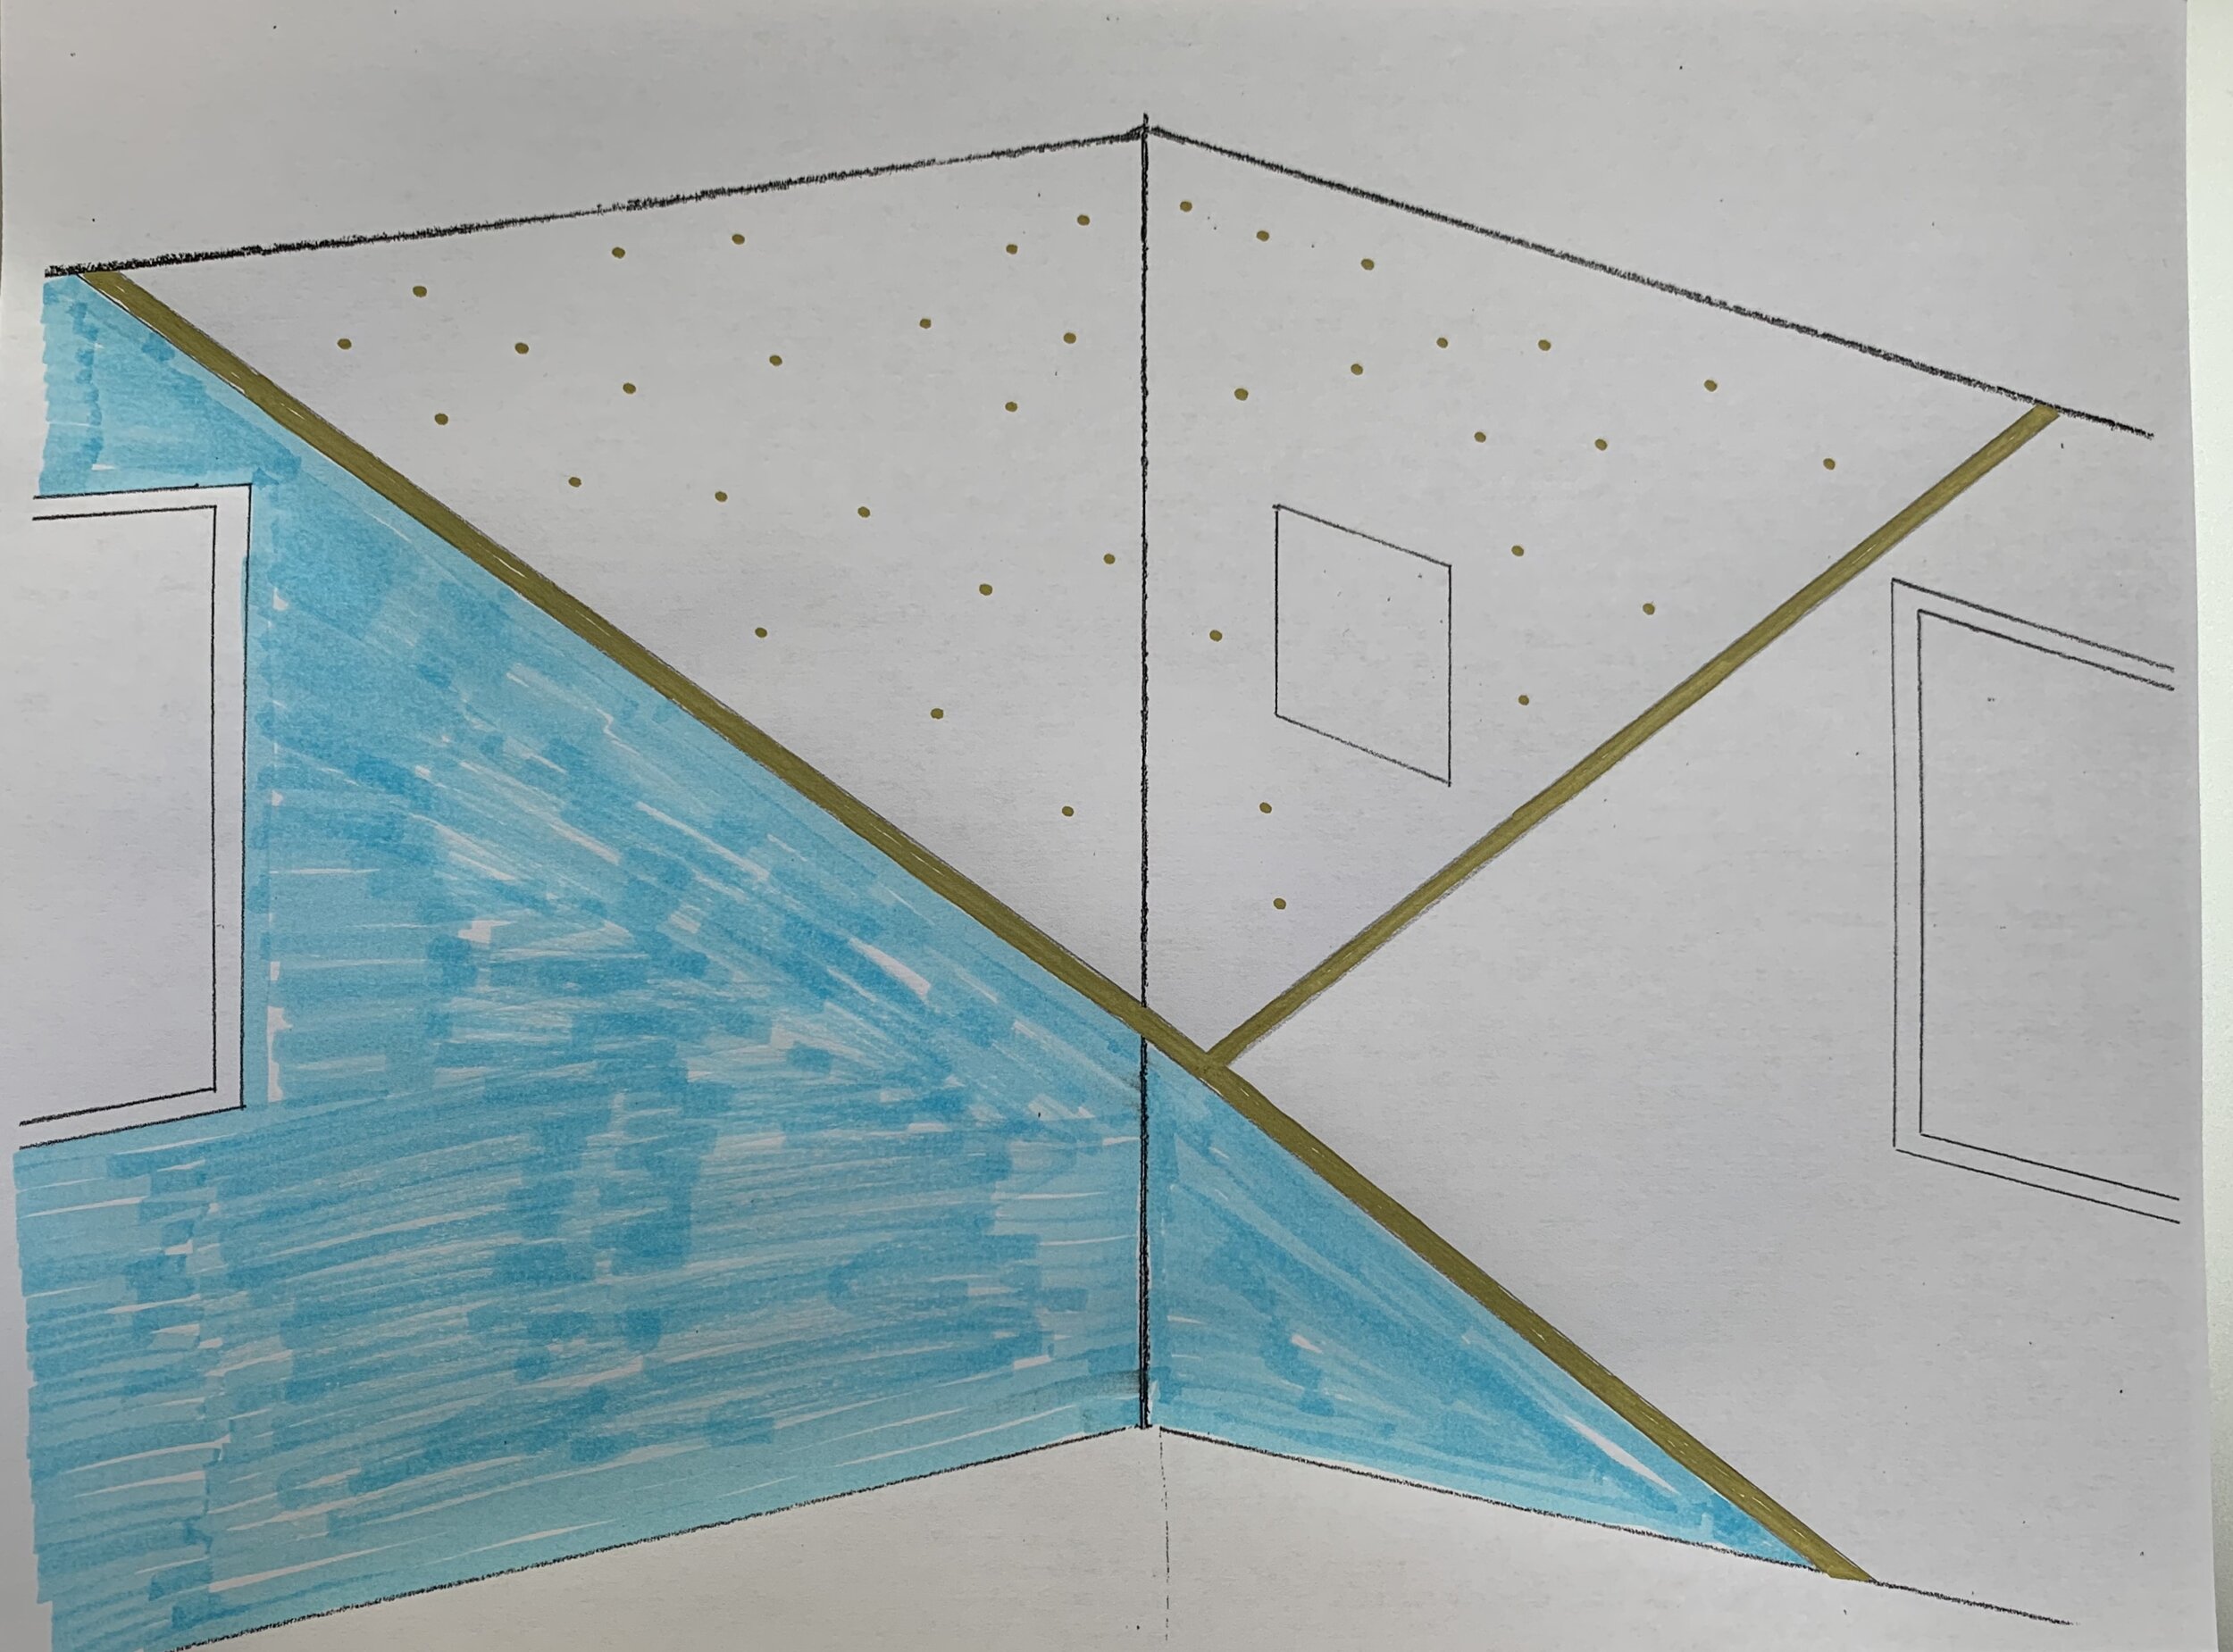
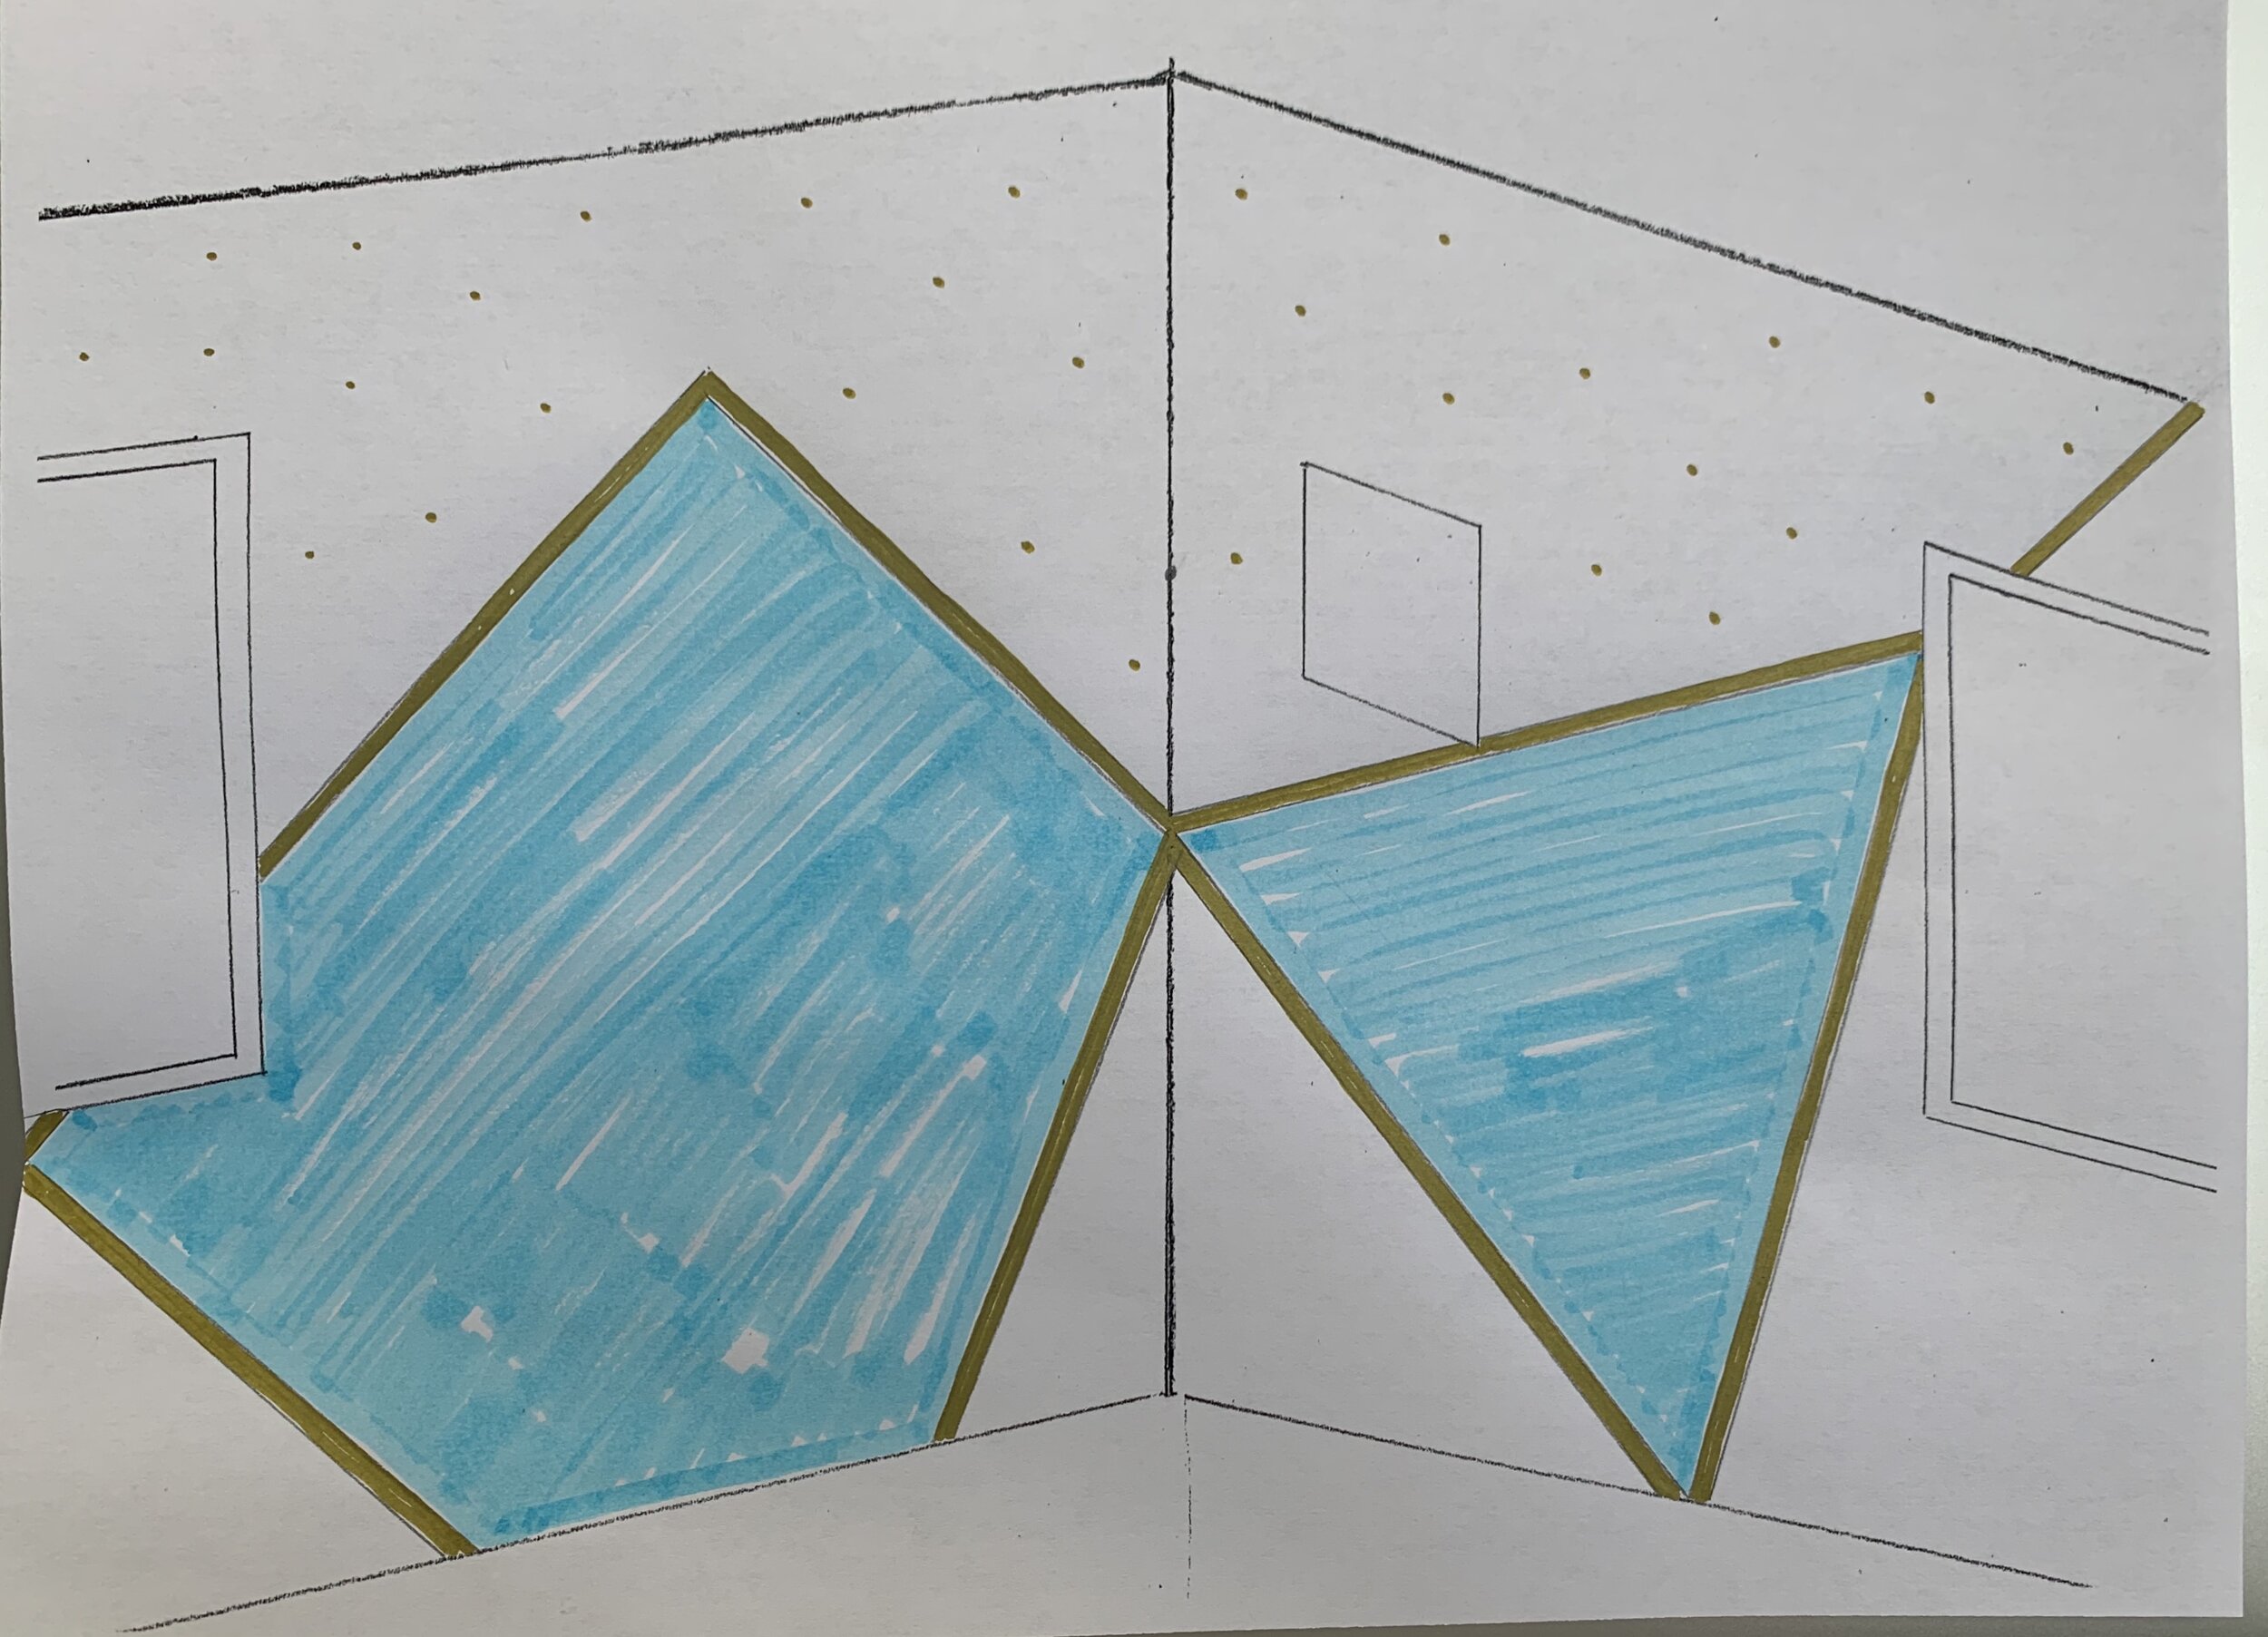
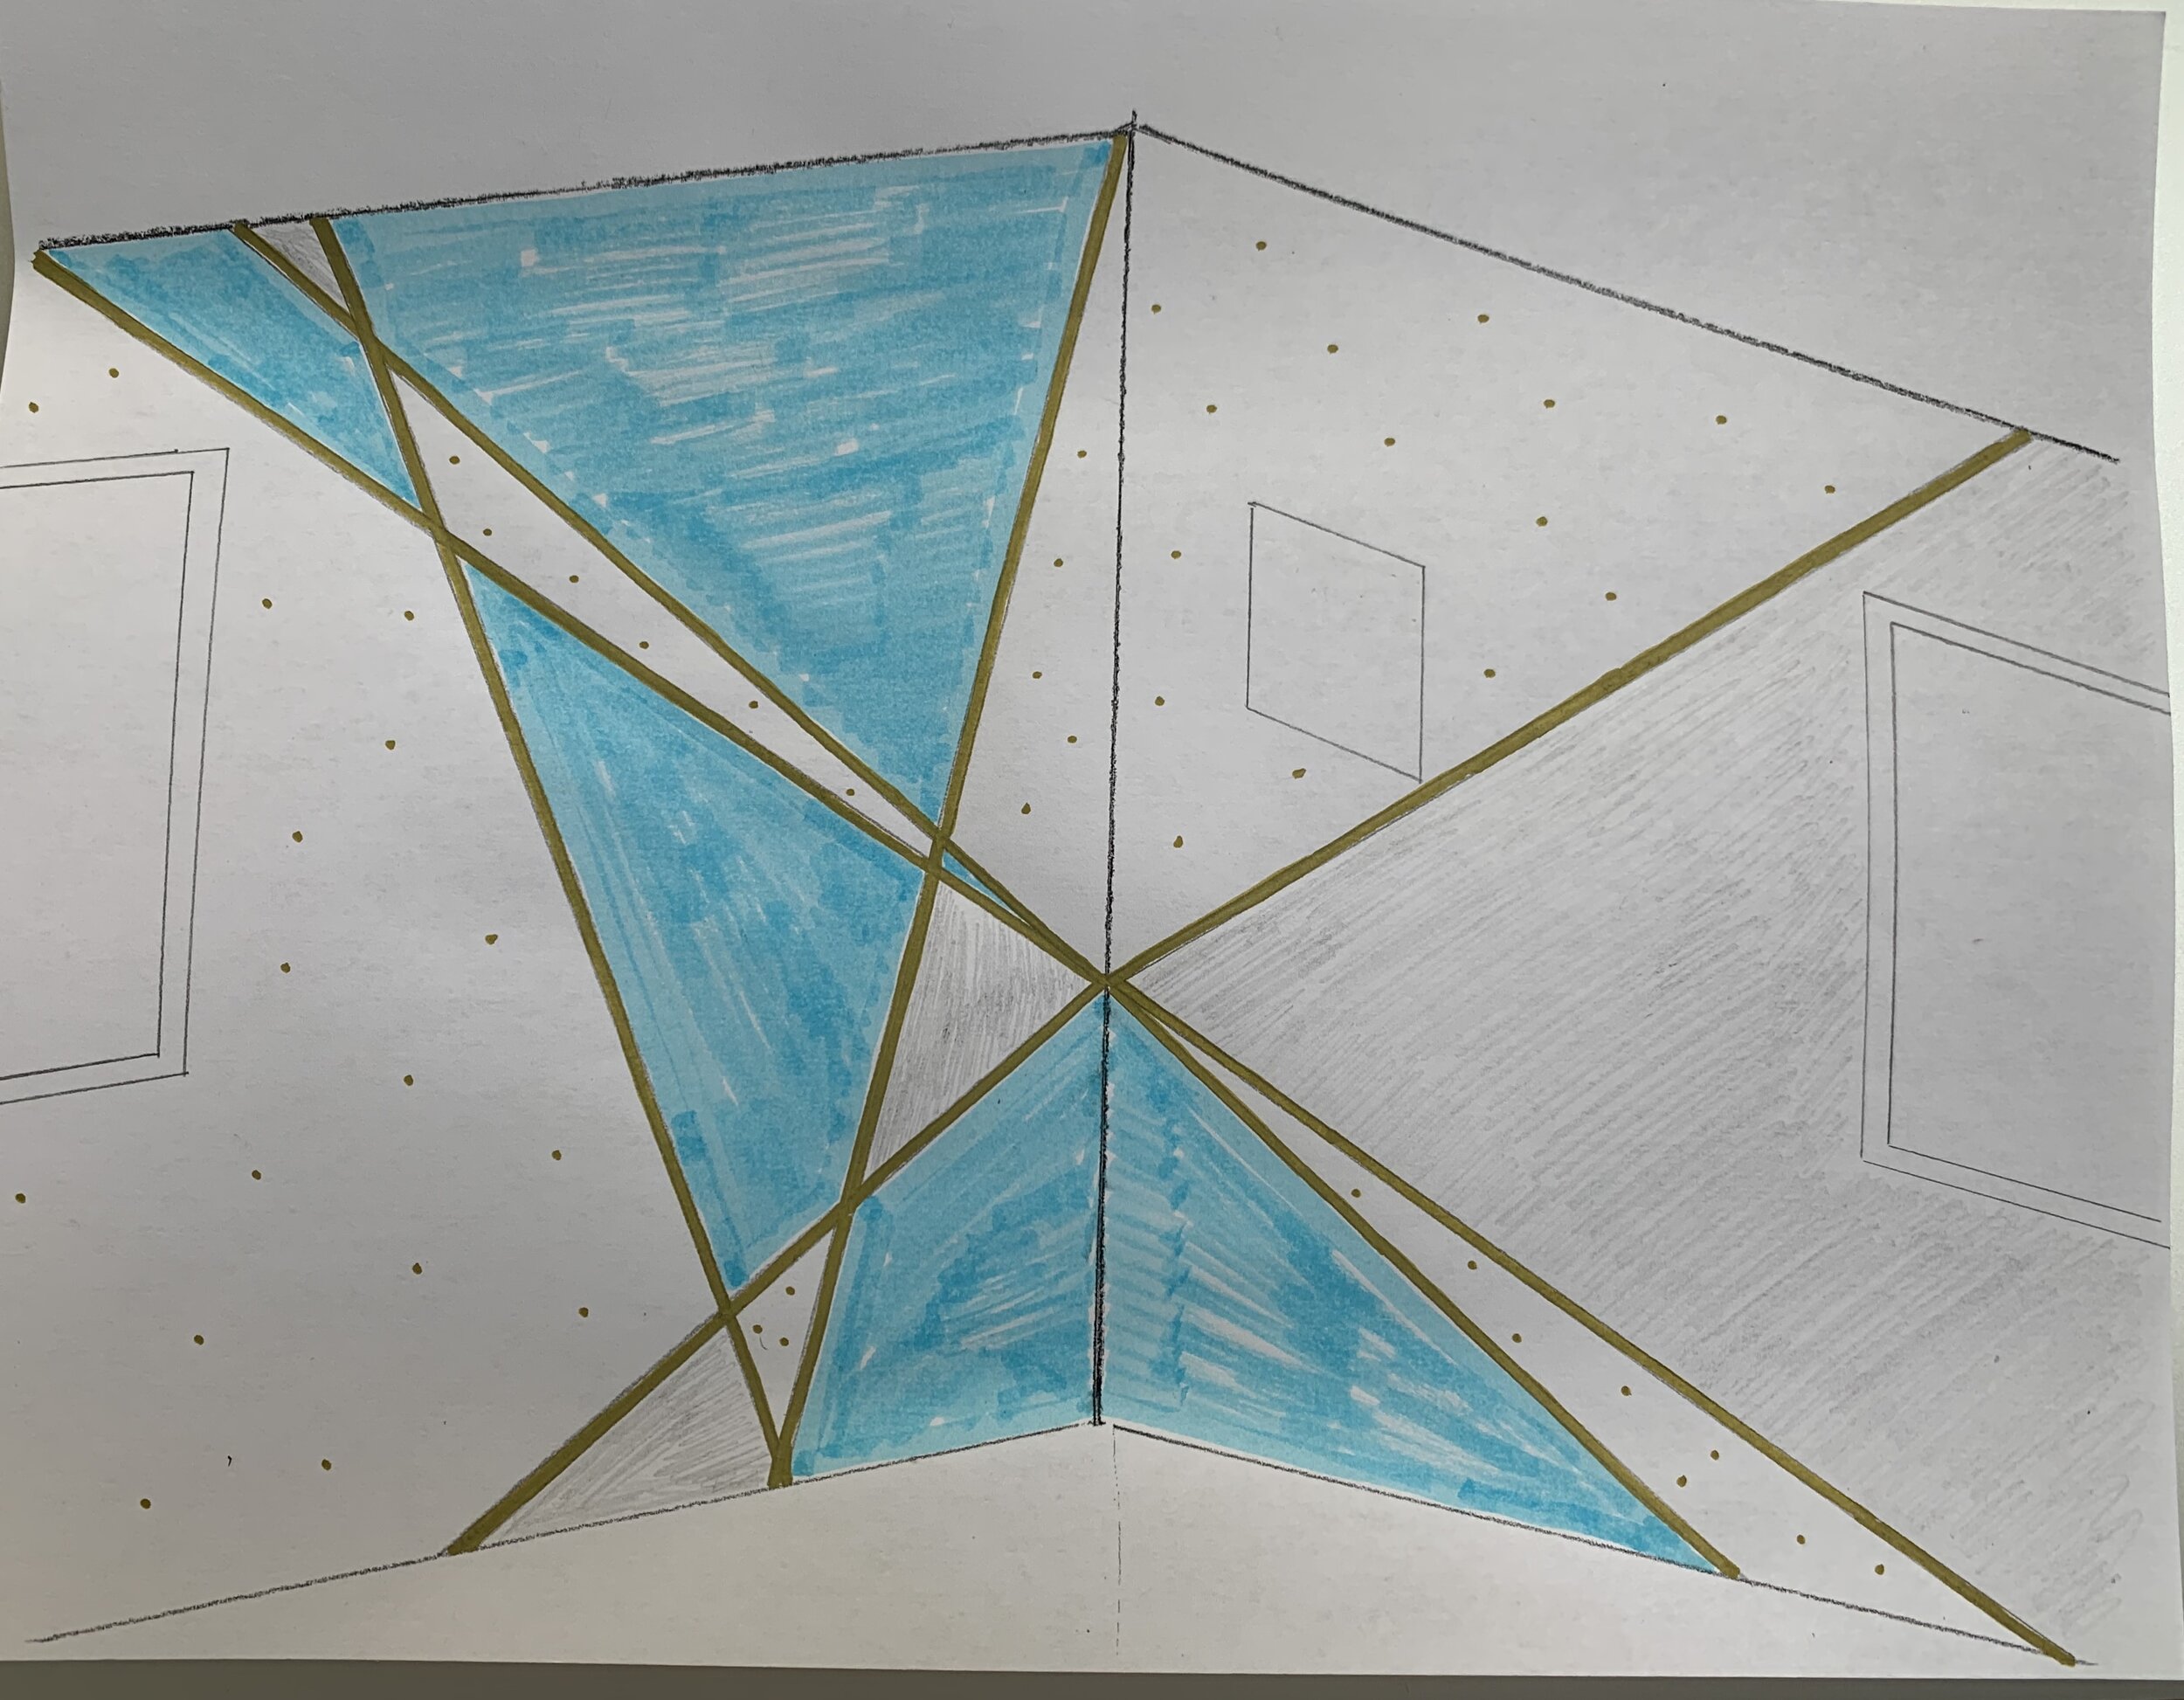
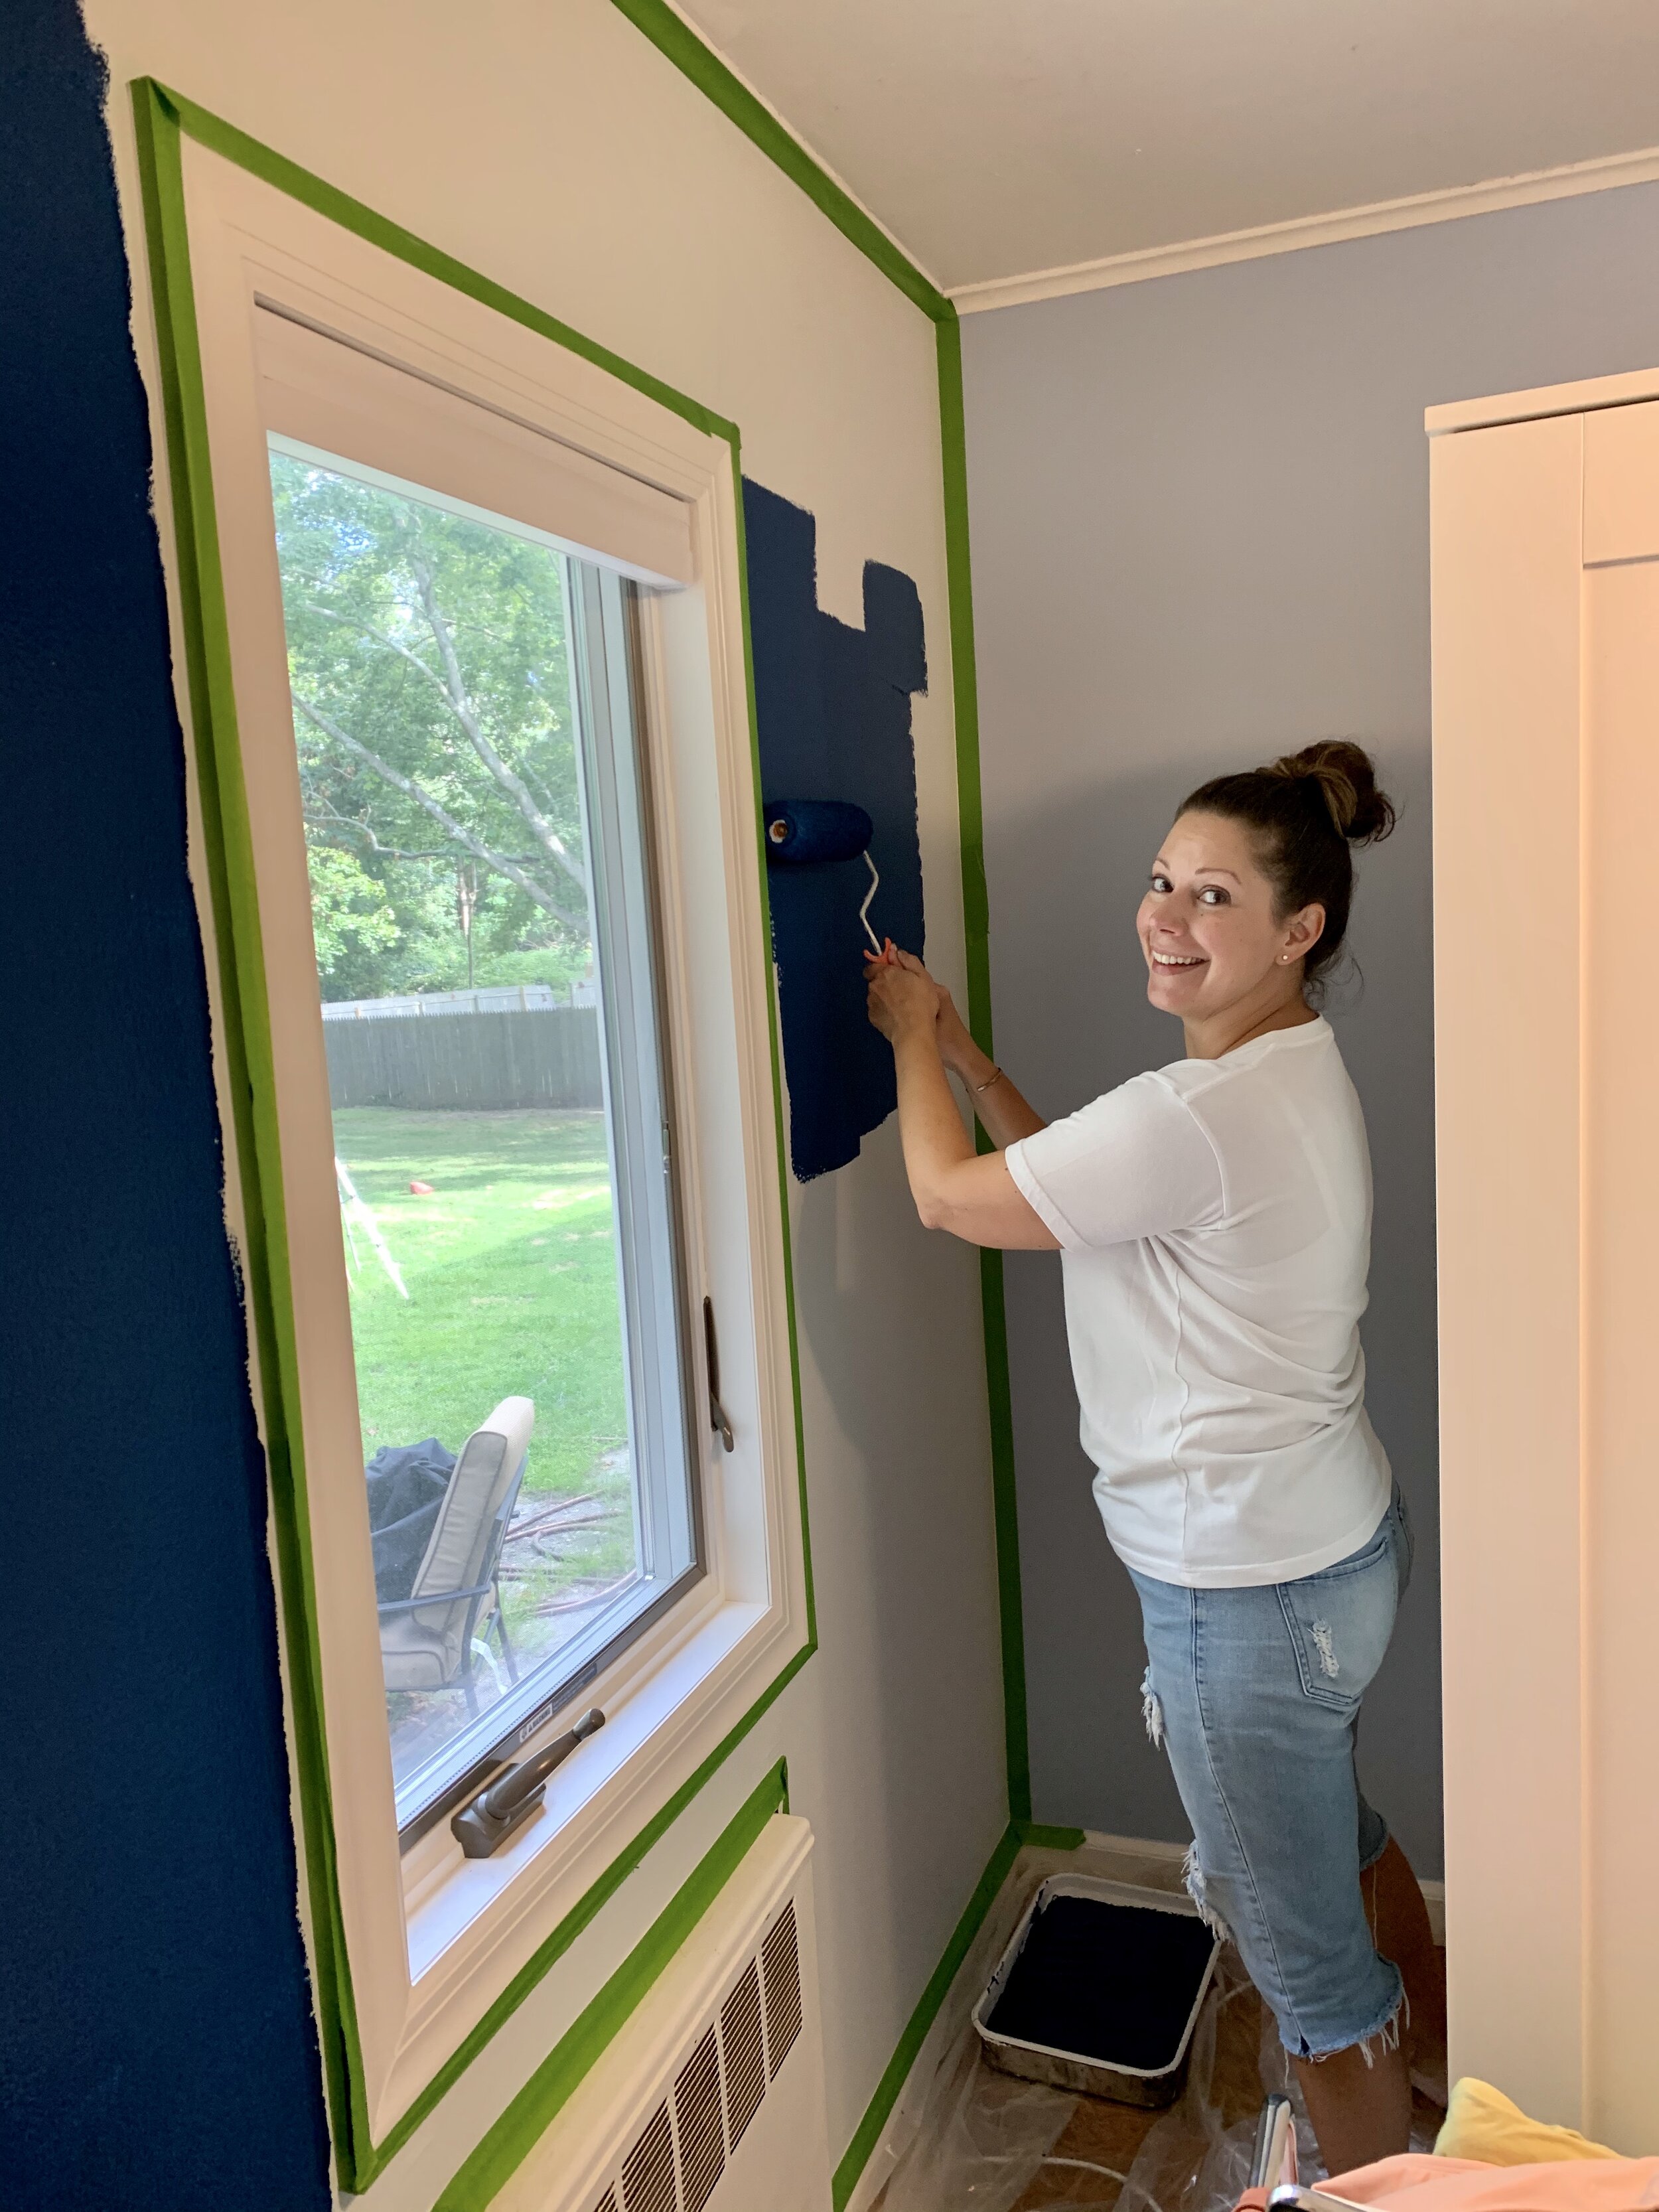
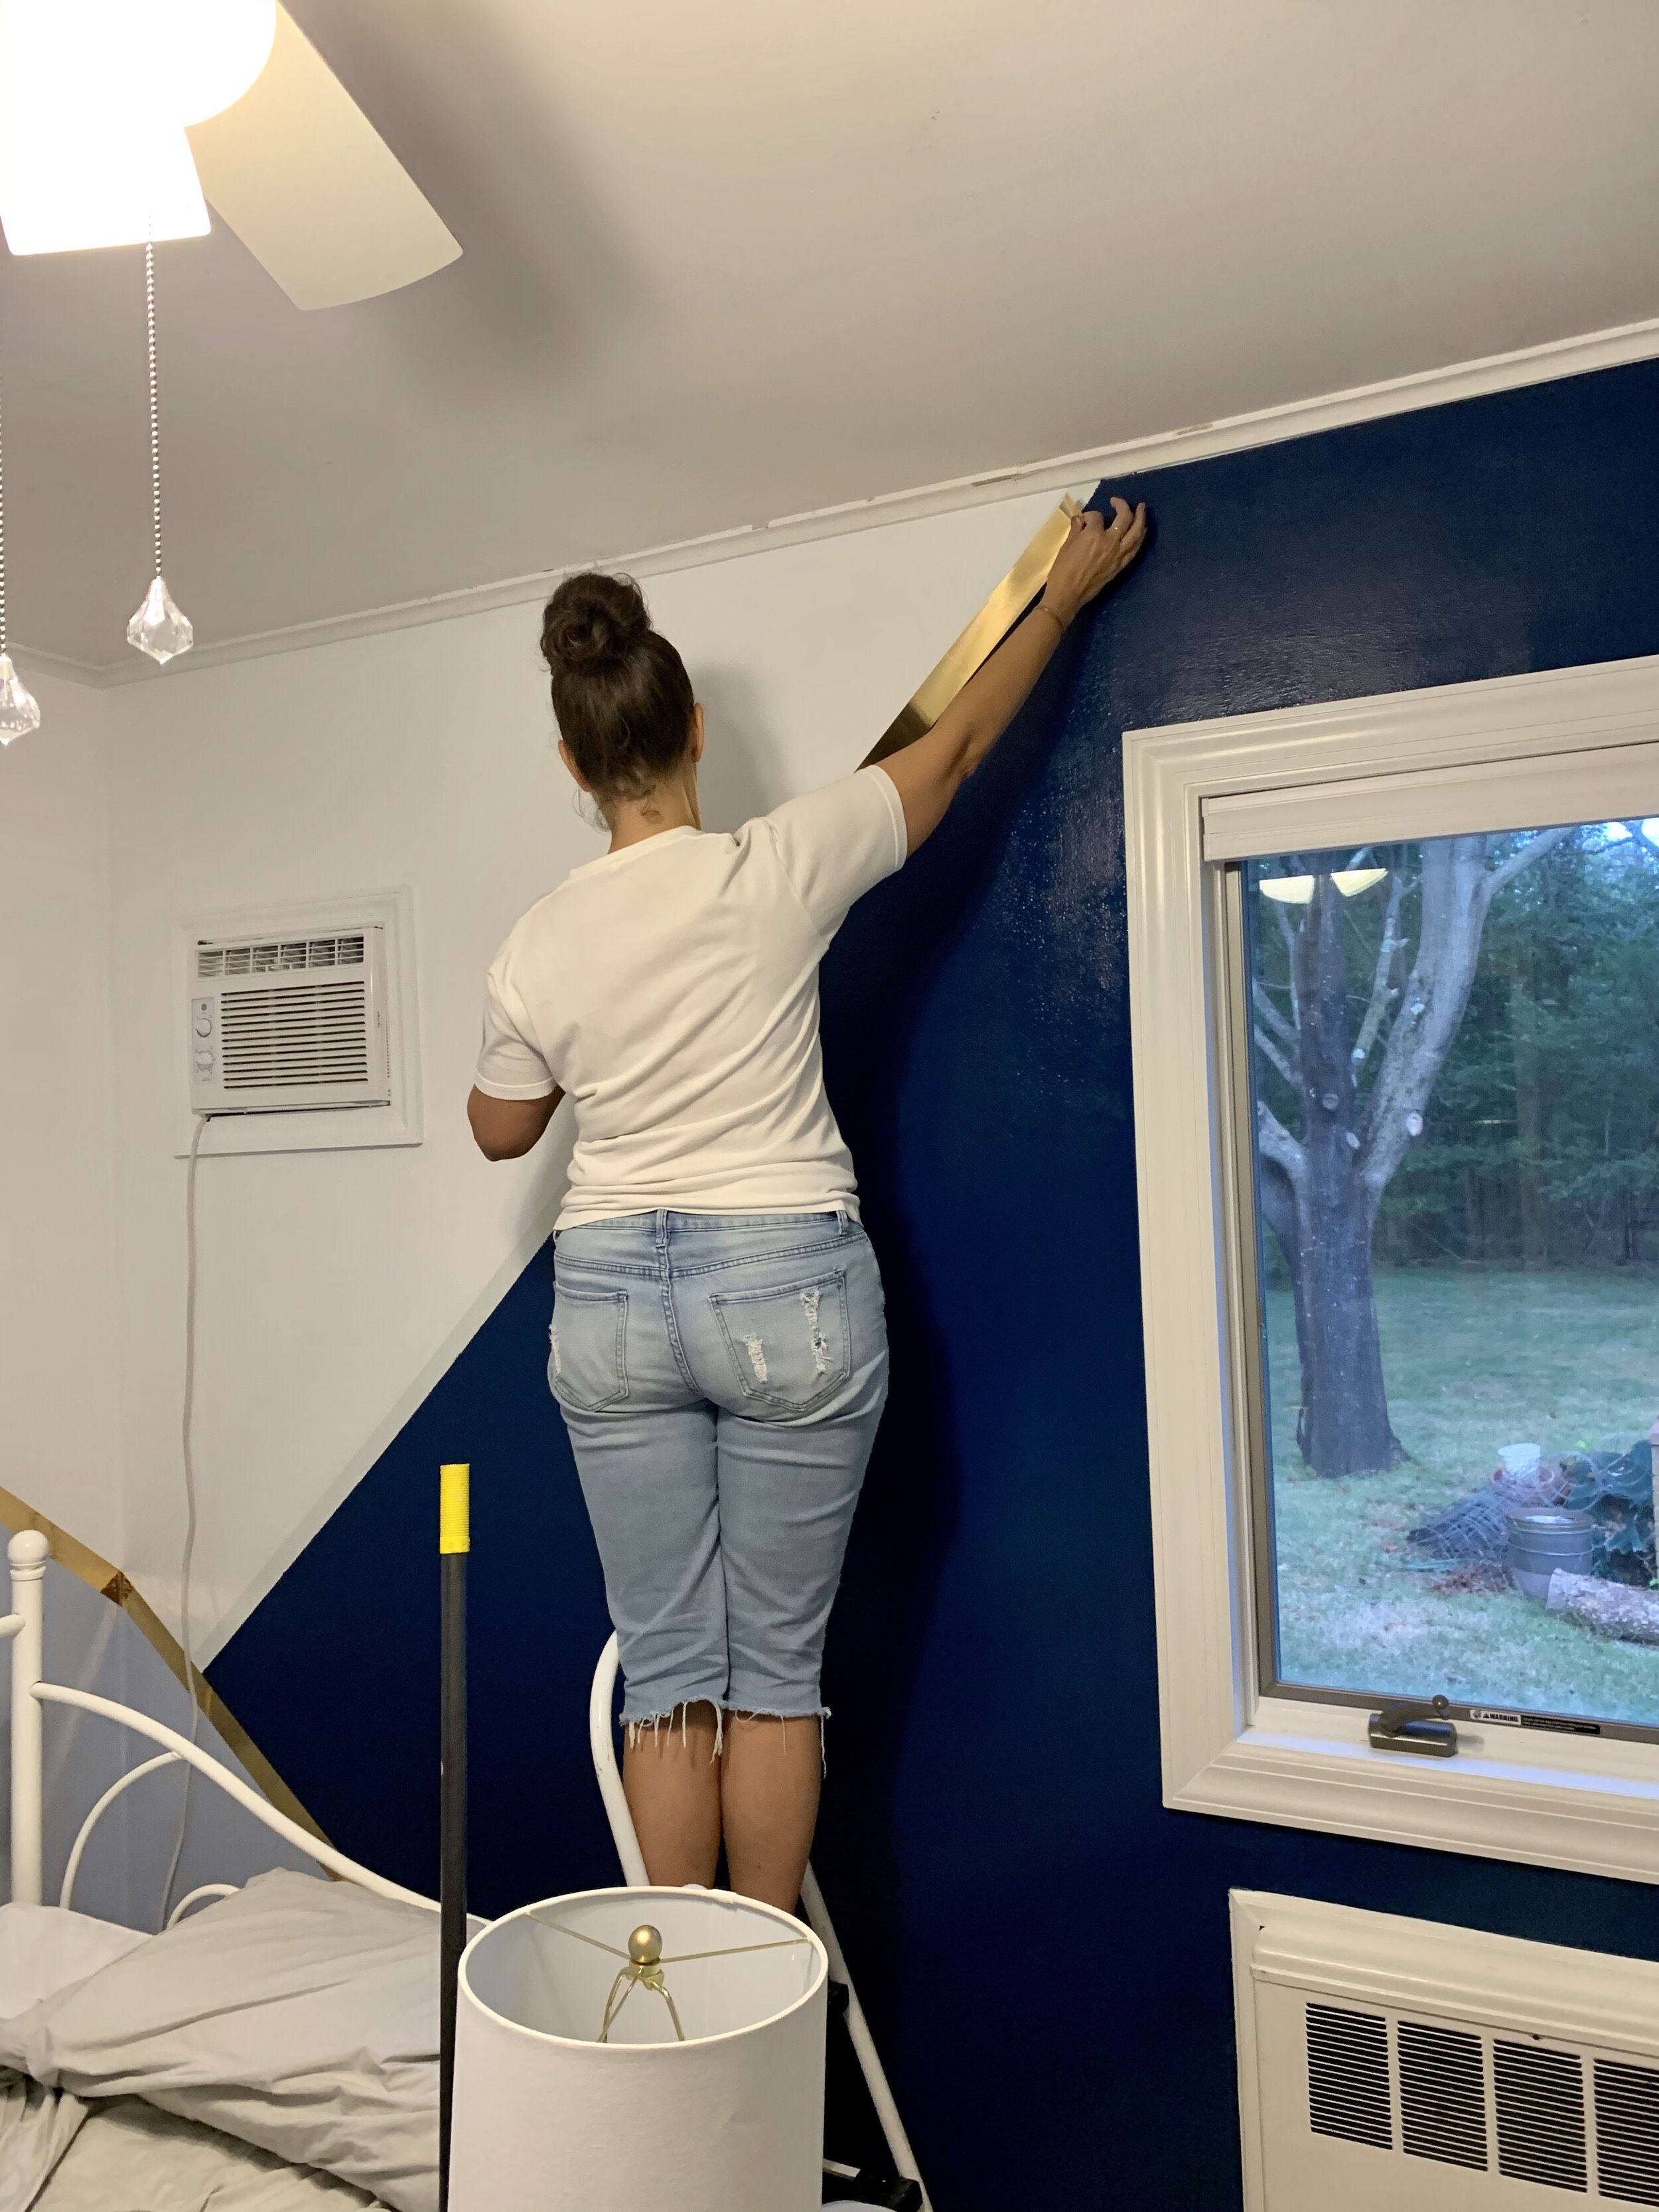
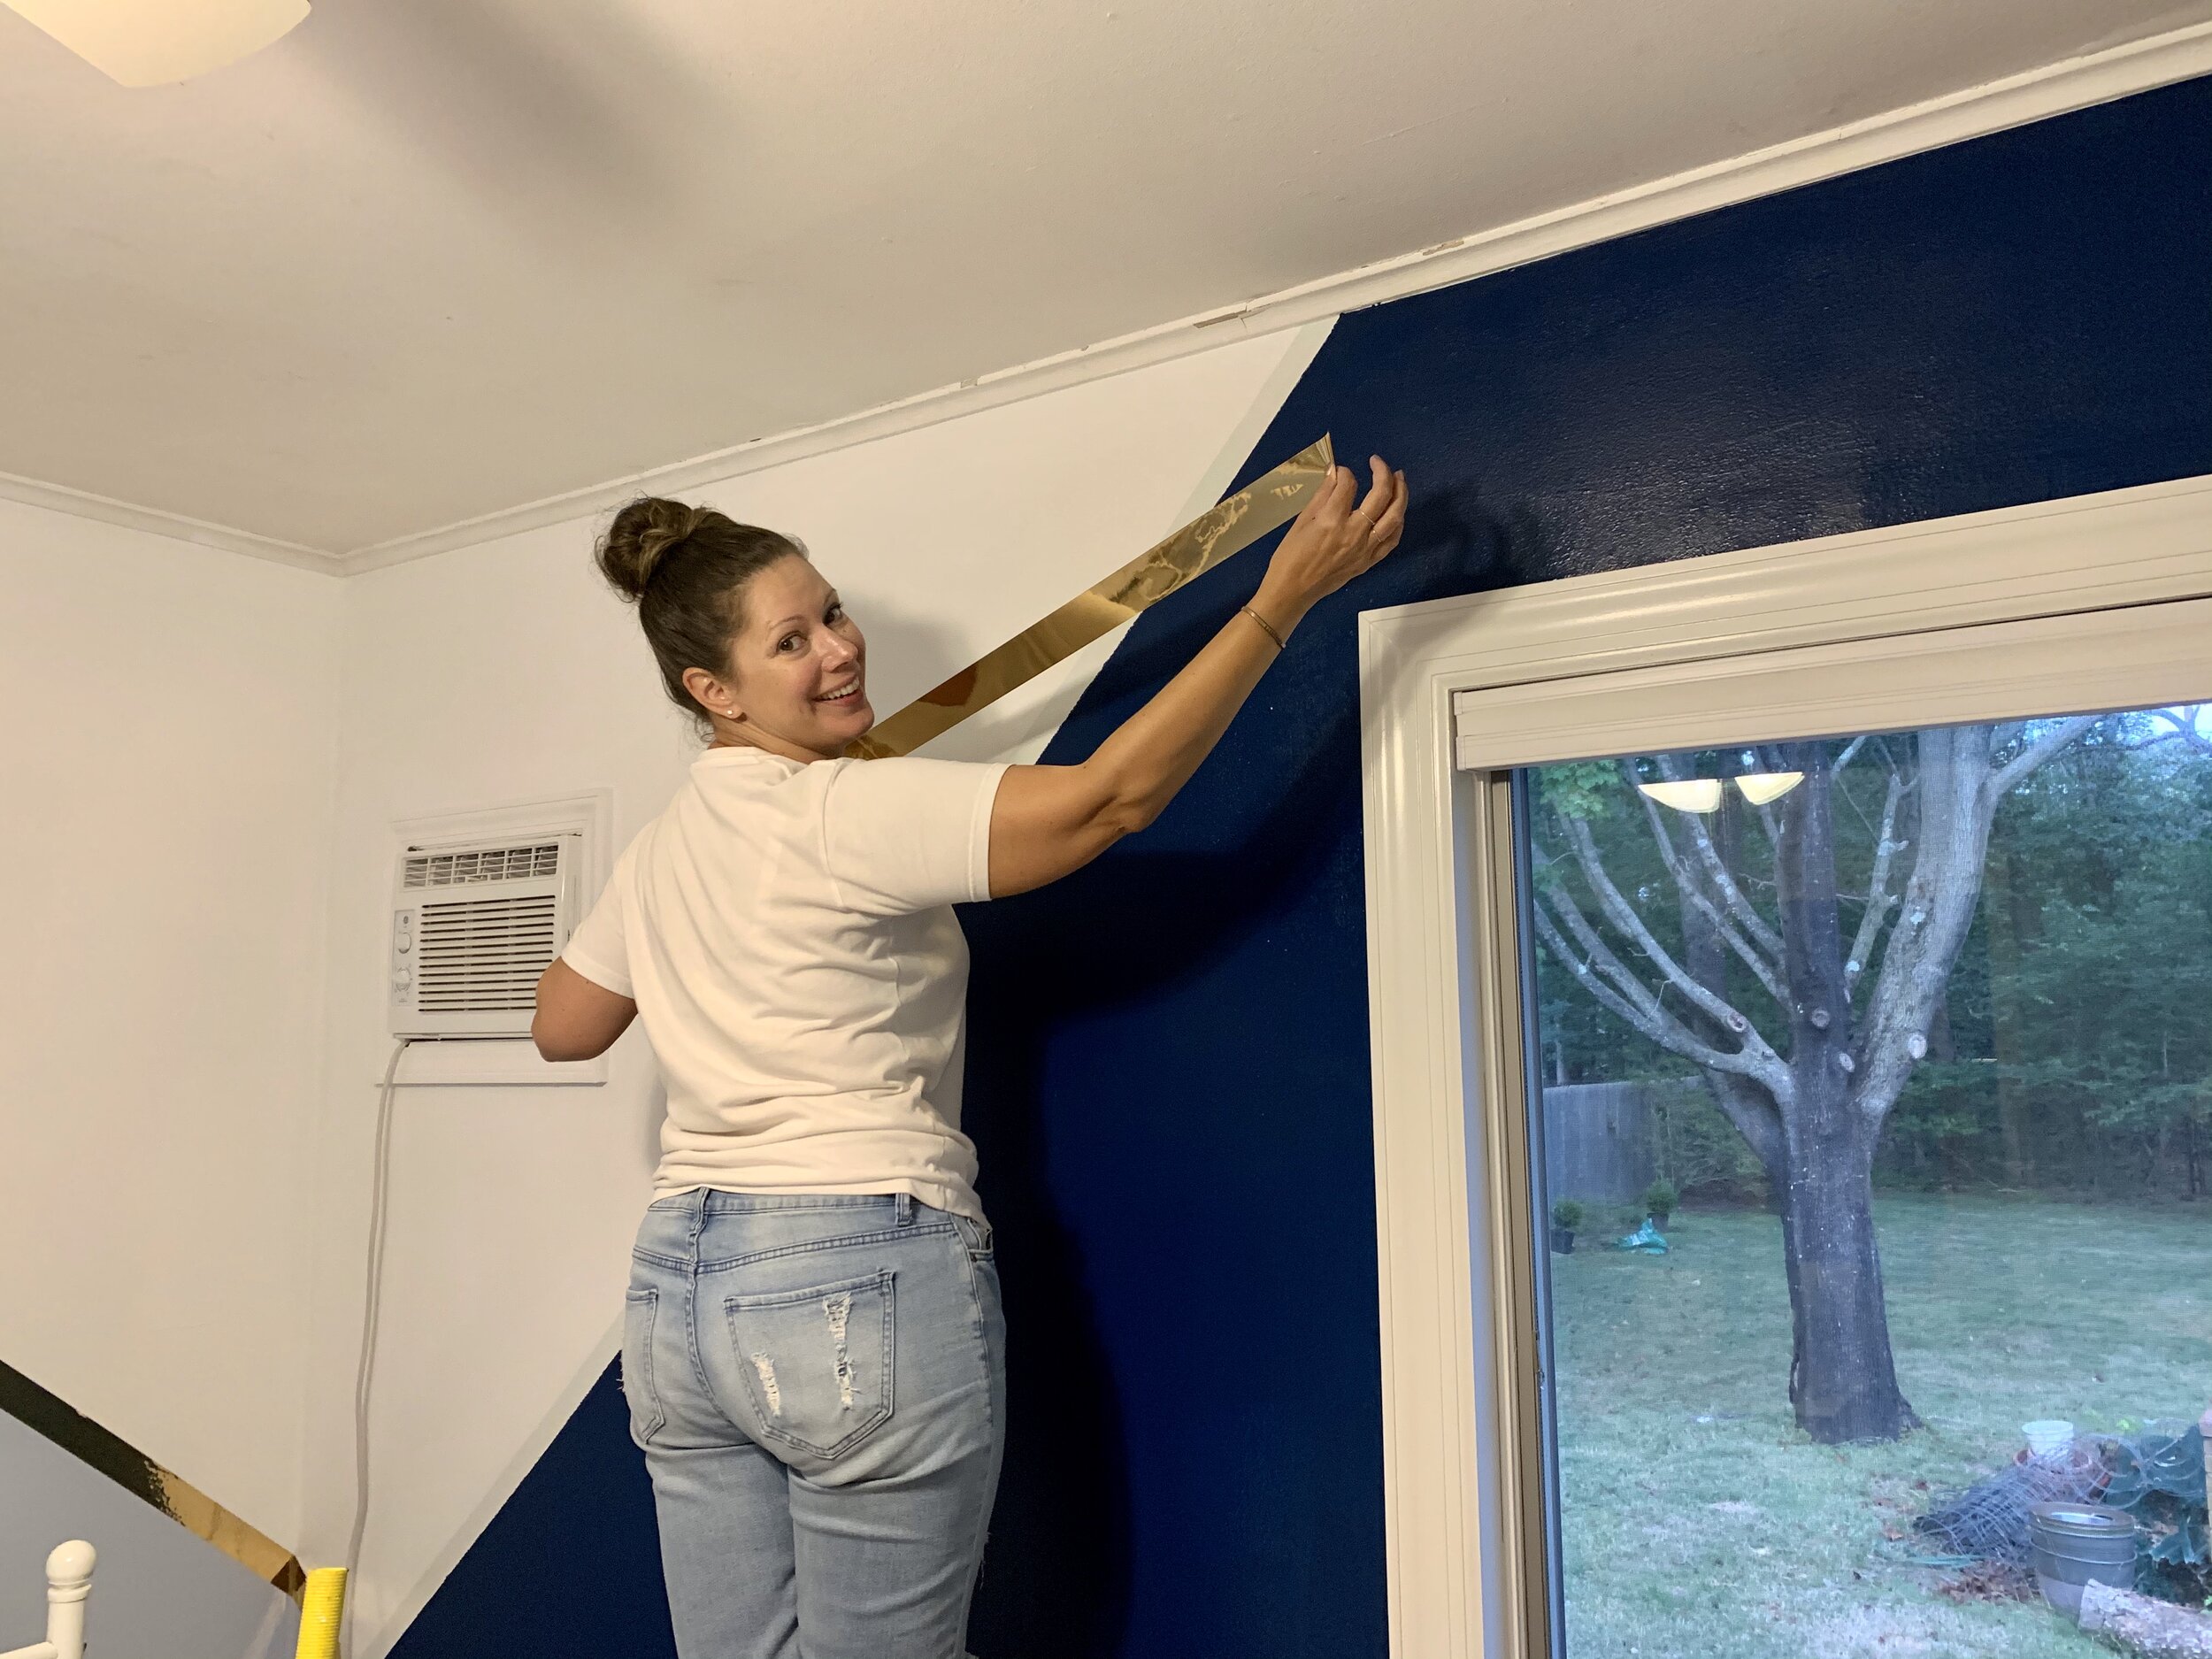
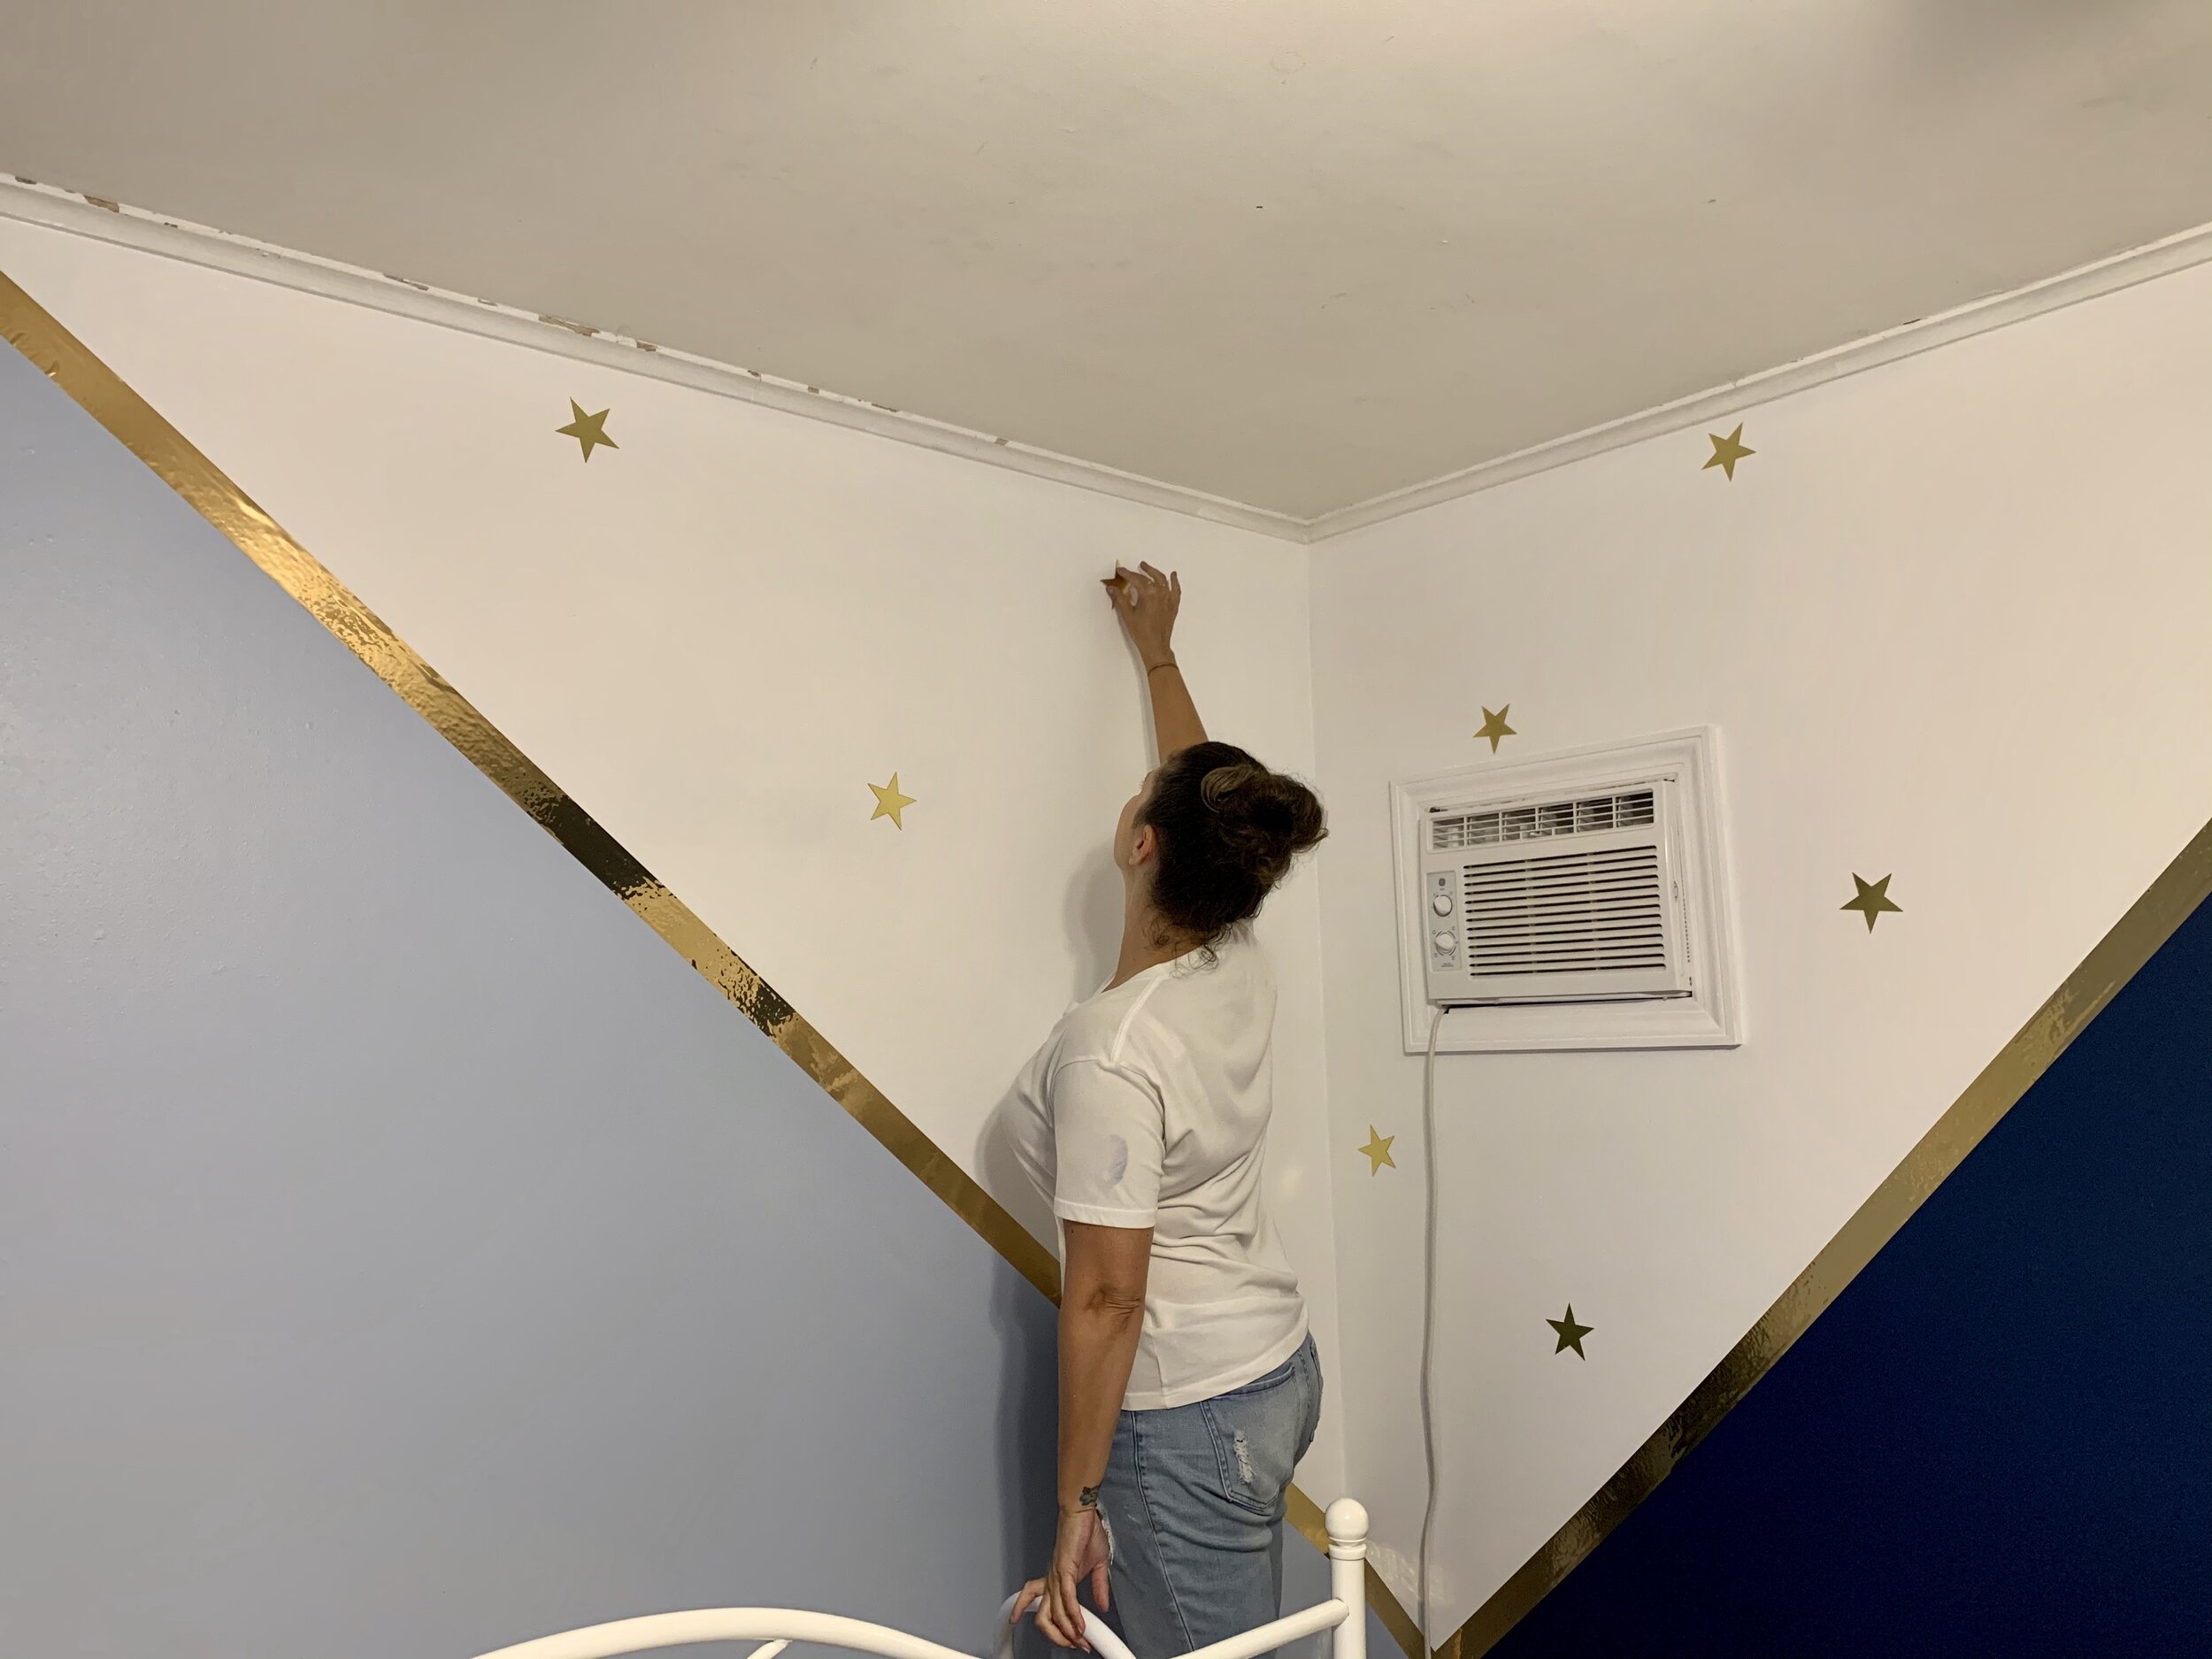
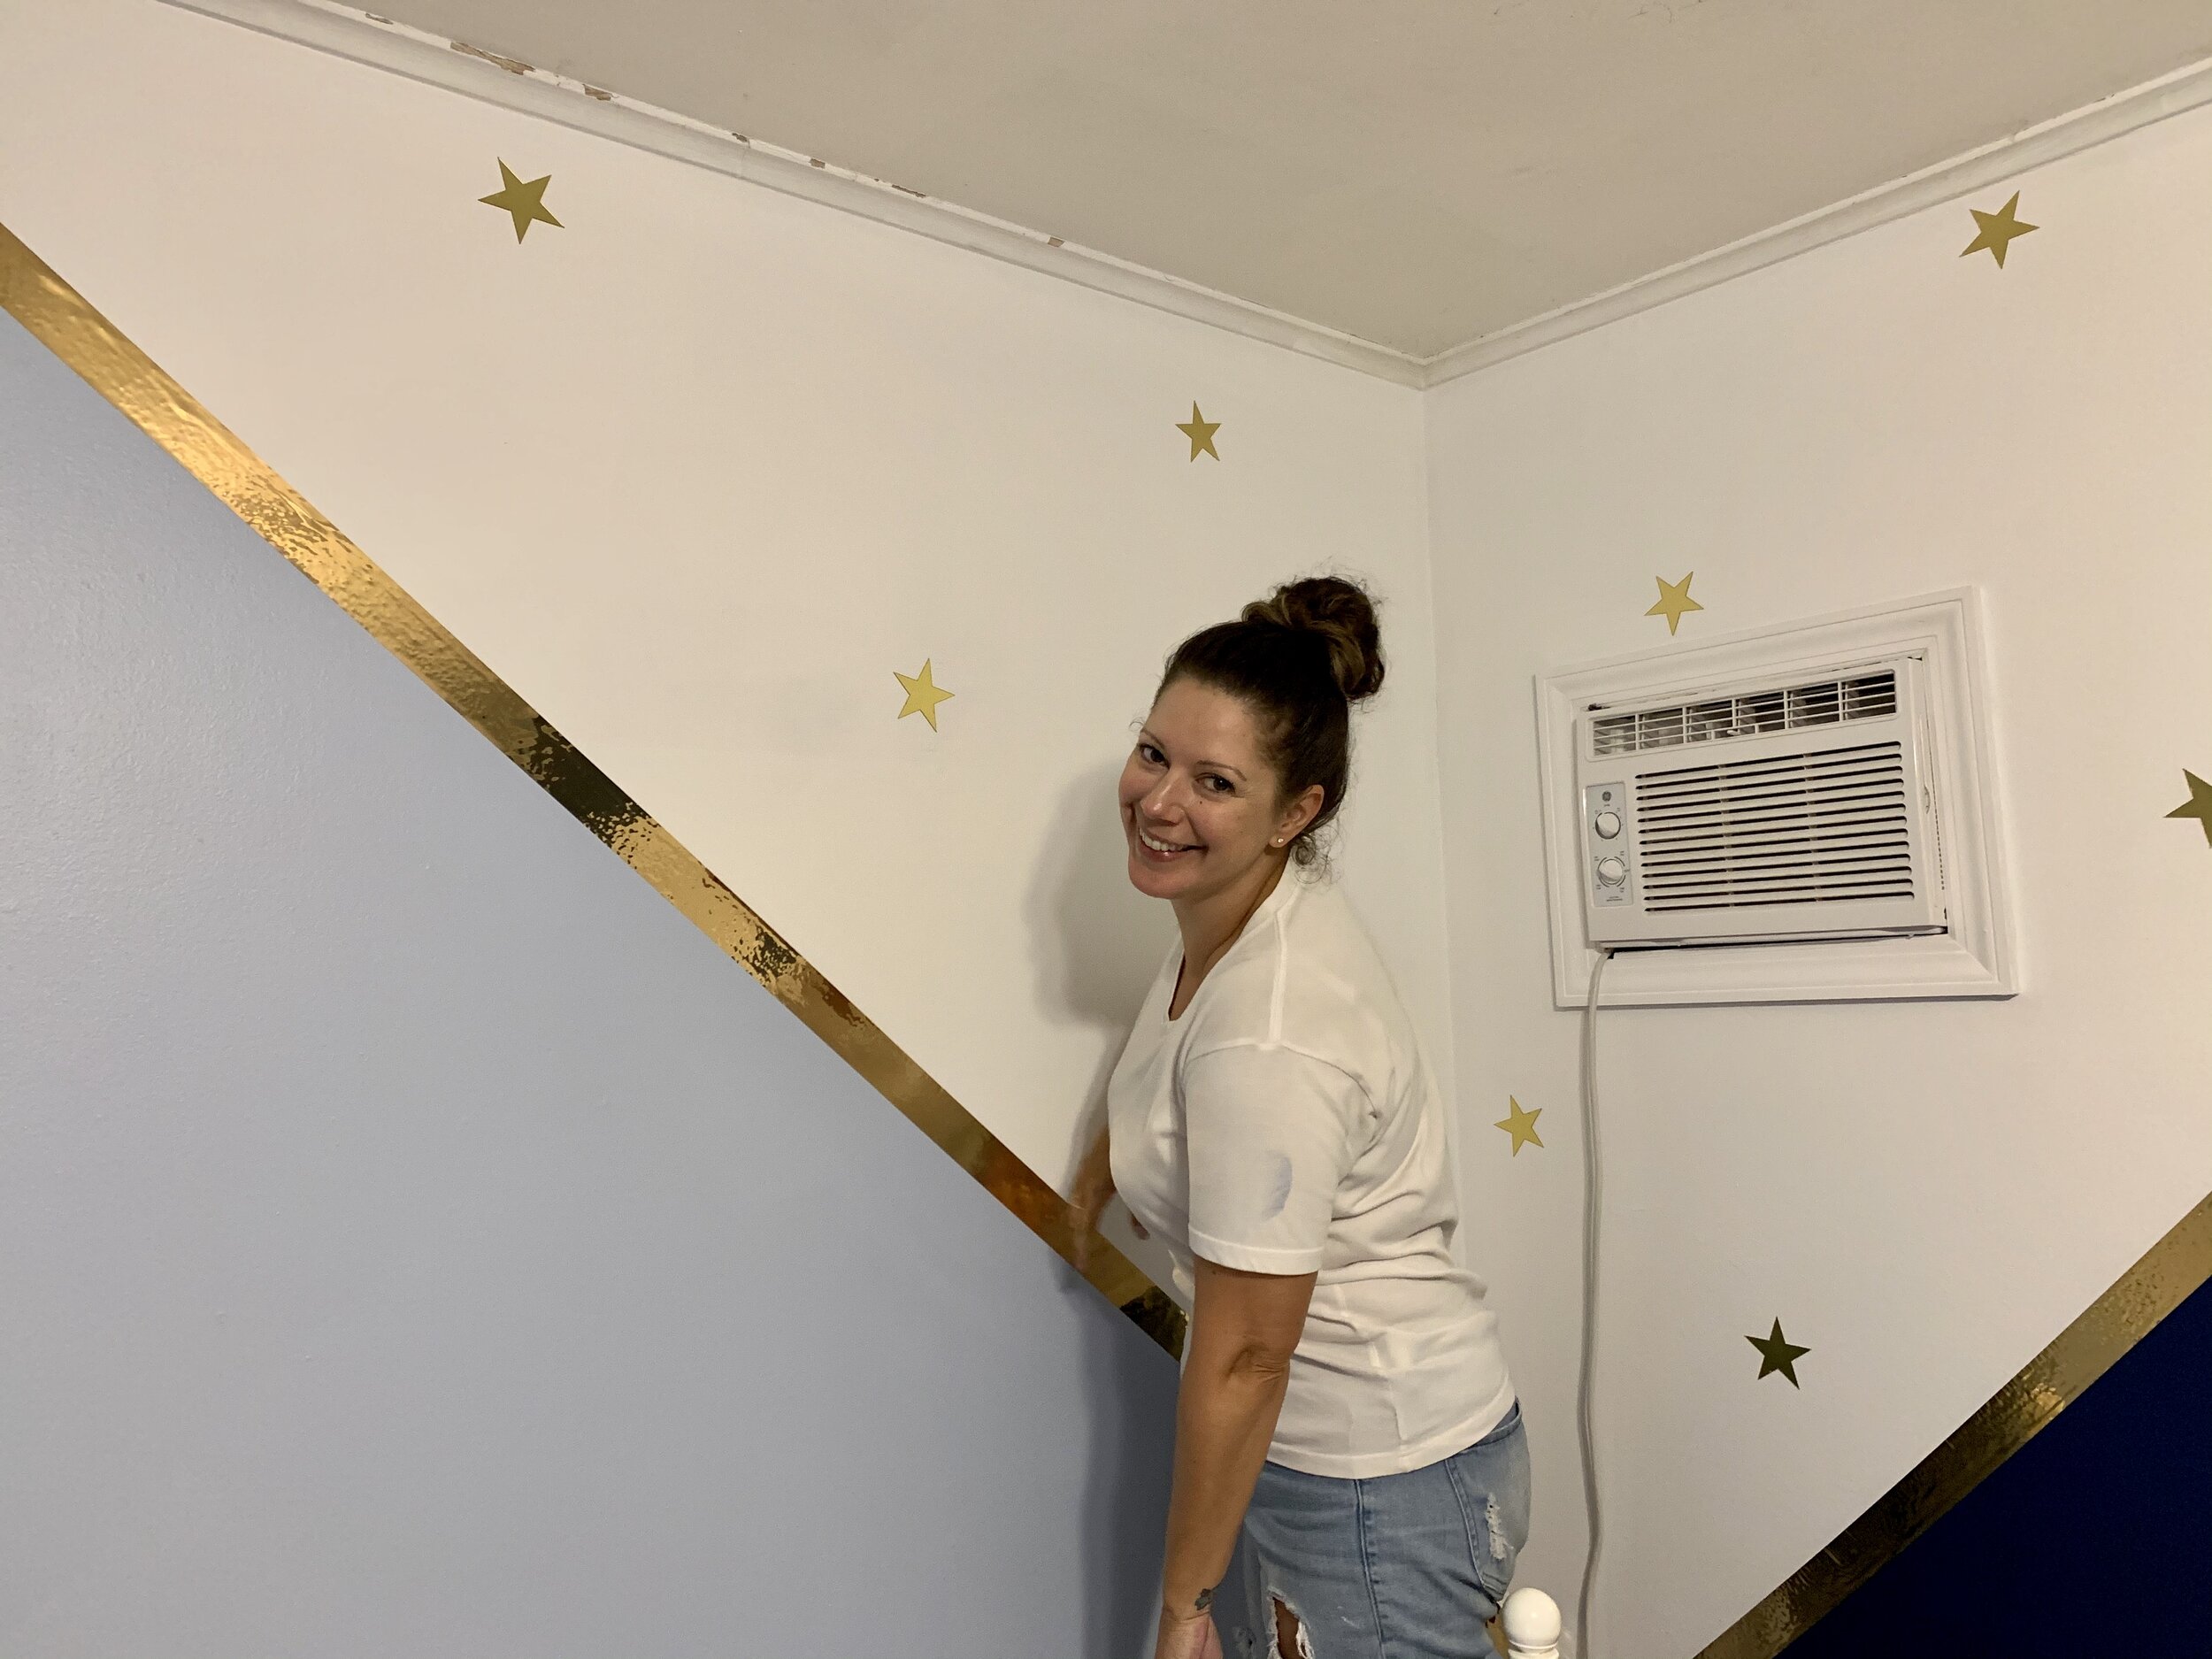
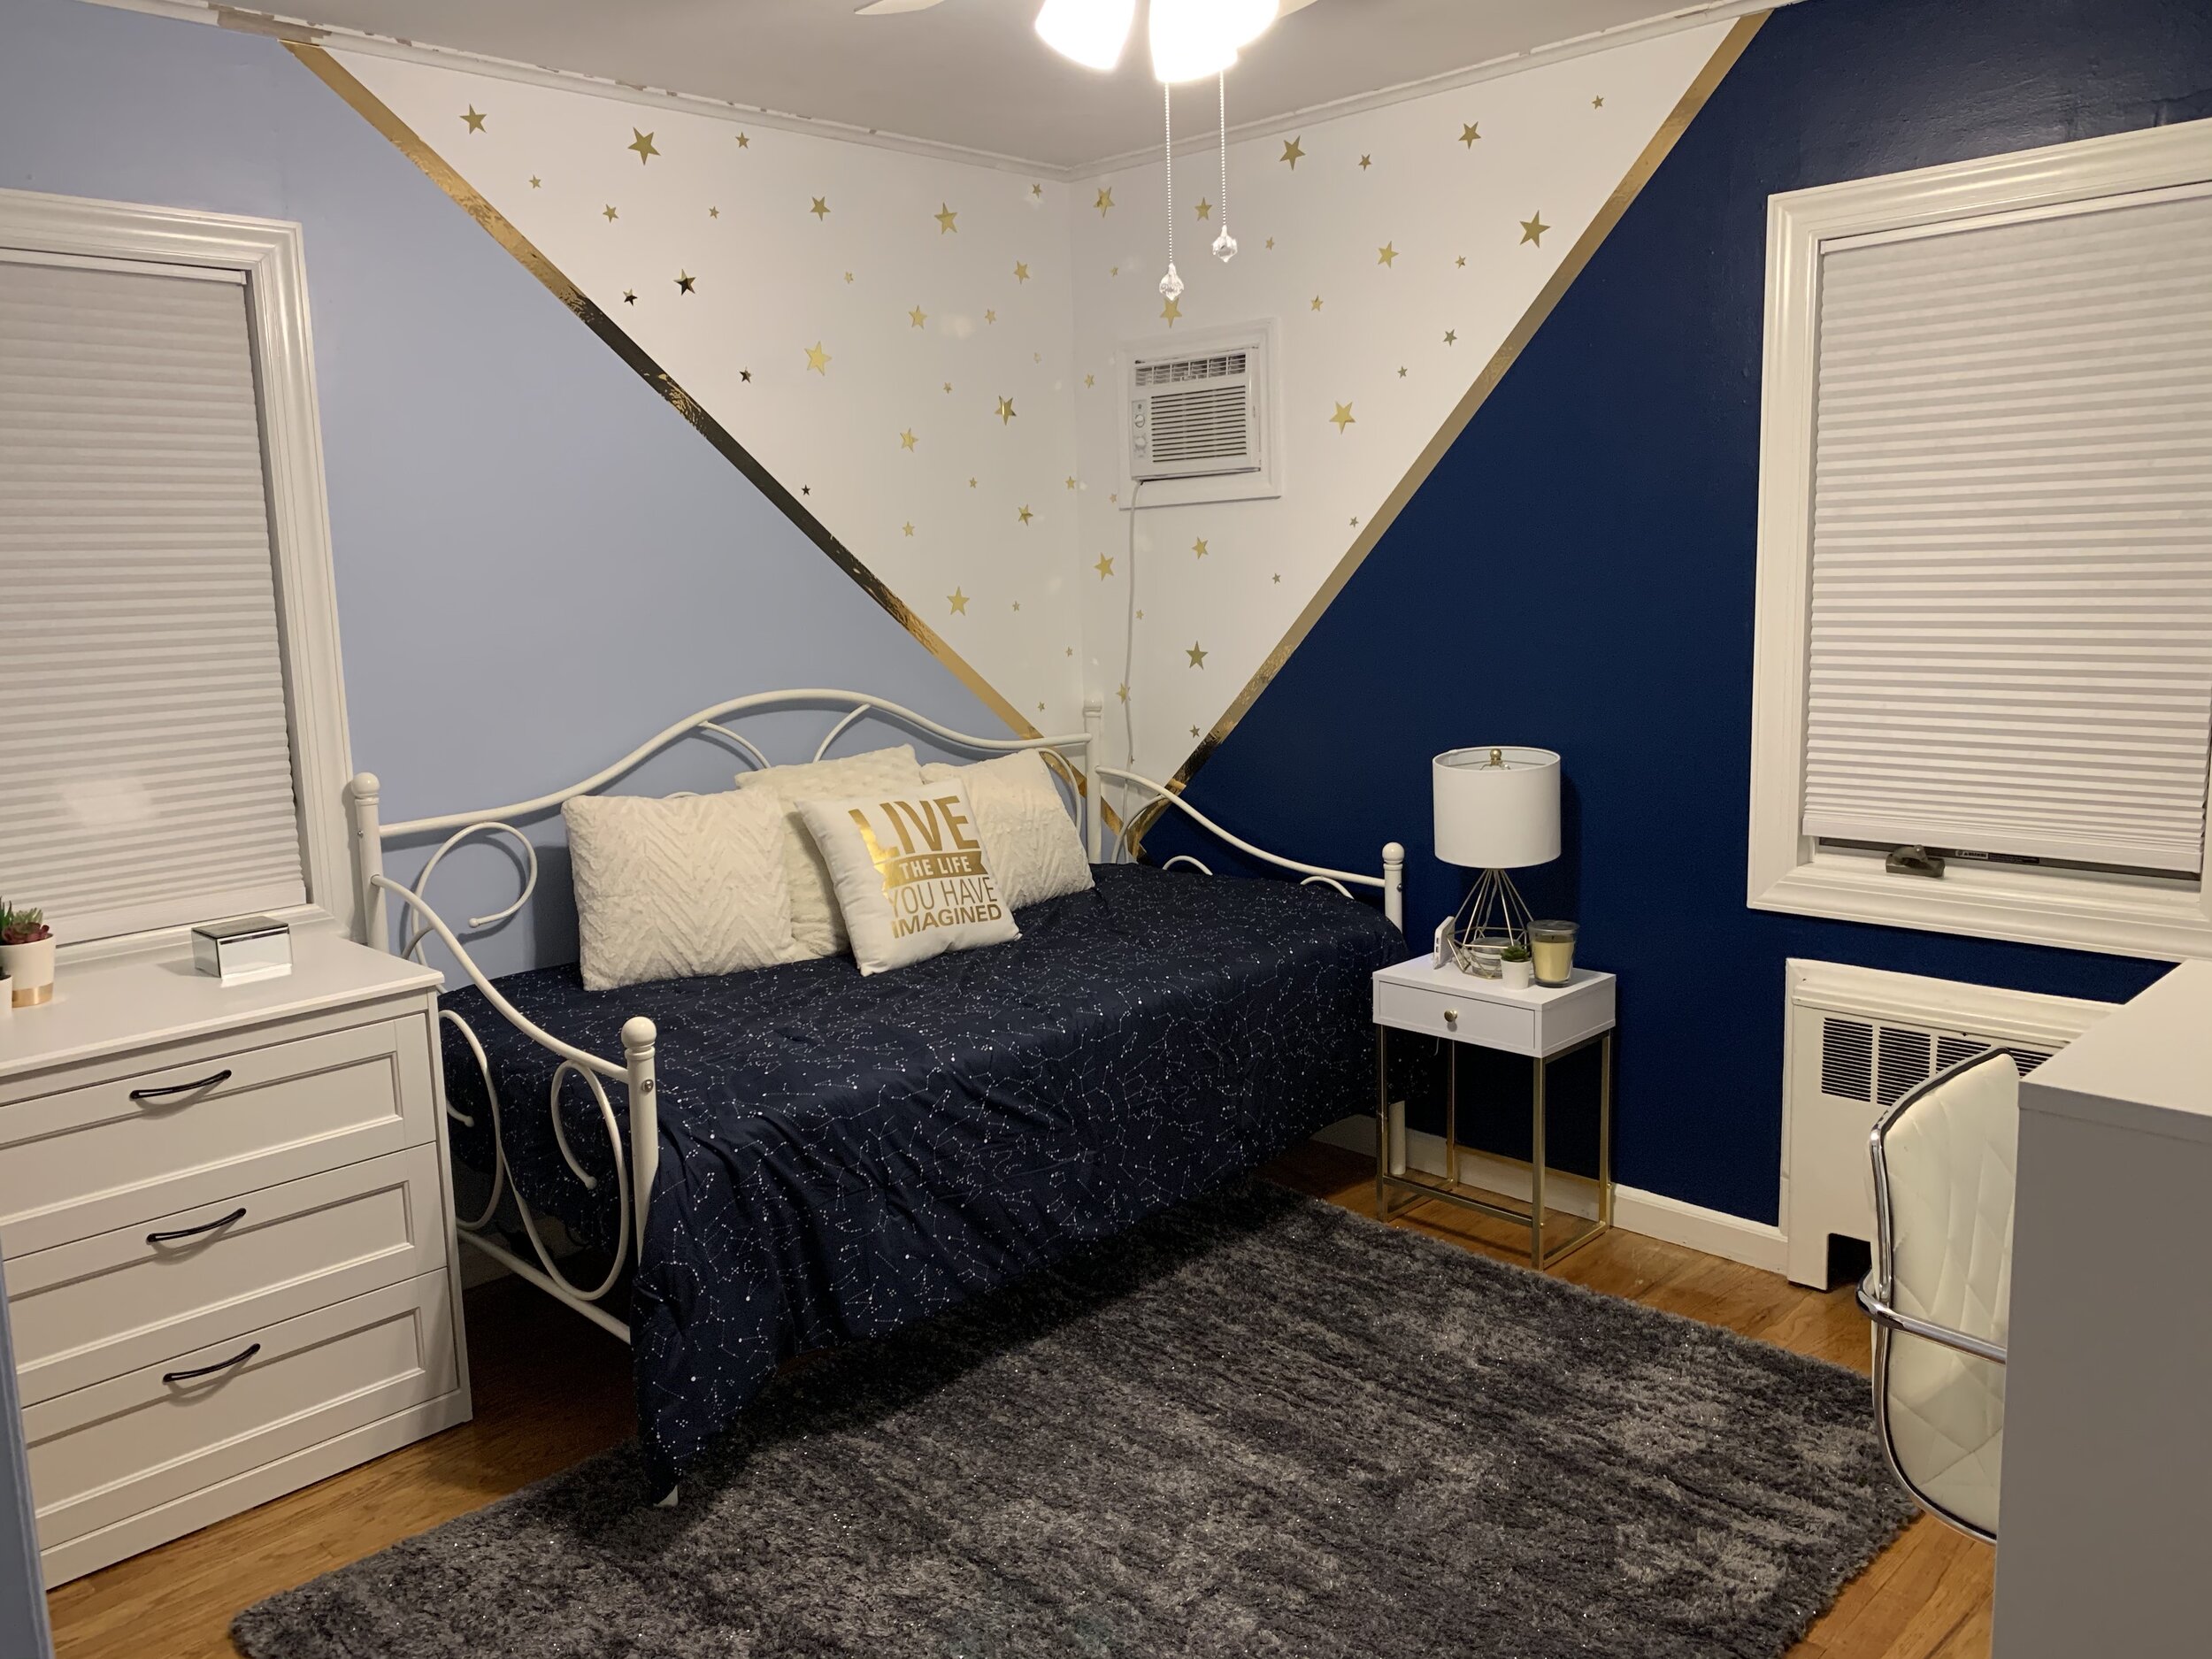
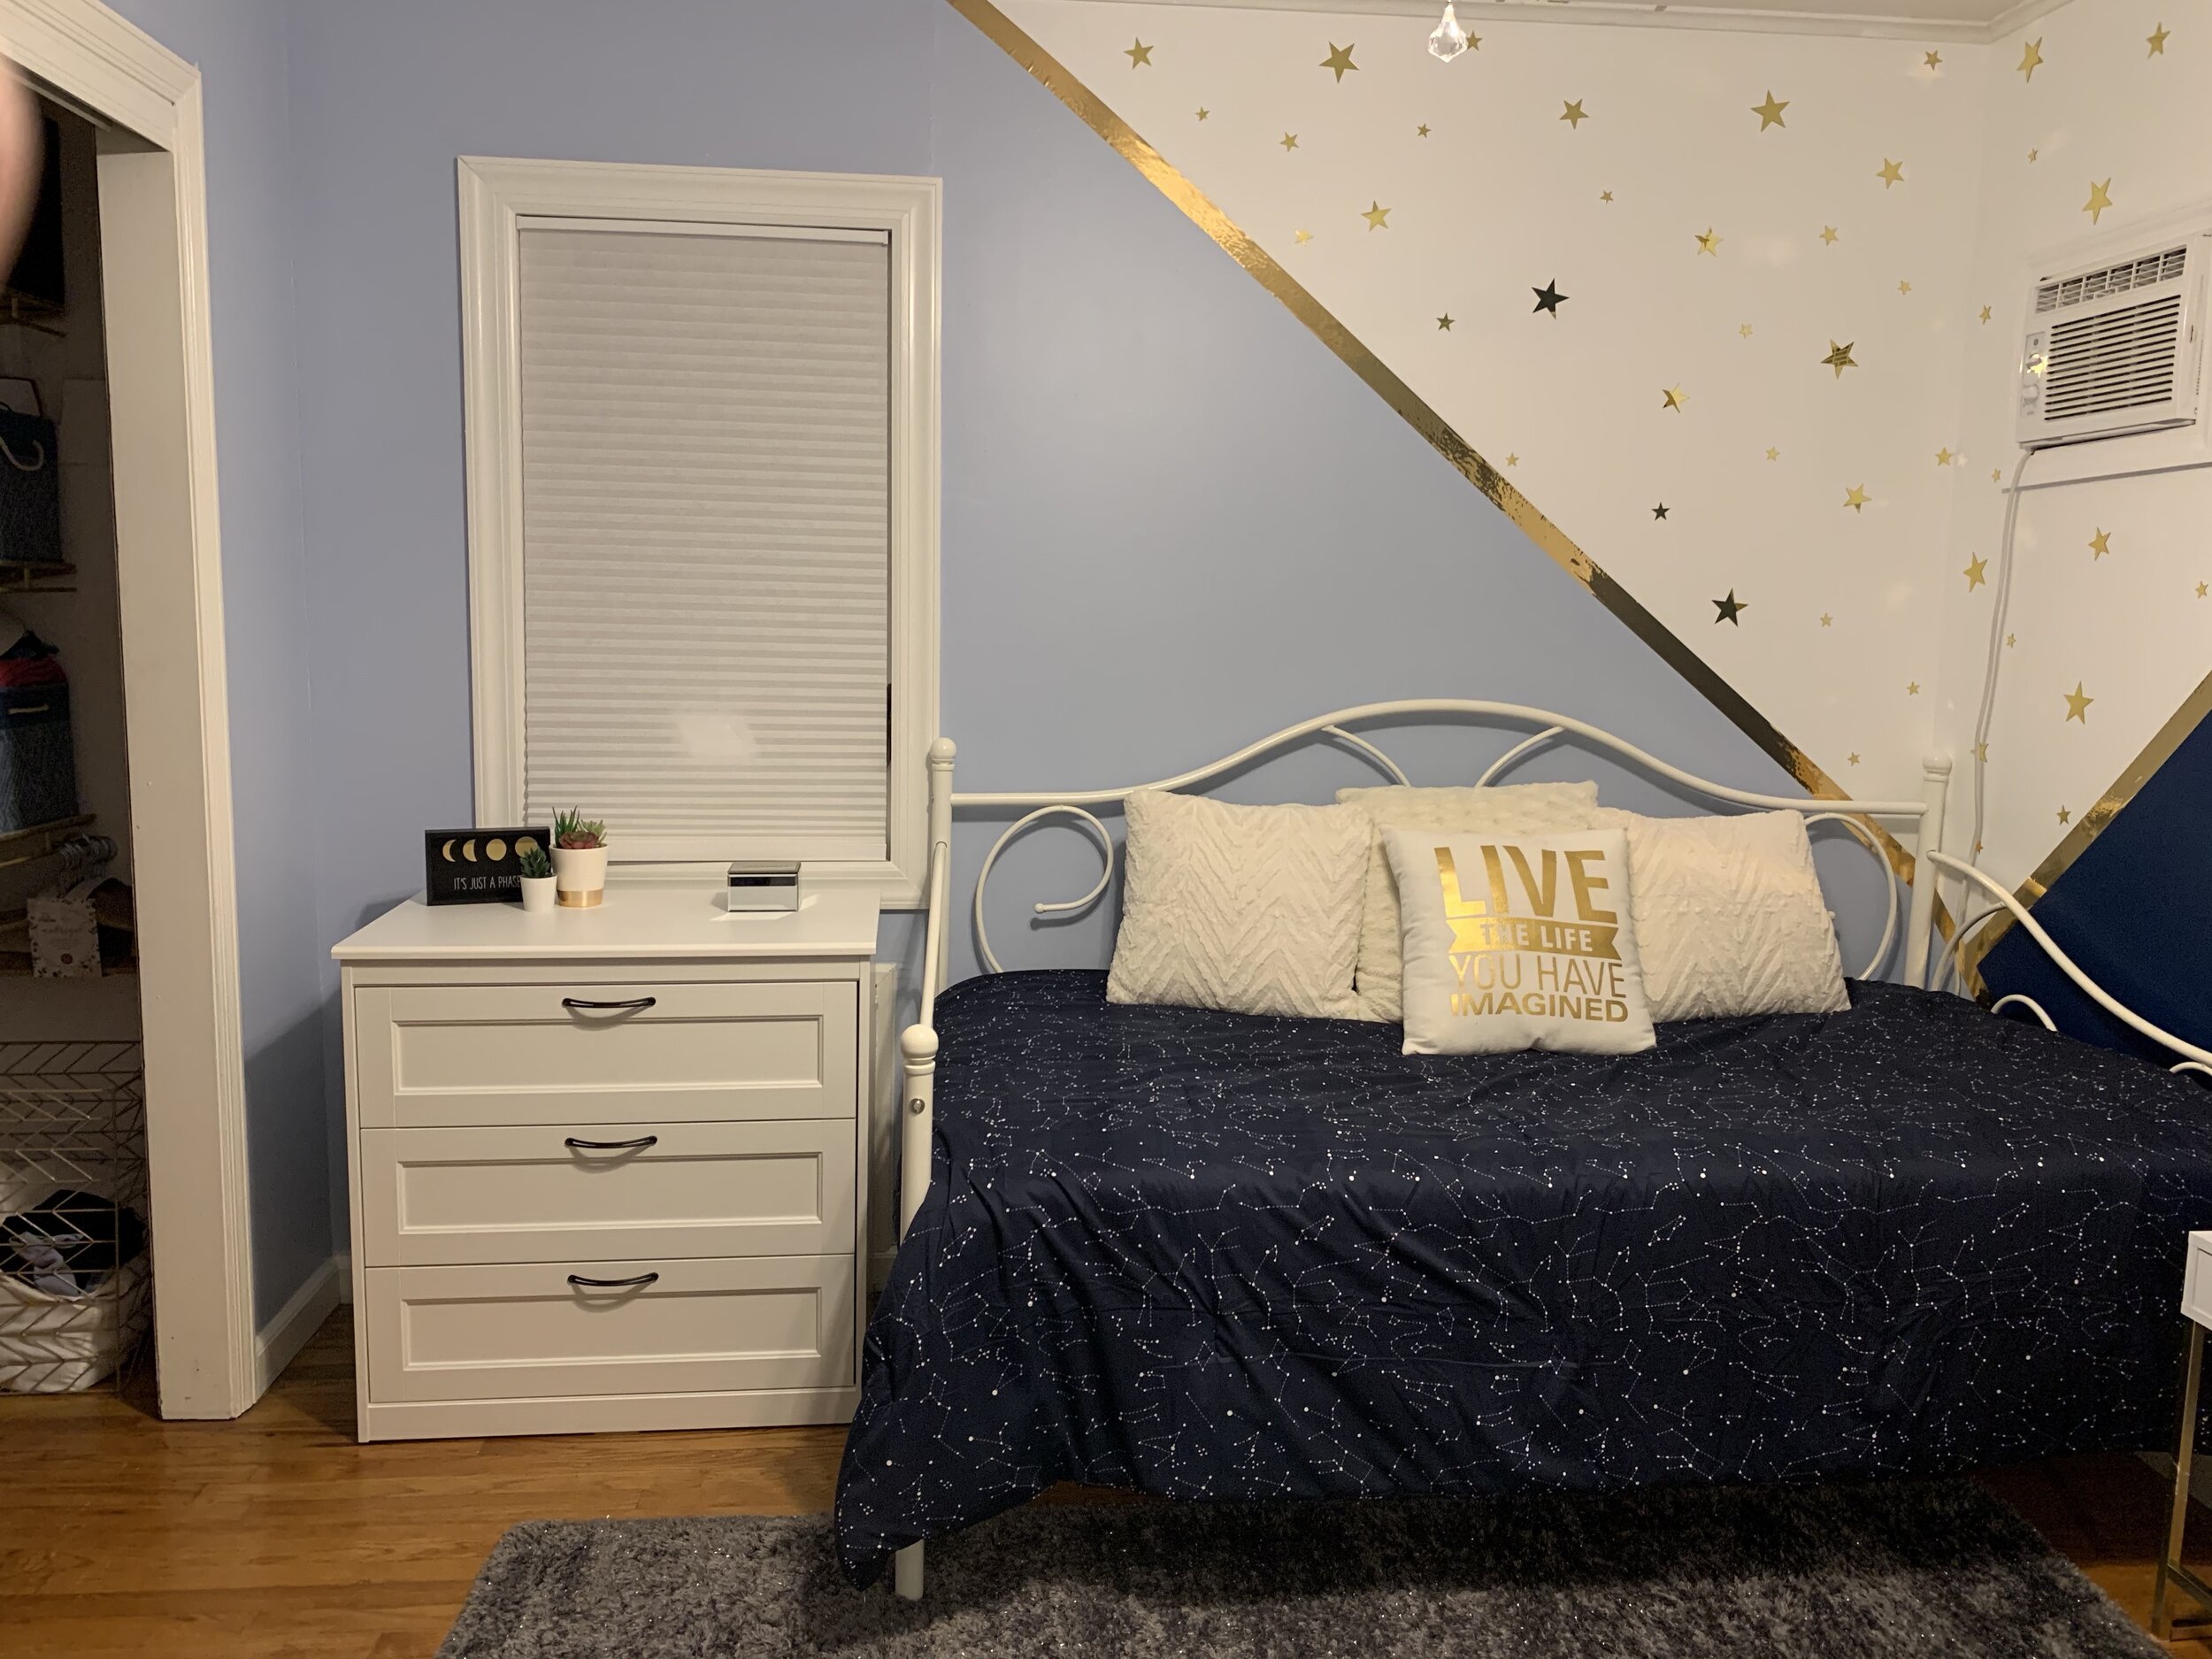
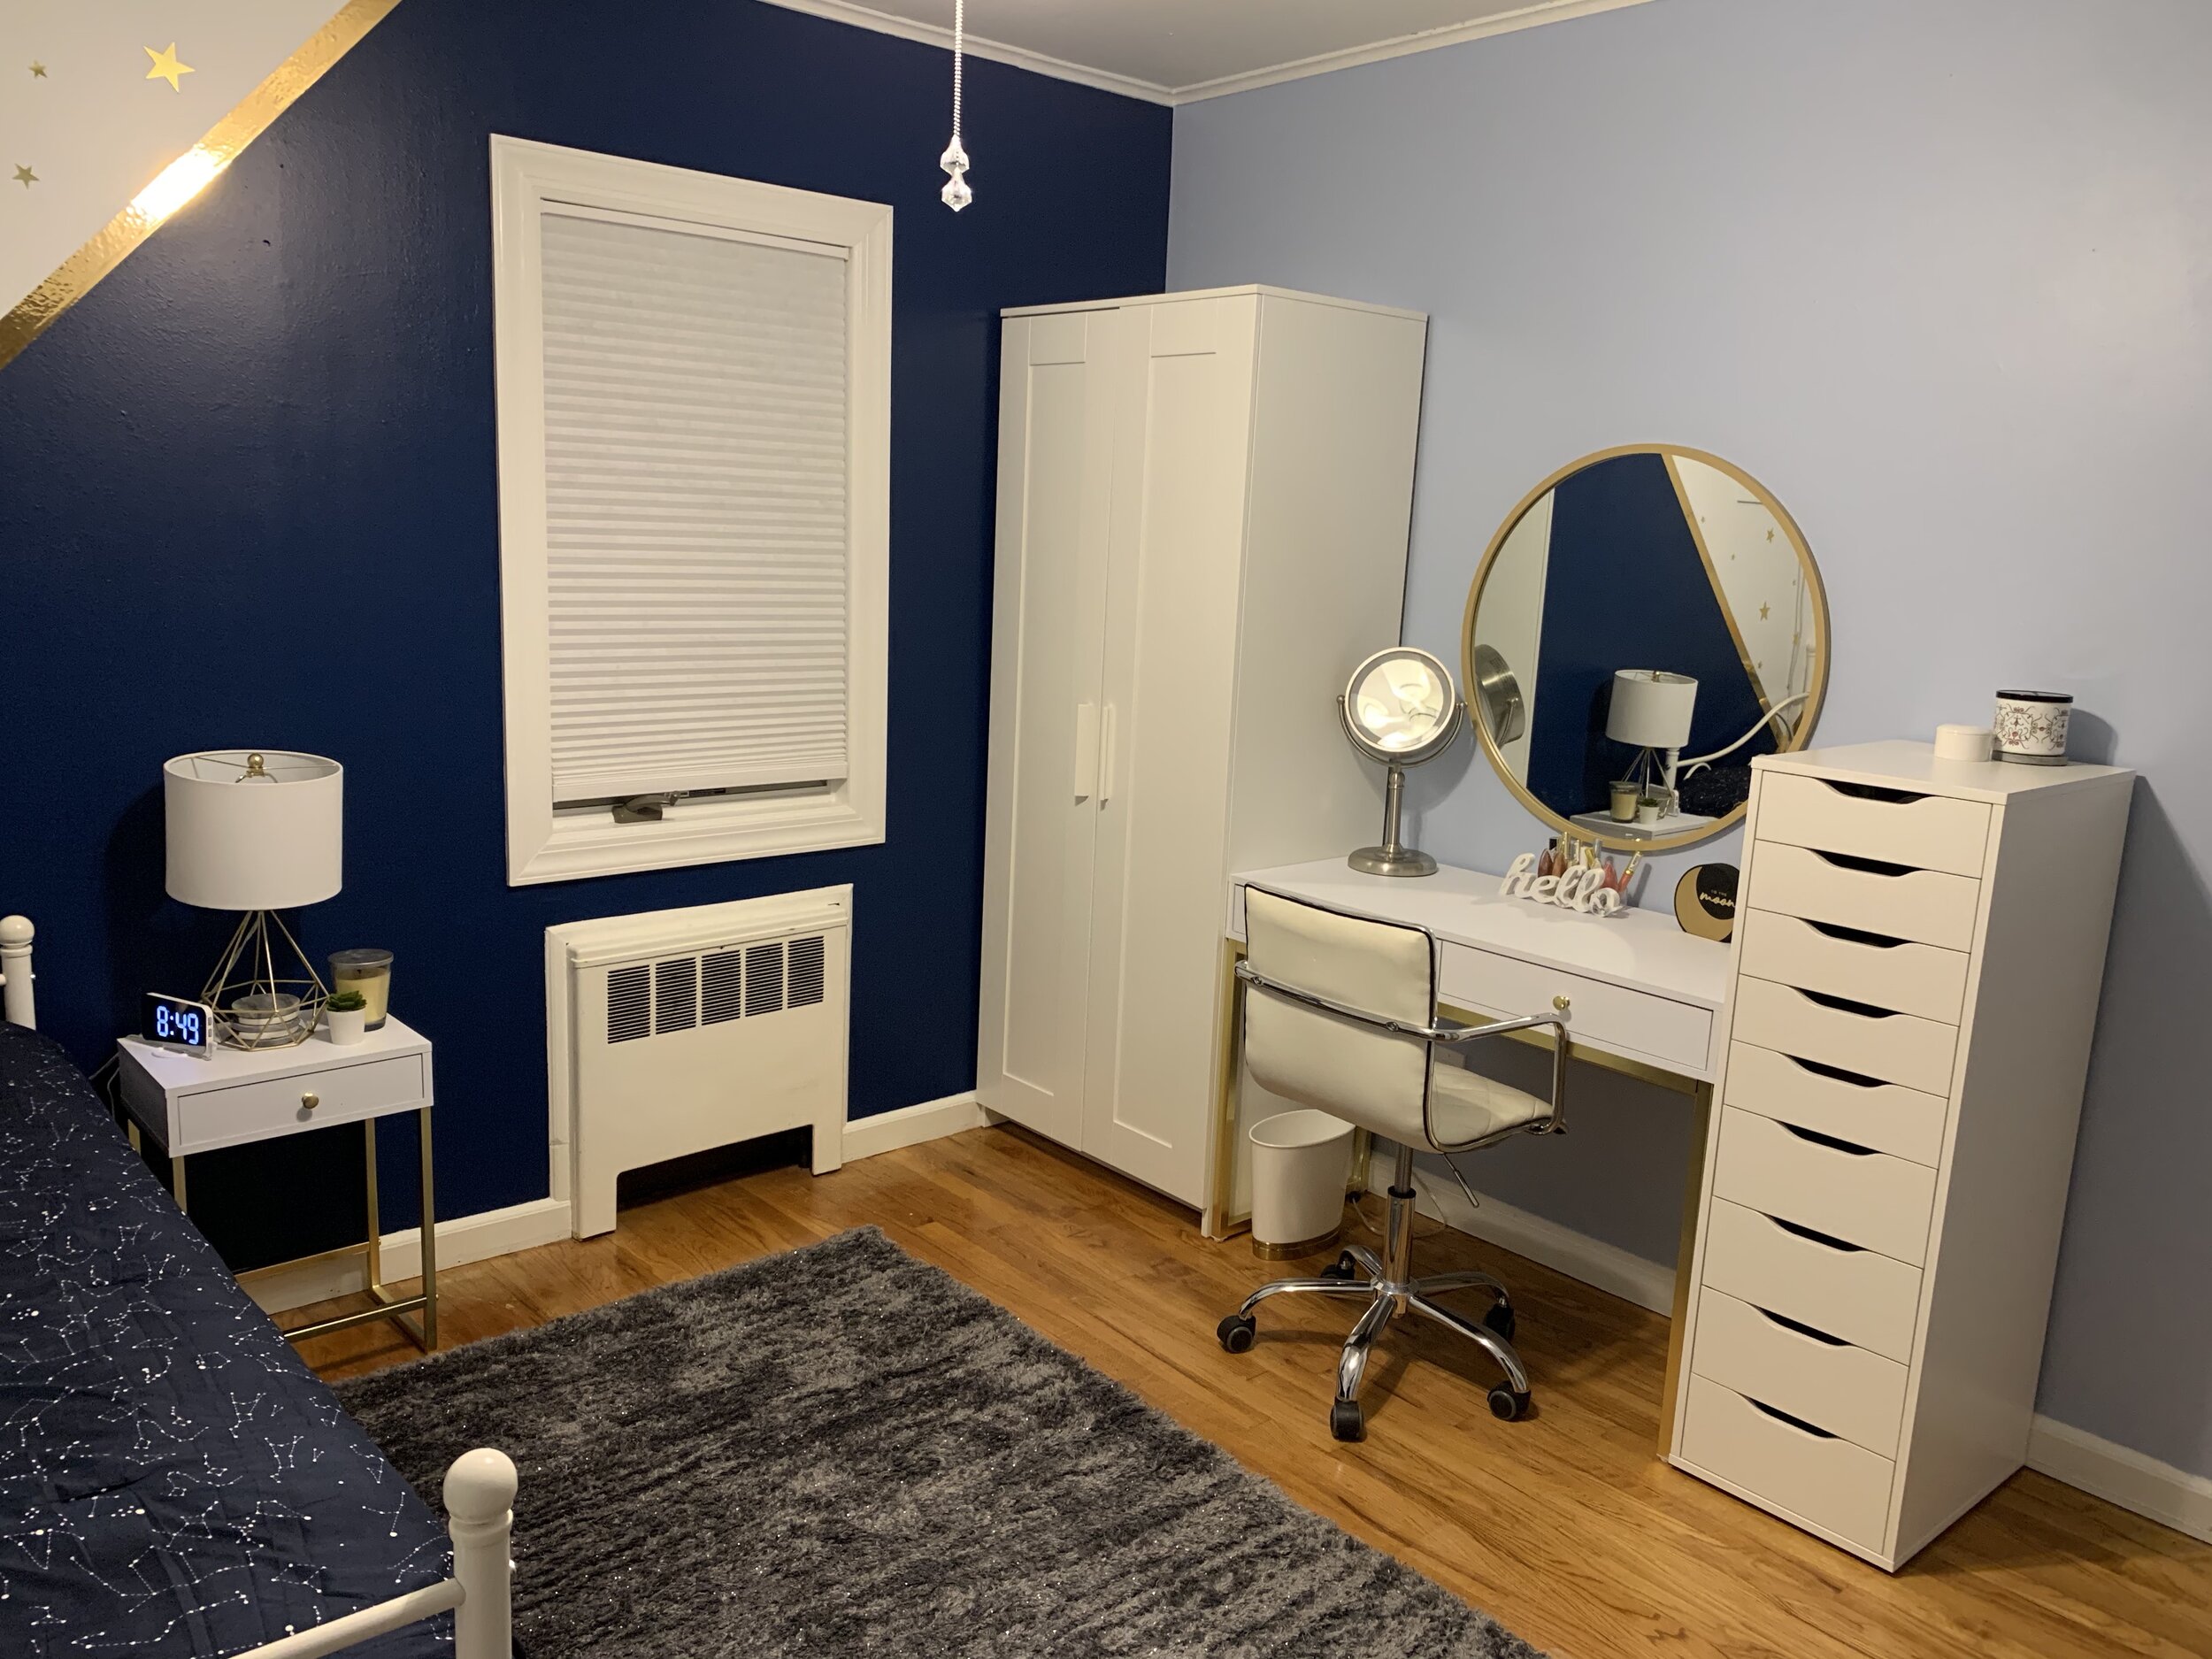
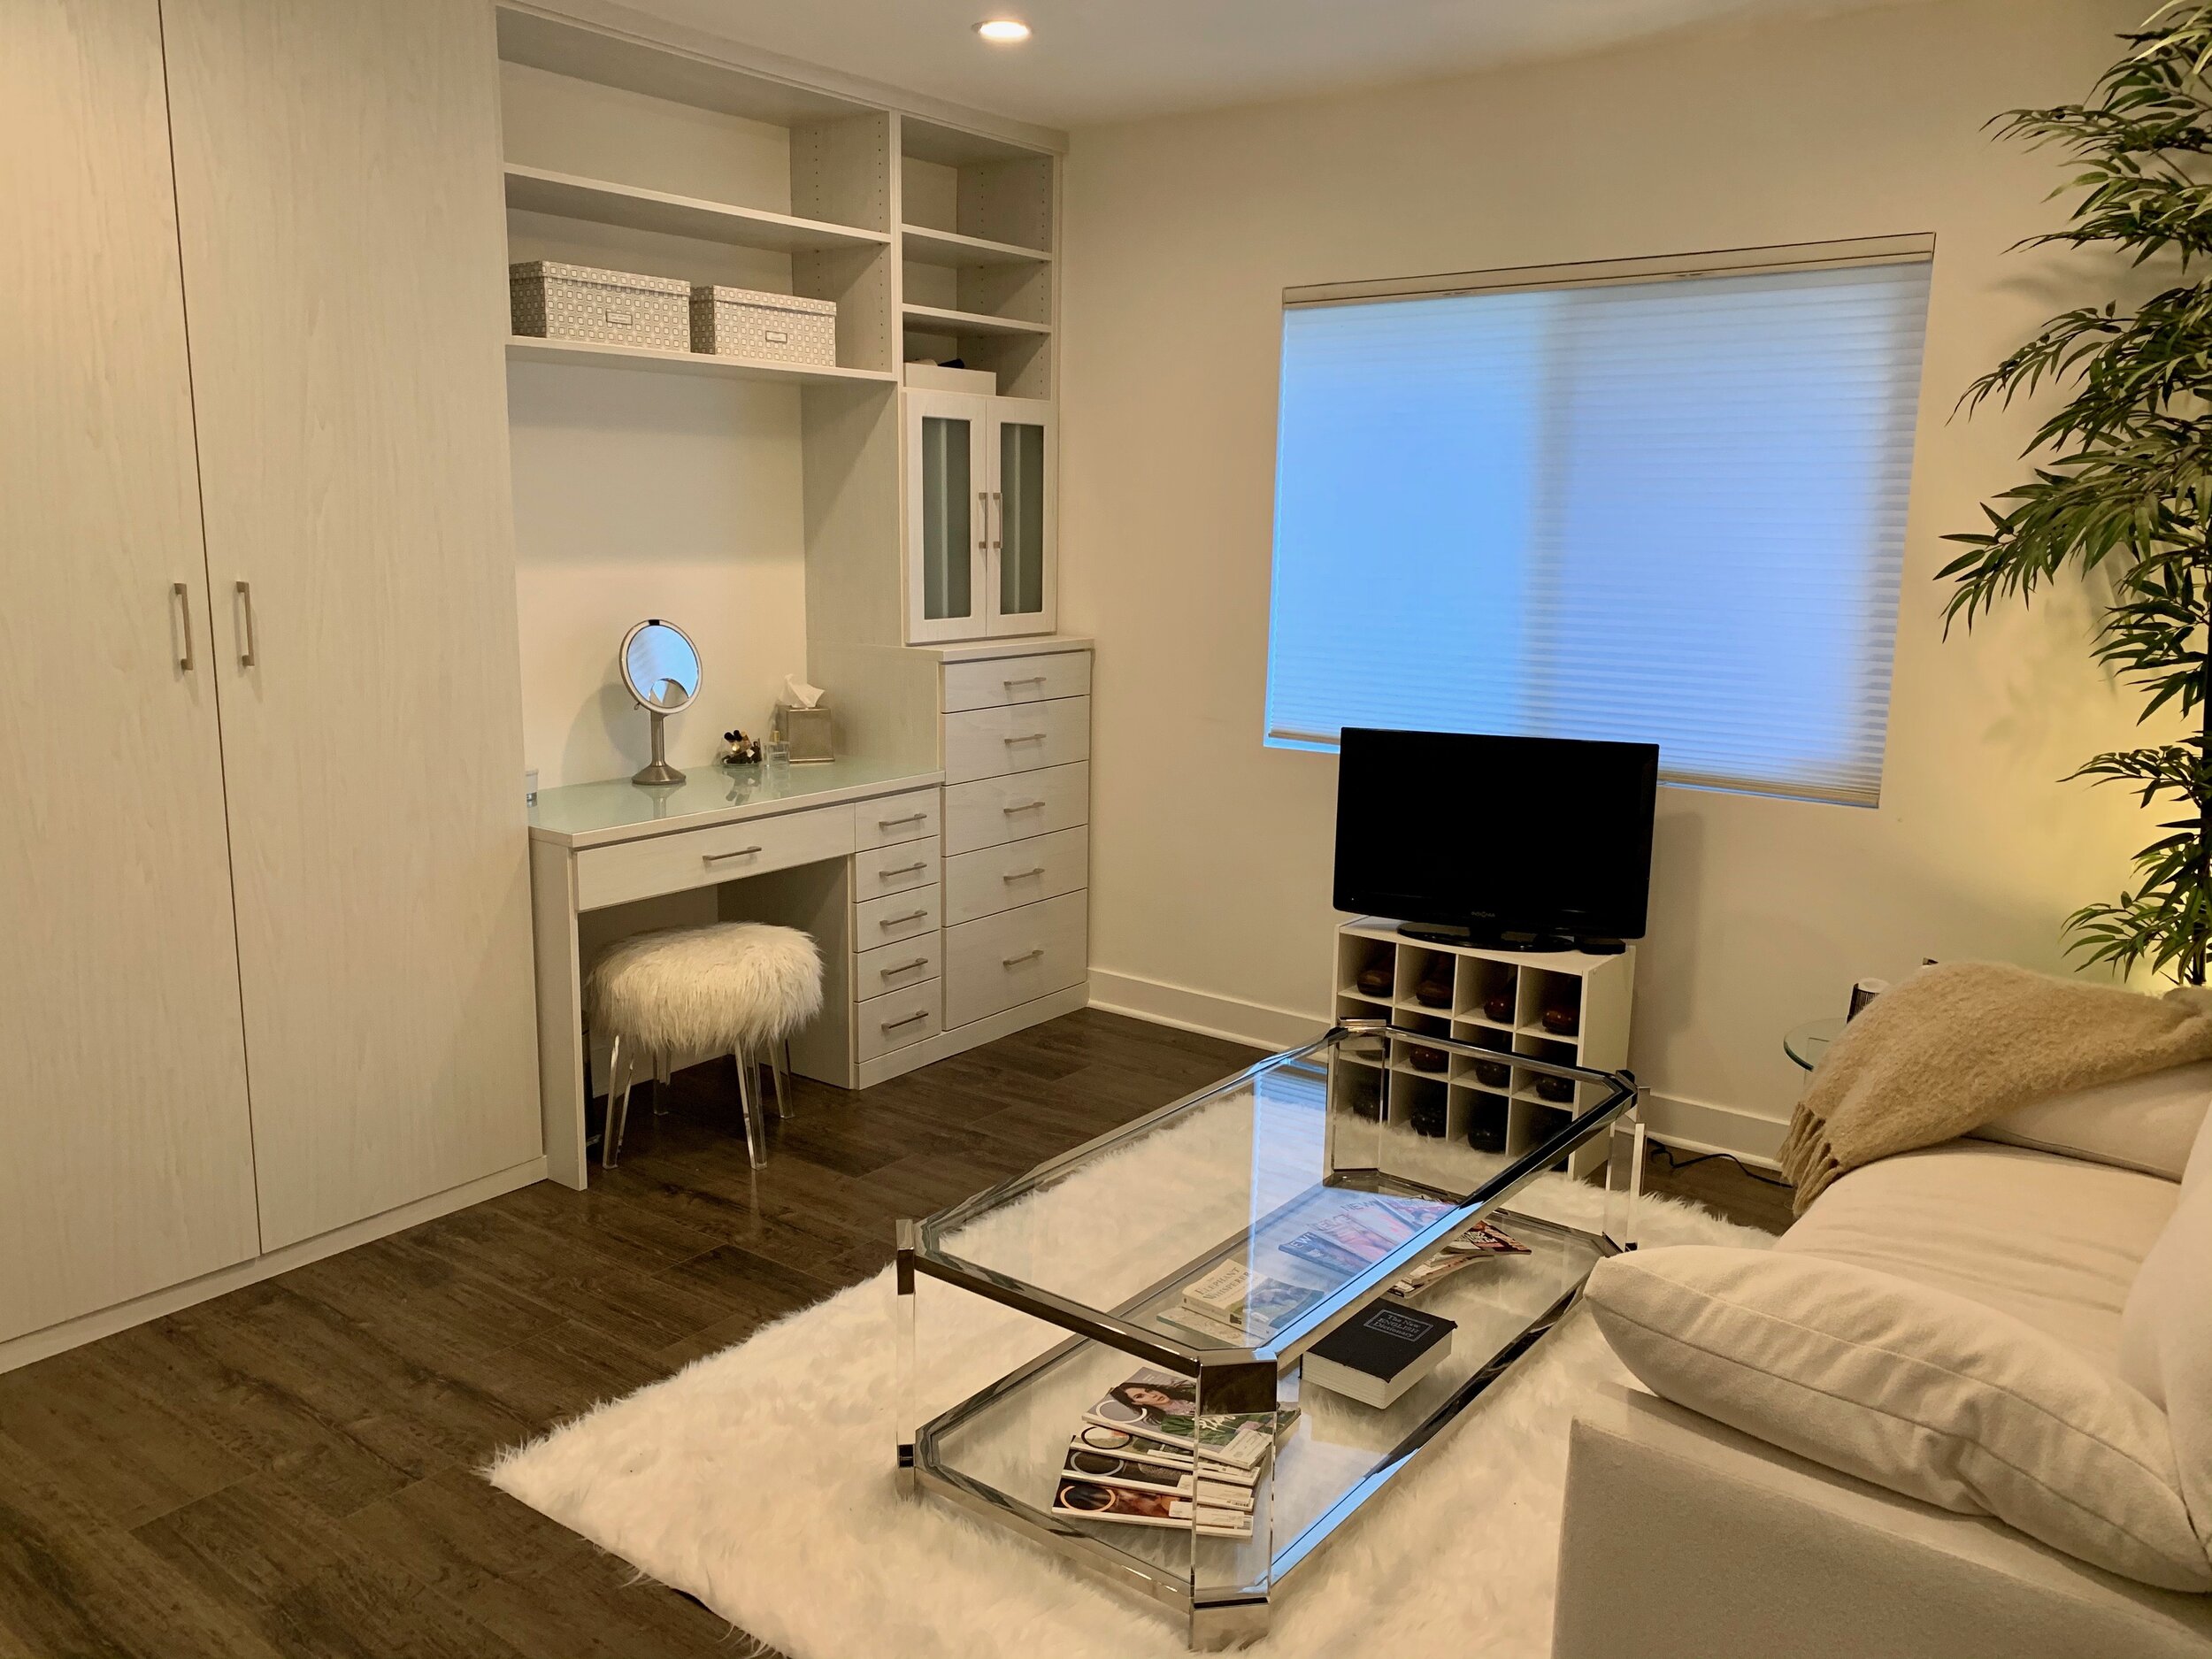
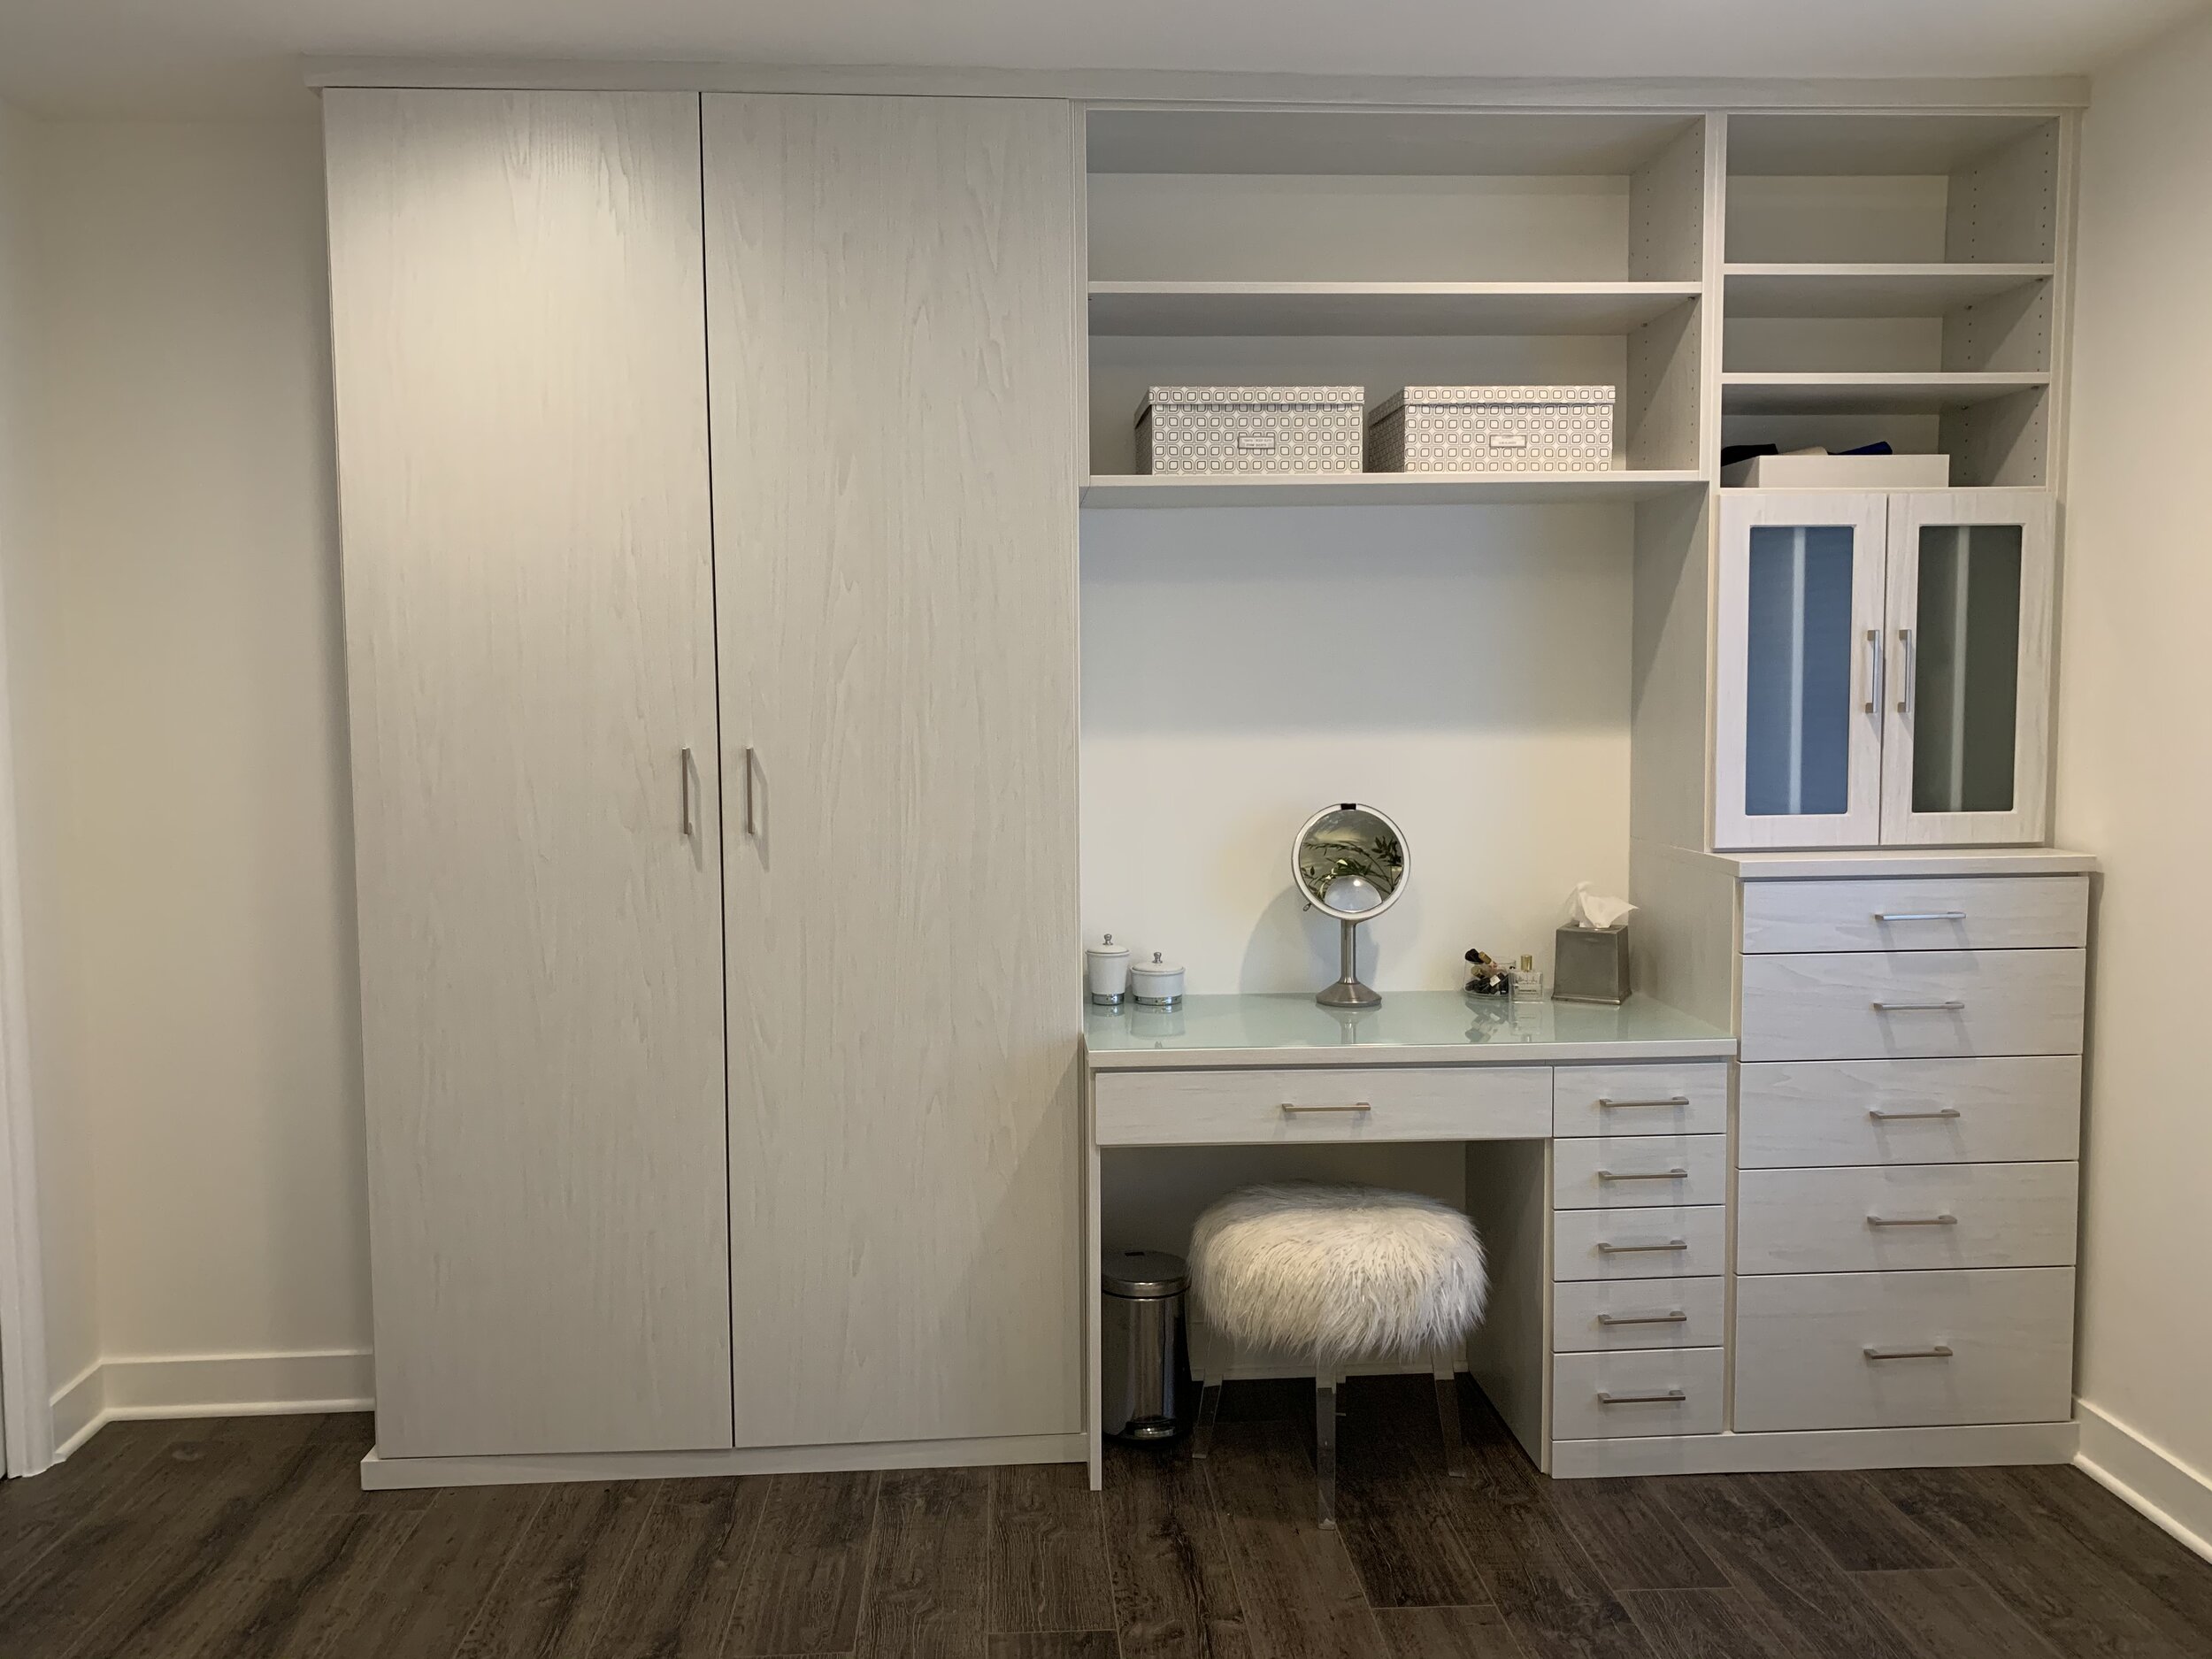
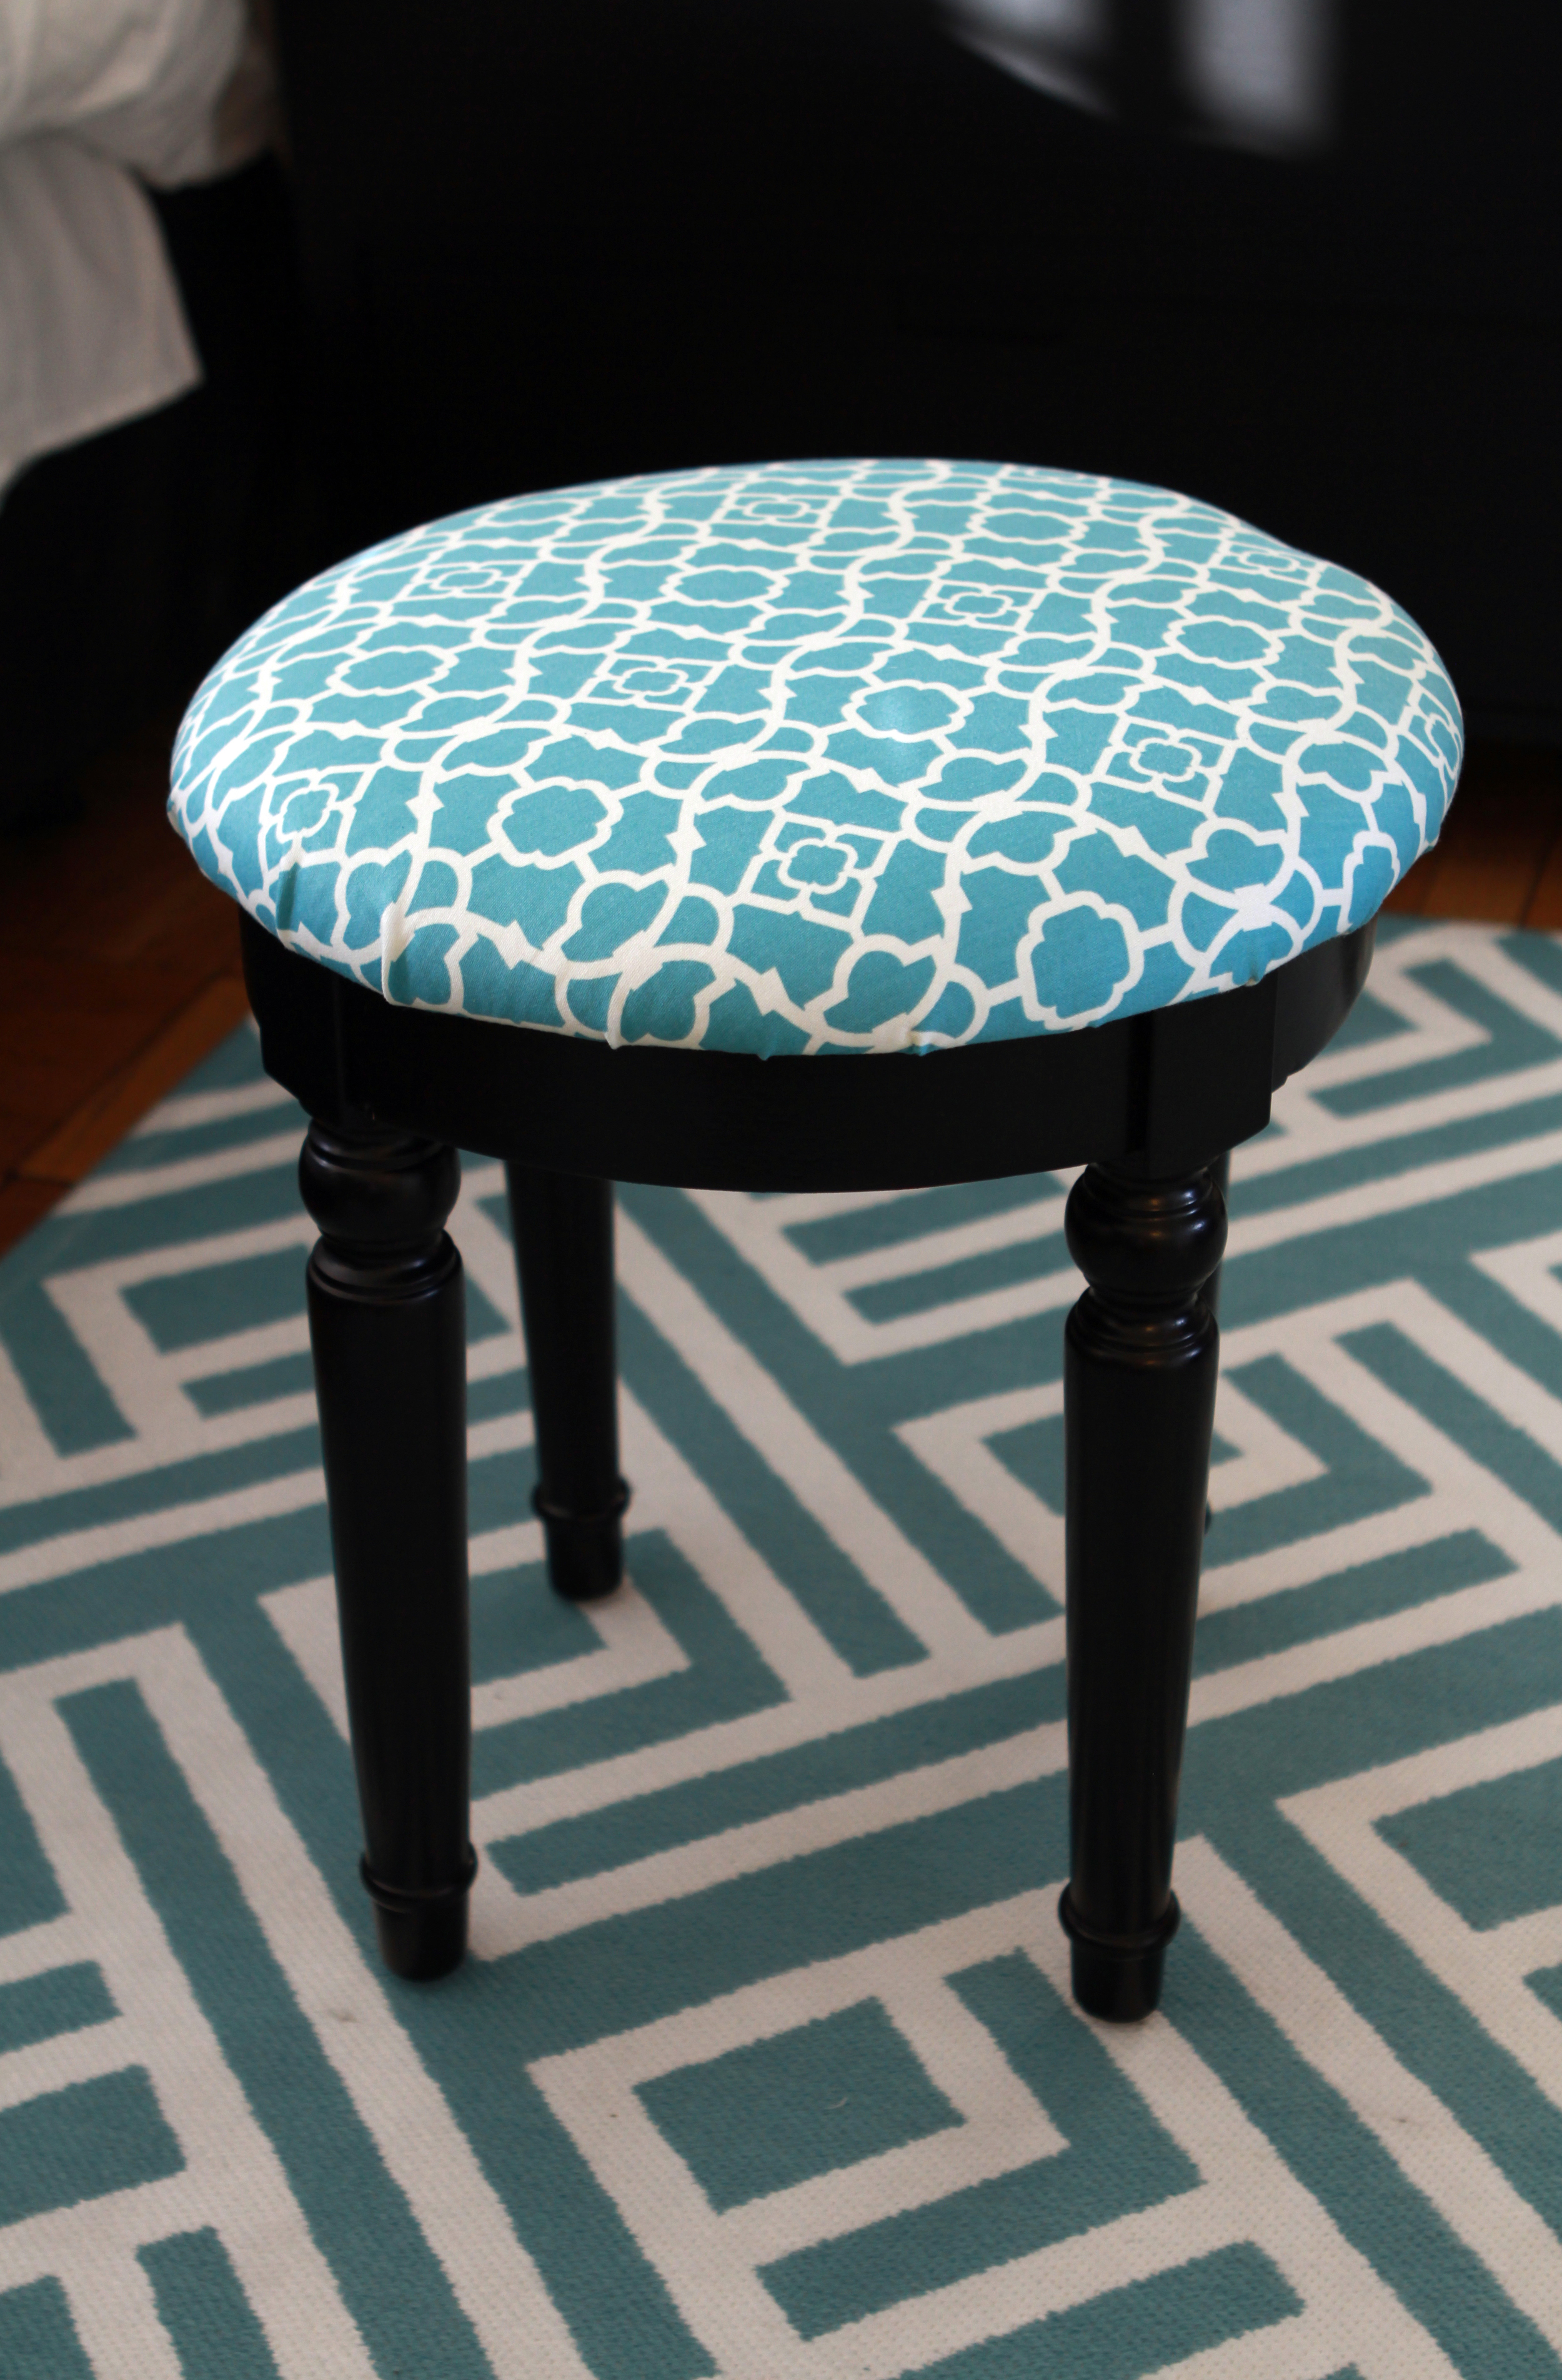
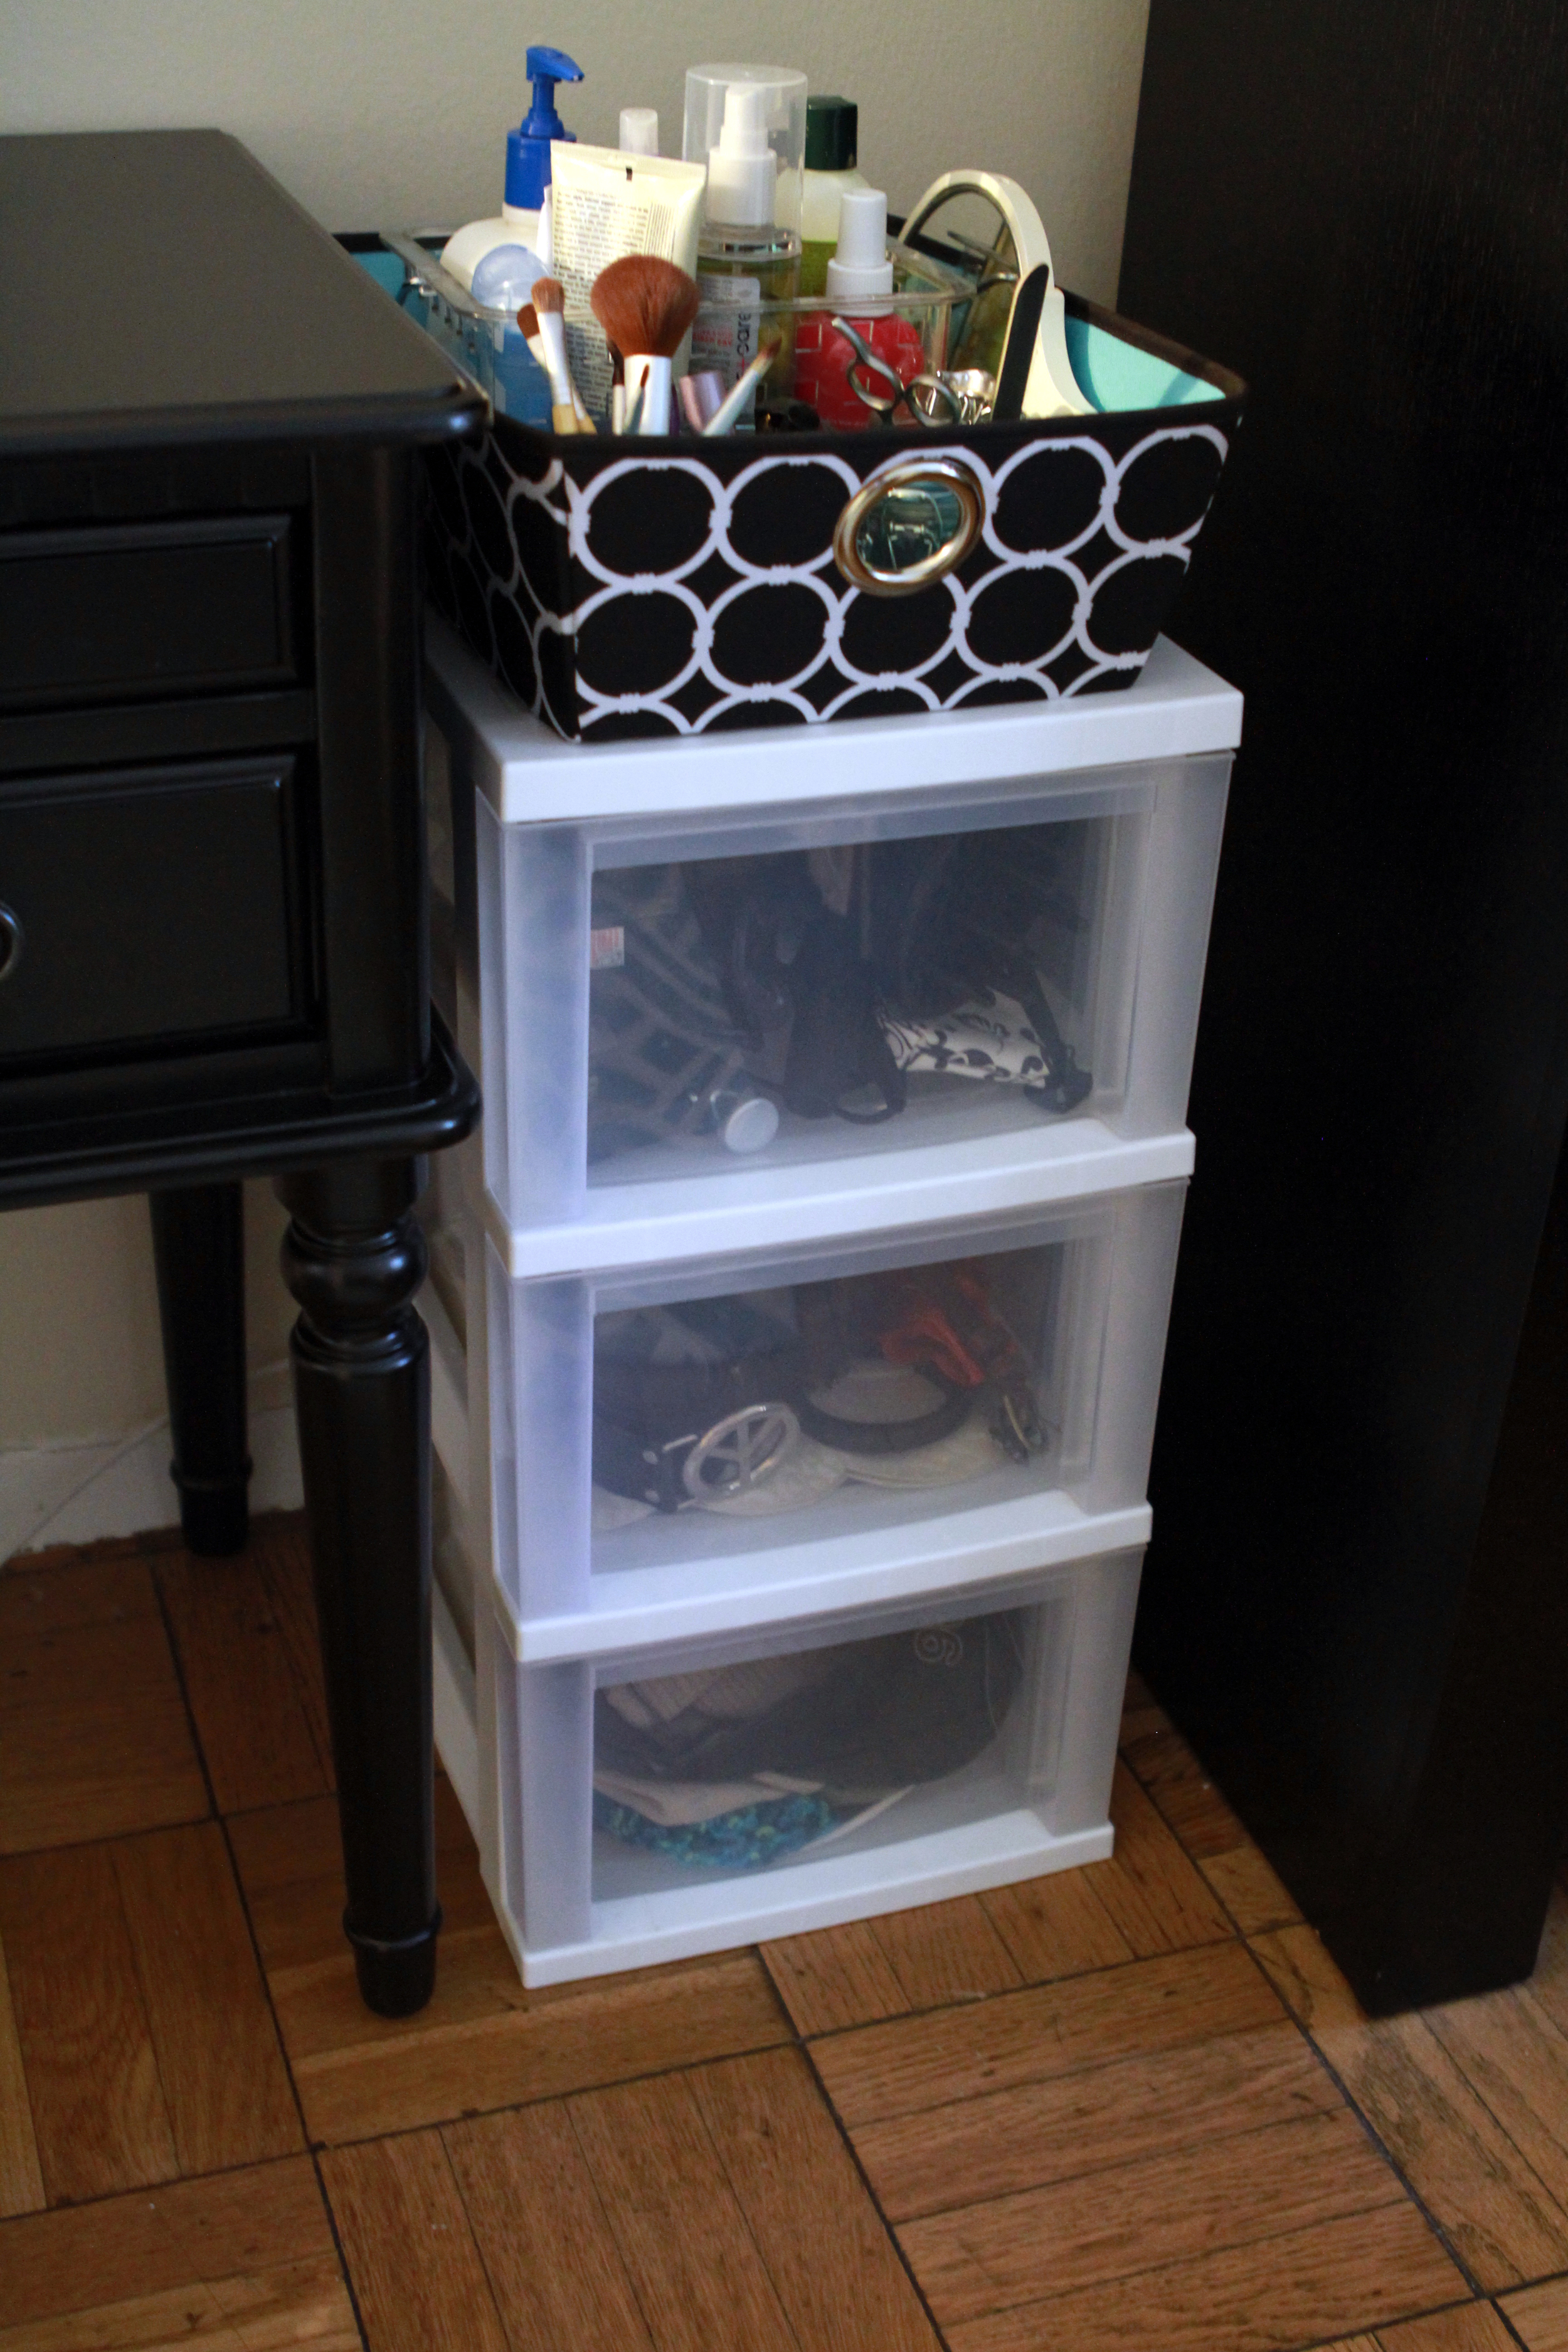
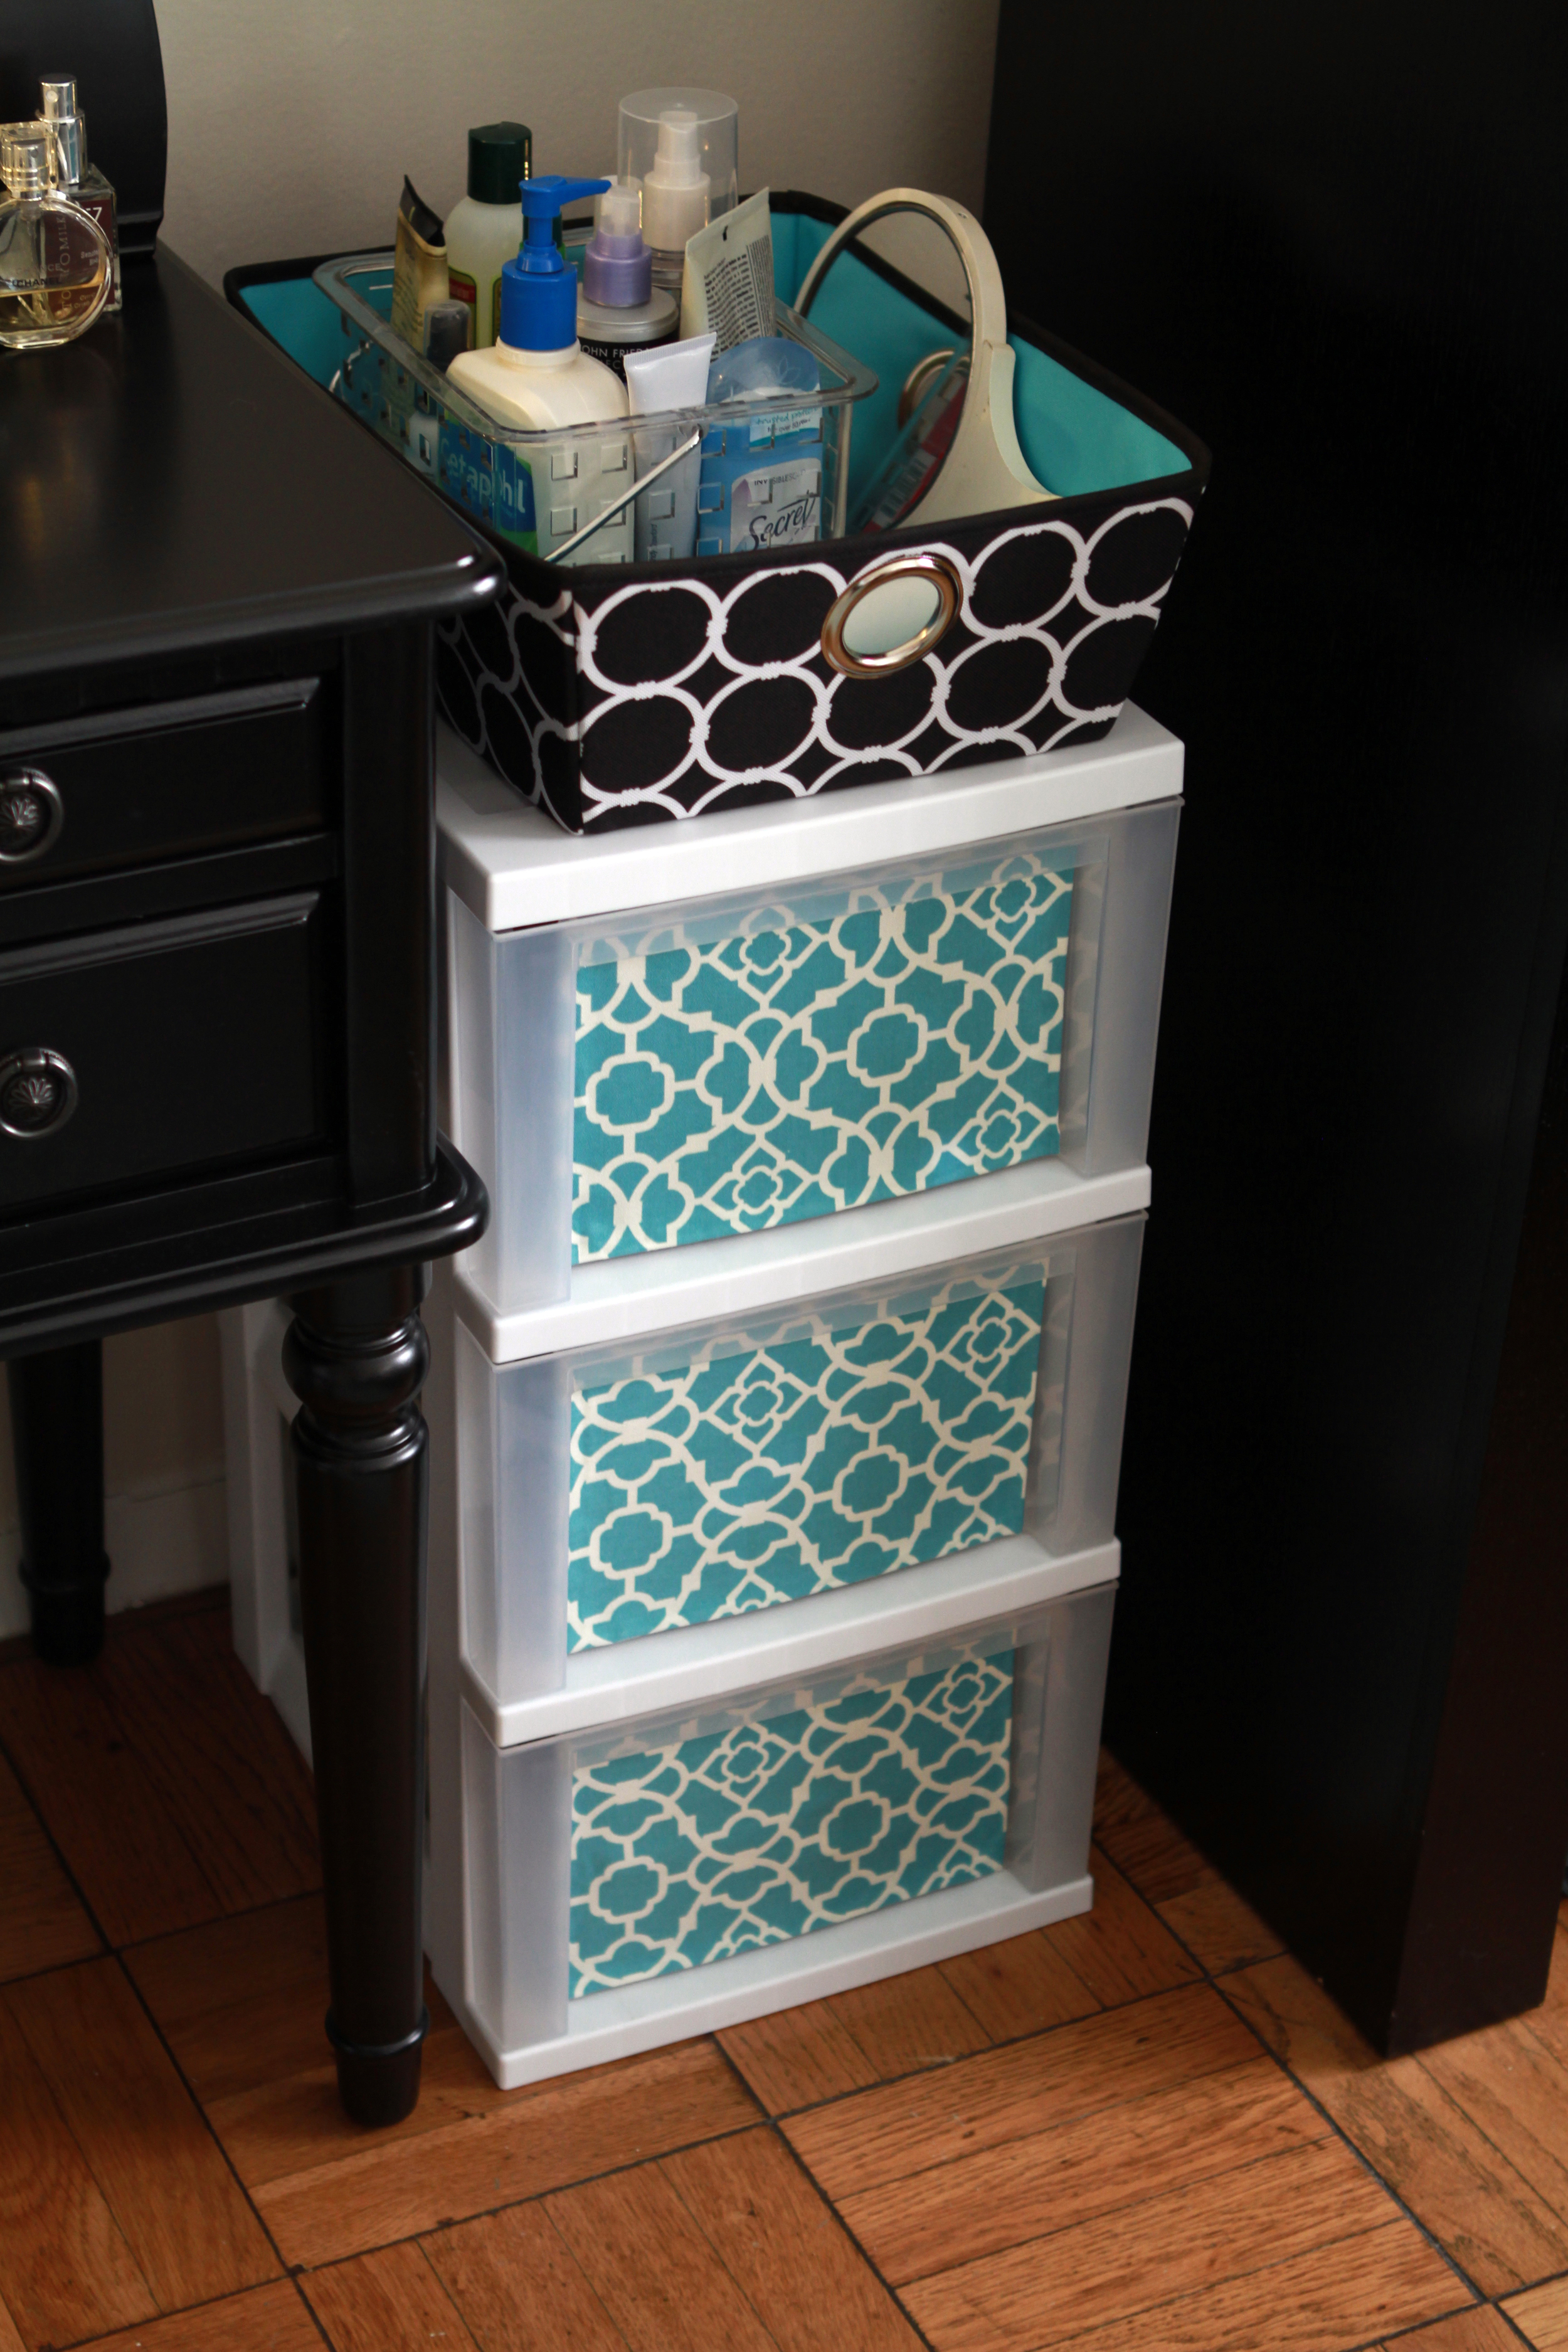
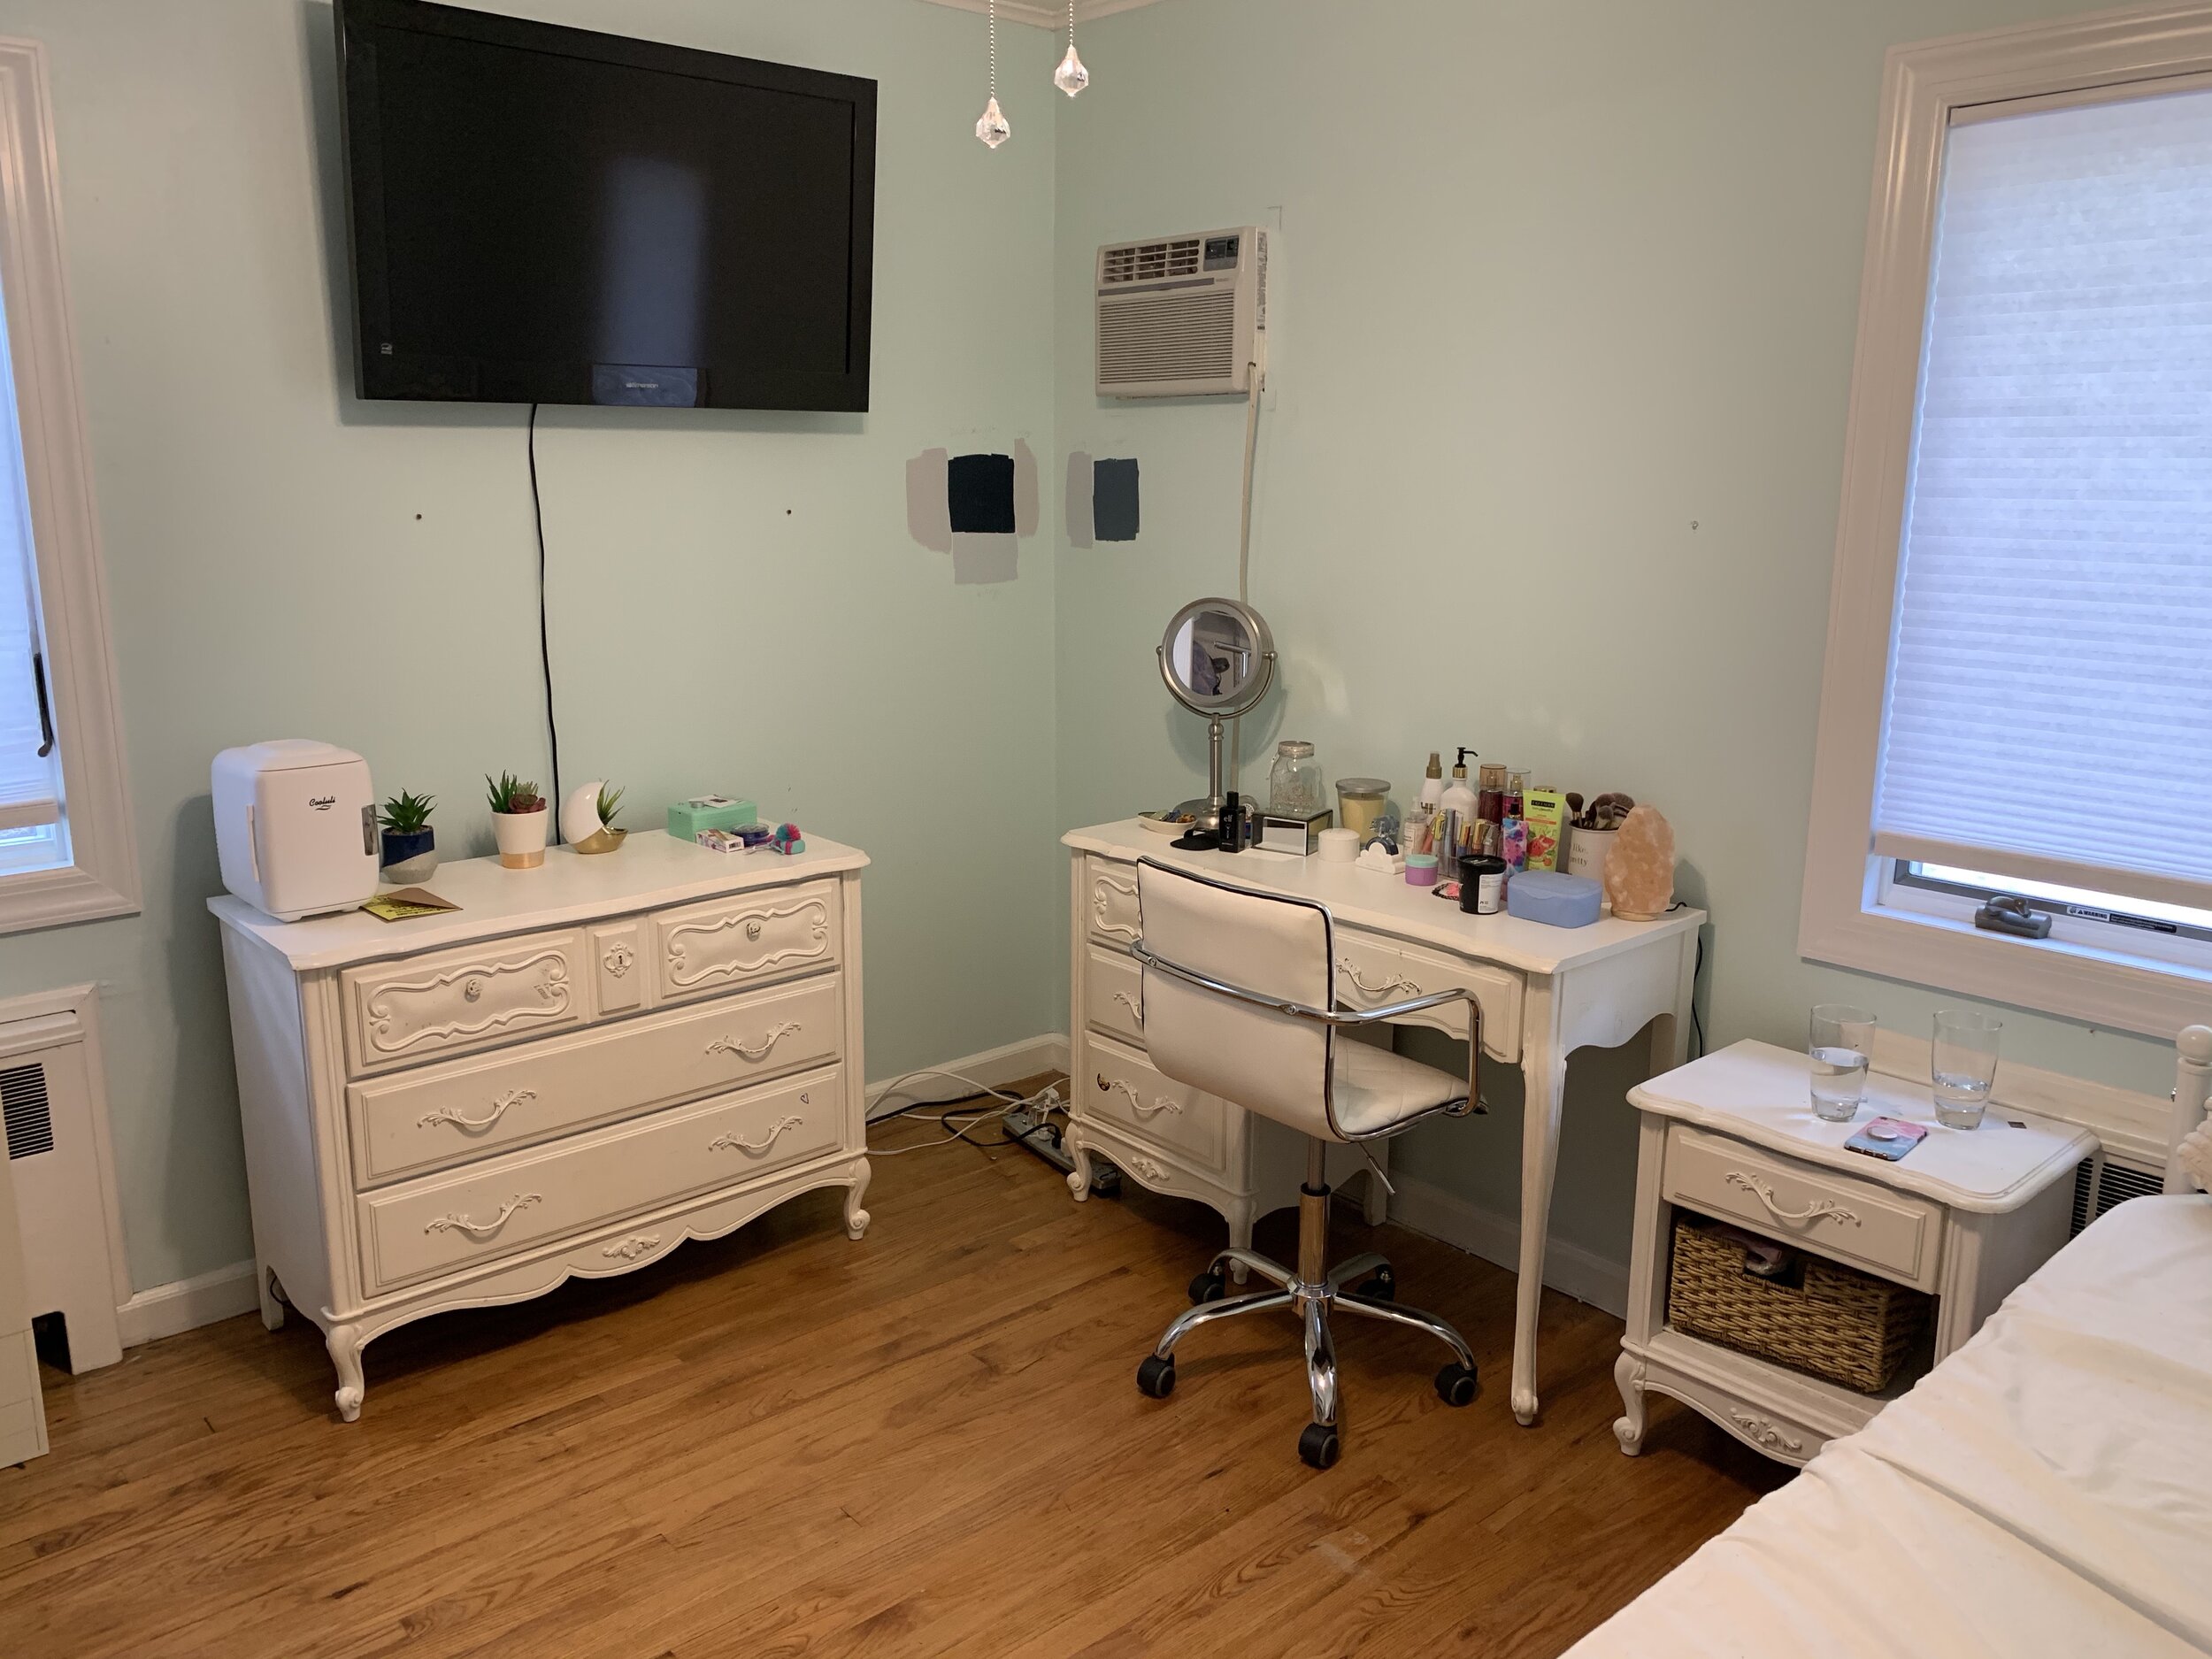
Step 5, Stylize. This is probably one of my favorite steps. We had so much fun making her ideas come into fruition. She wanted a celestial theme with gold stars and dark blues. We started with paint swatches and simple drawings to figure out the wall layout. Then we moved on to furniture ideas which lead to changing up the floorplan to maximize her space.

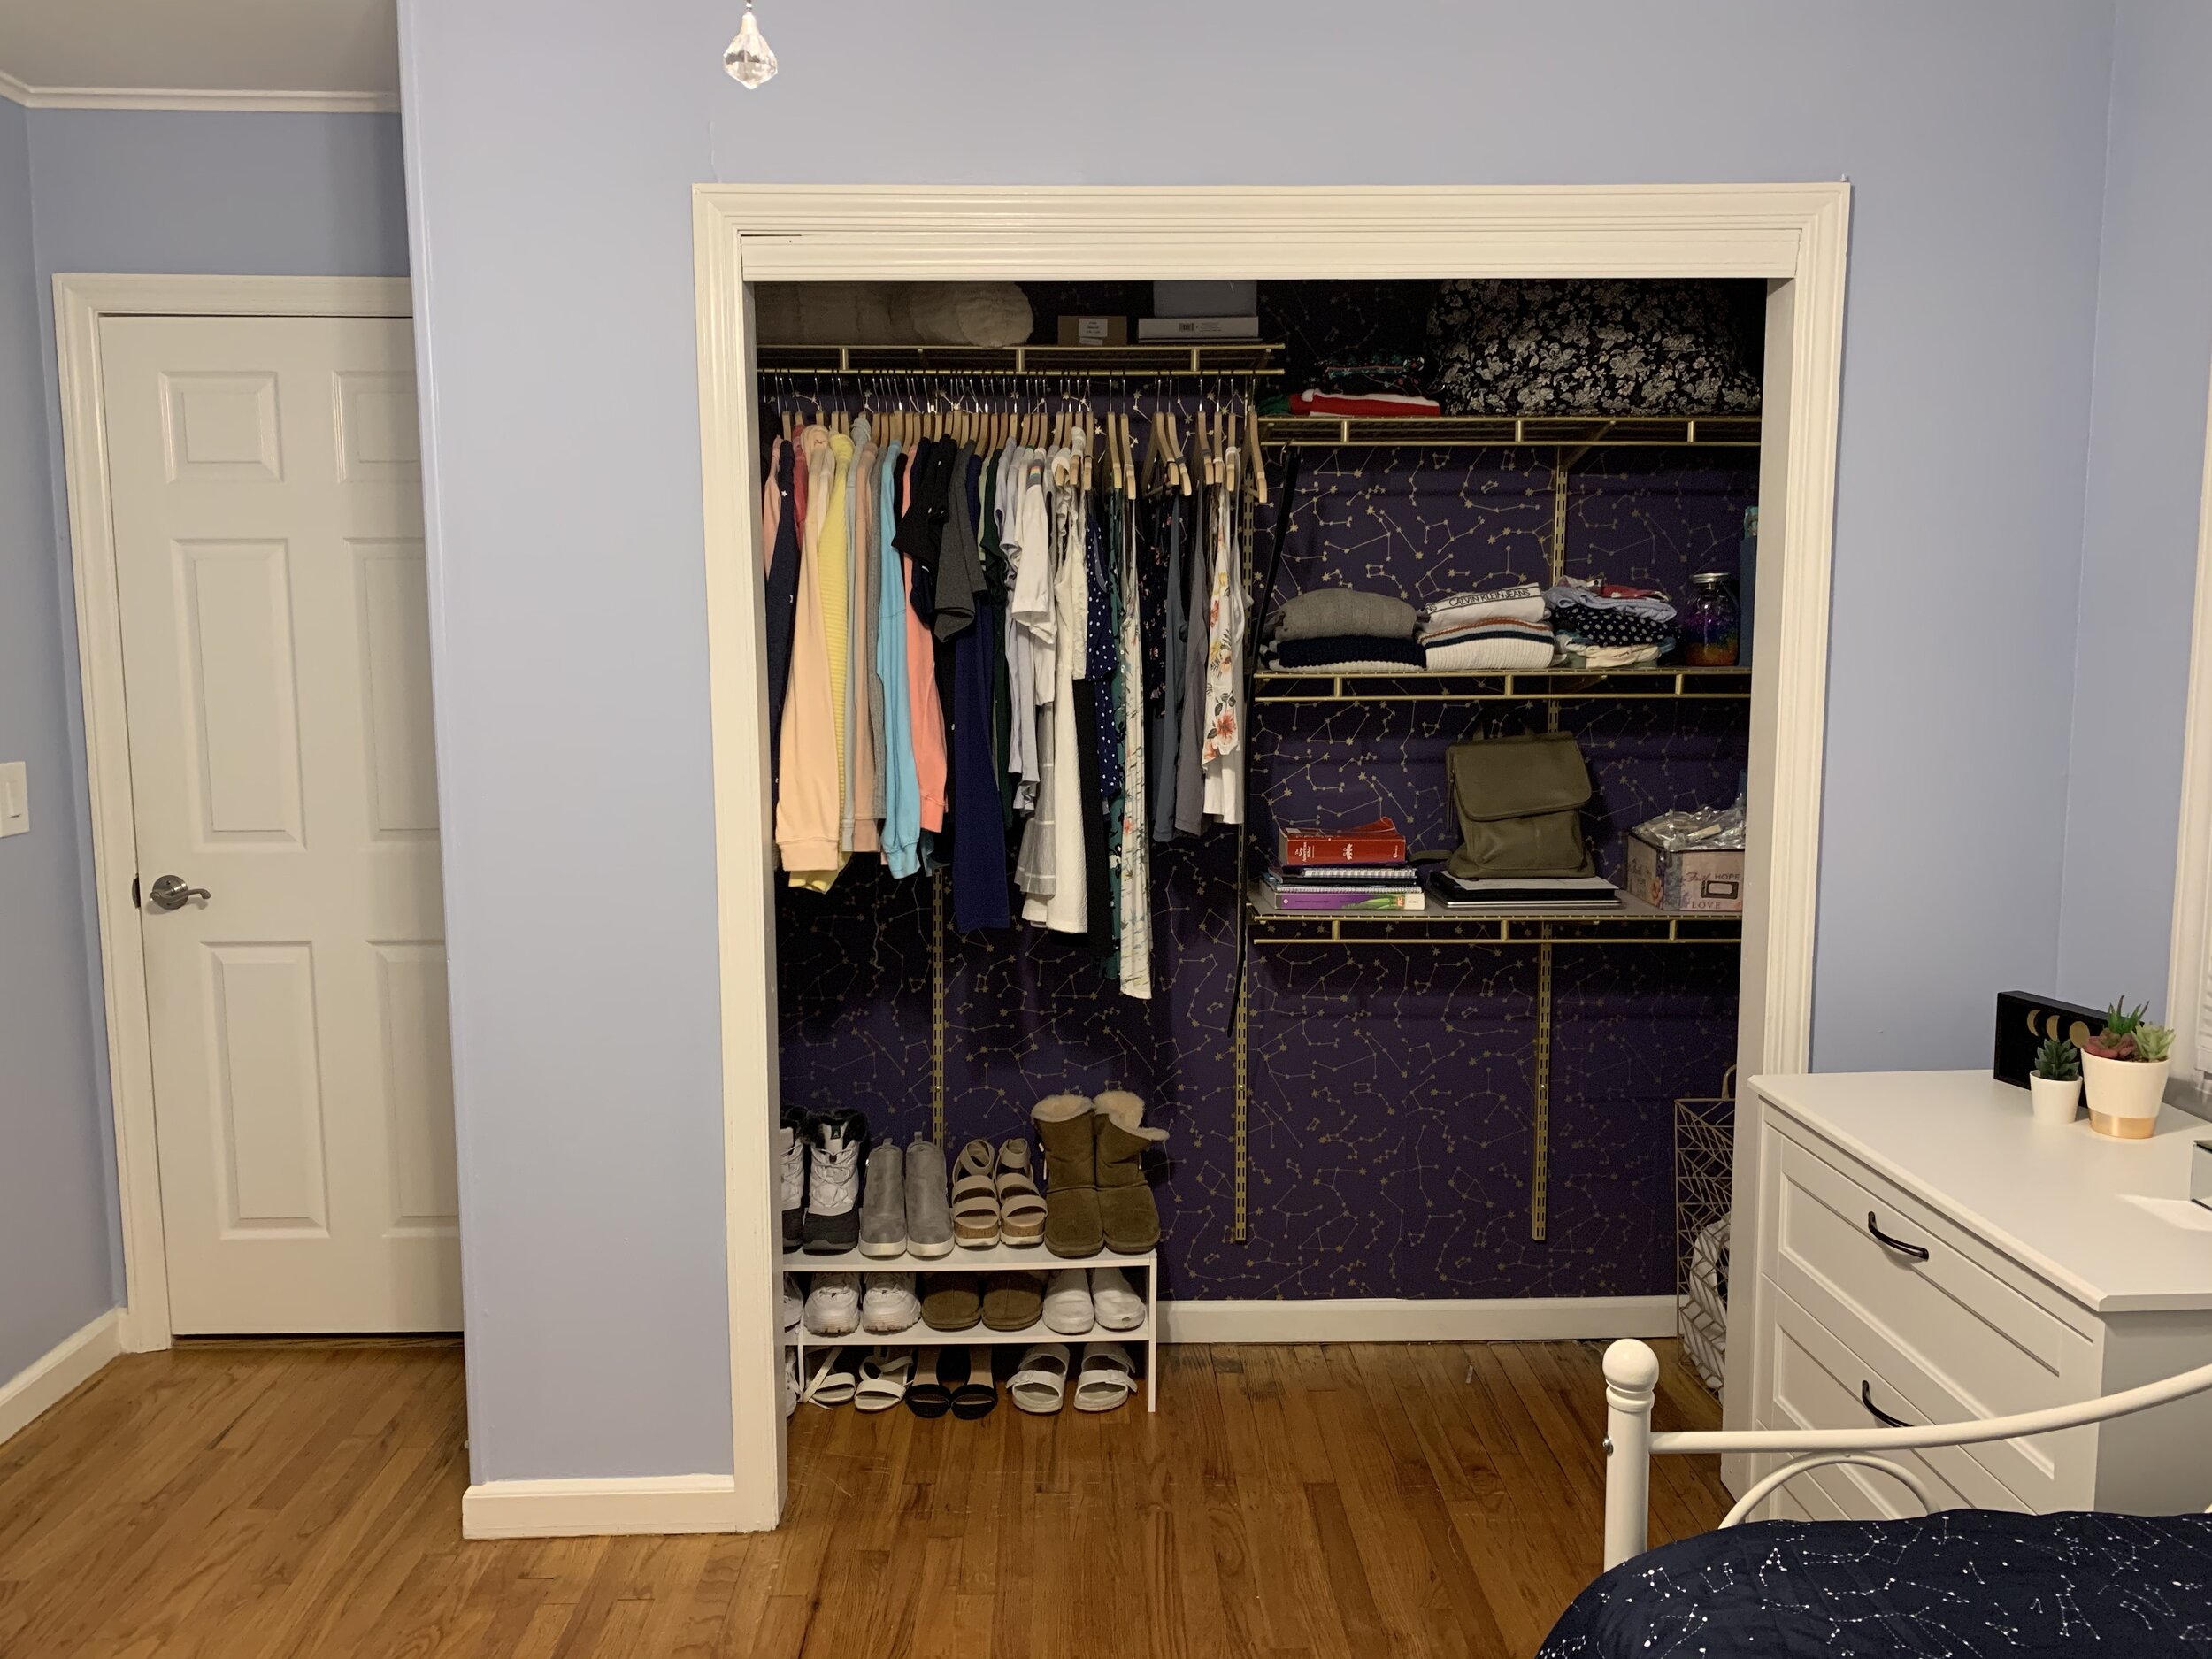
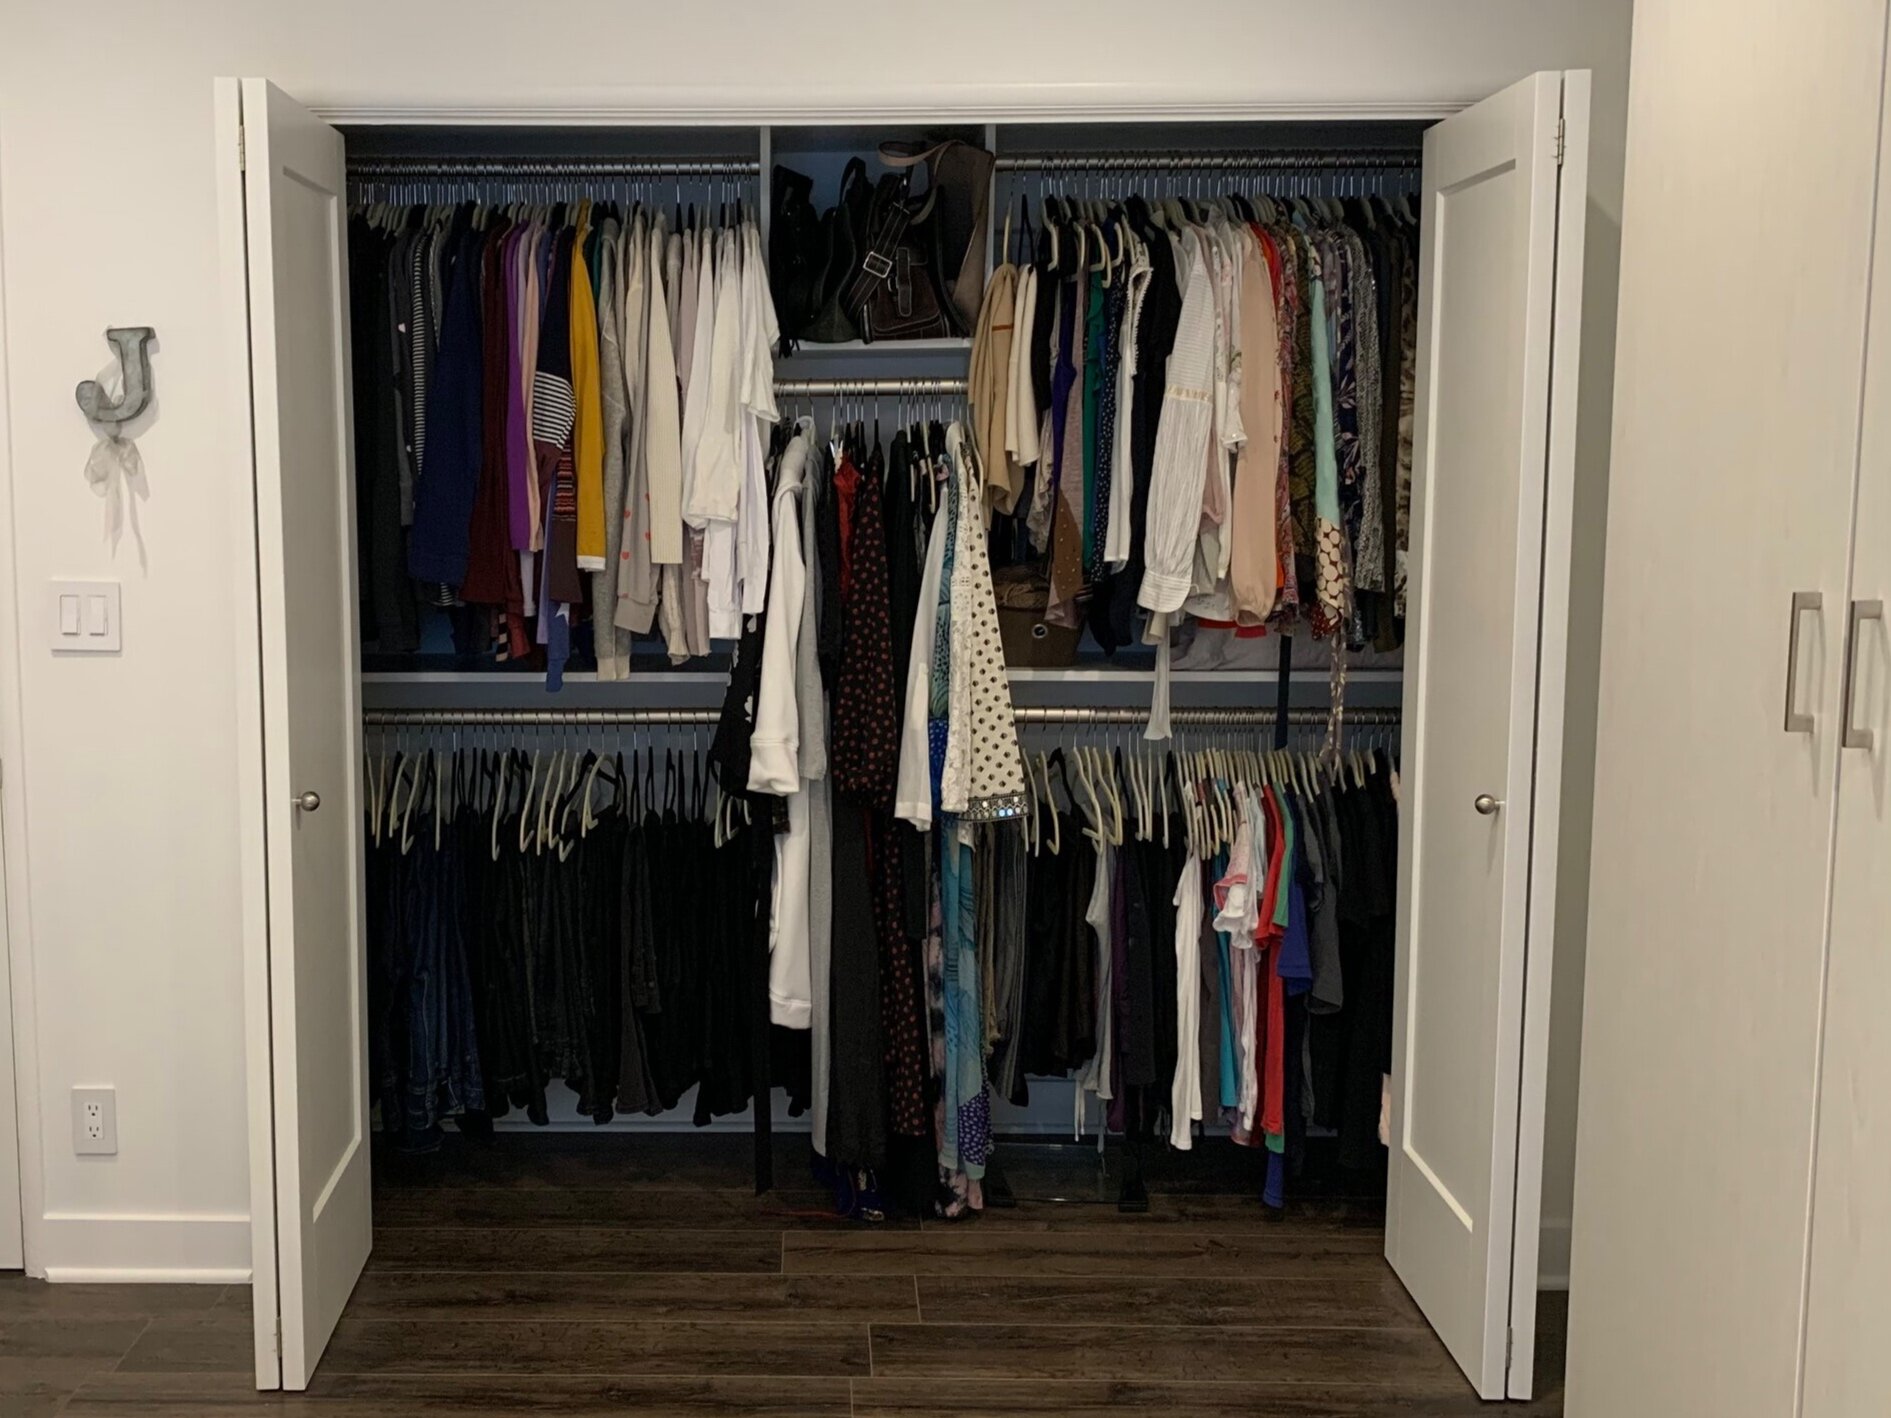
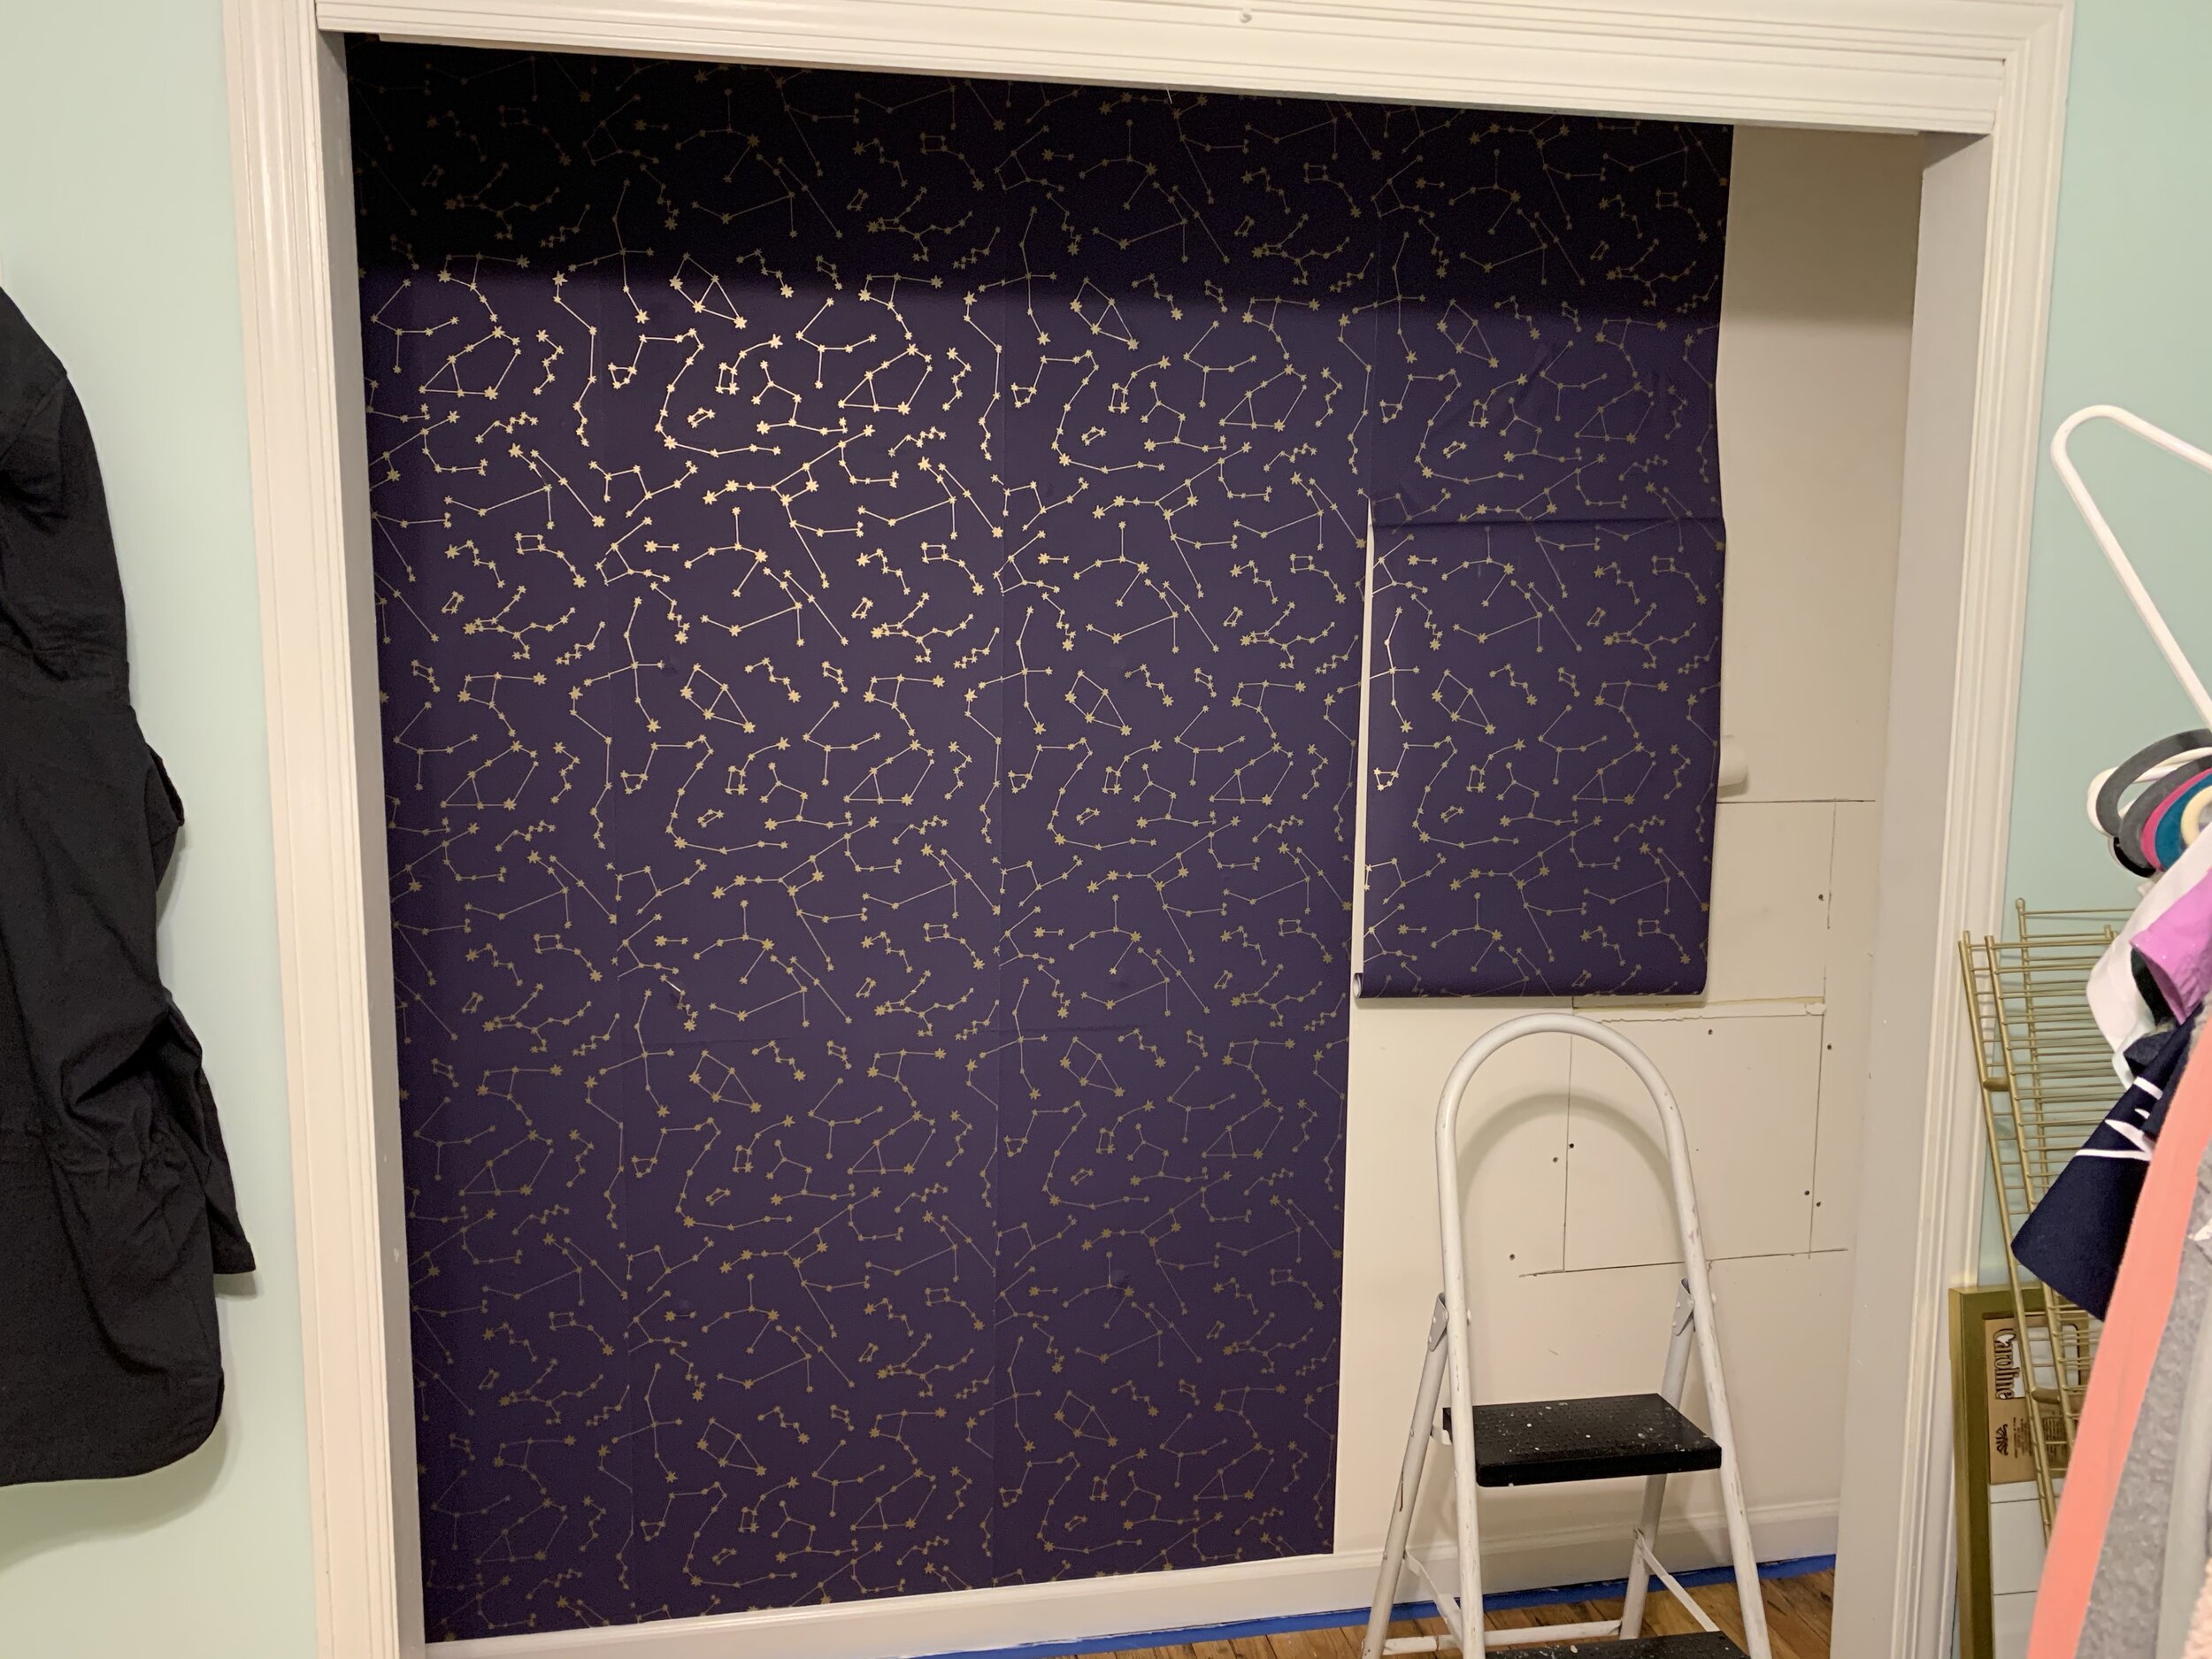
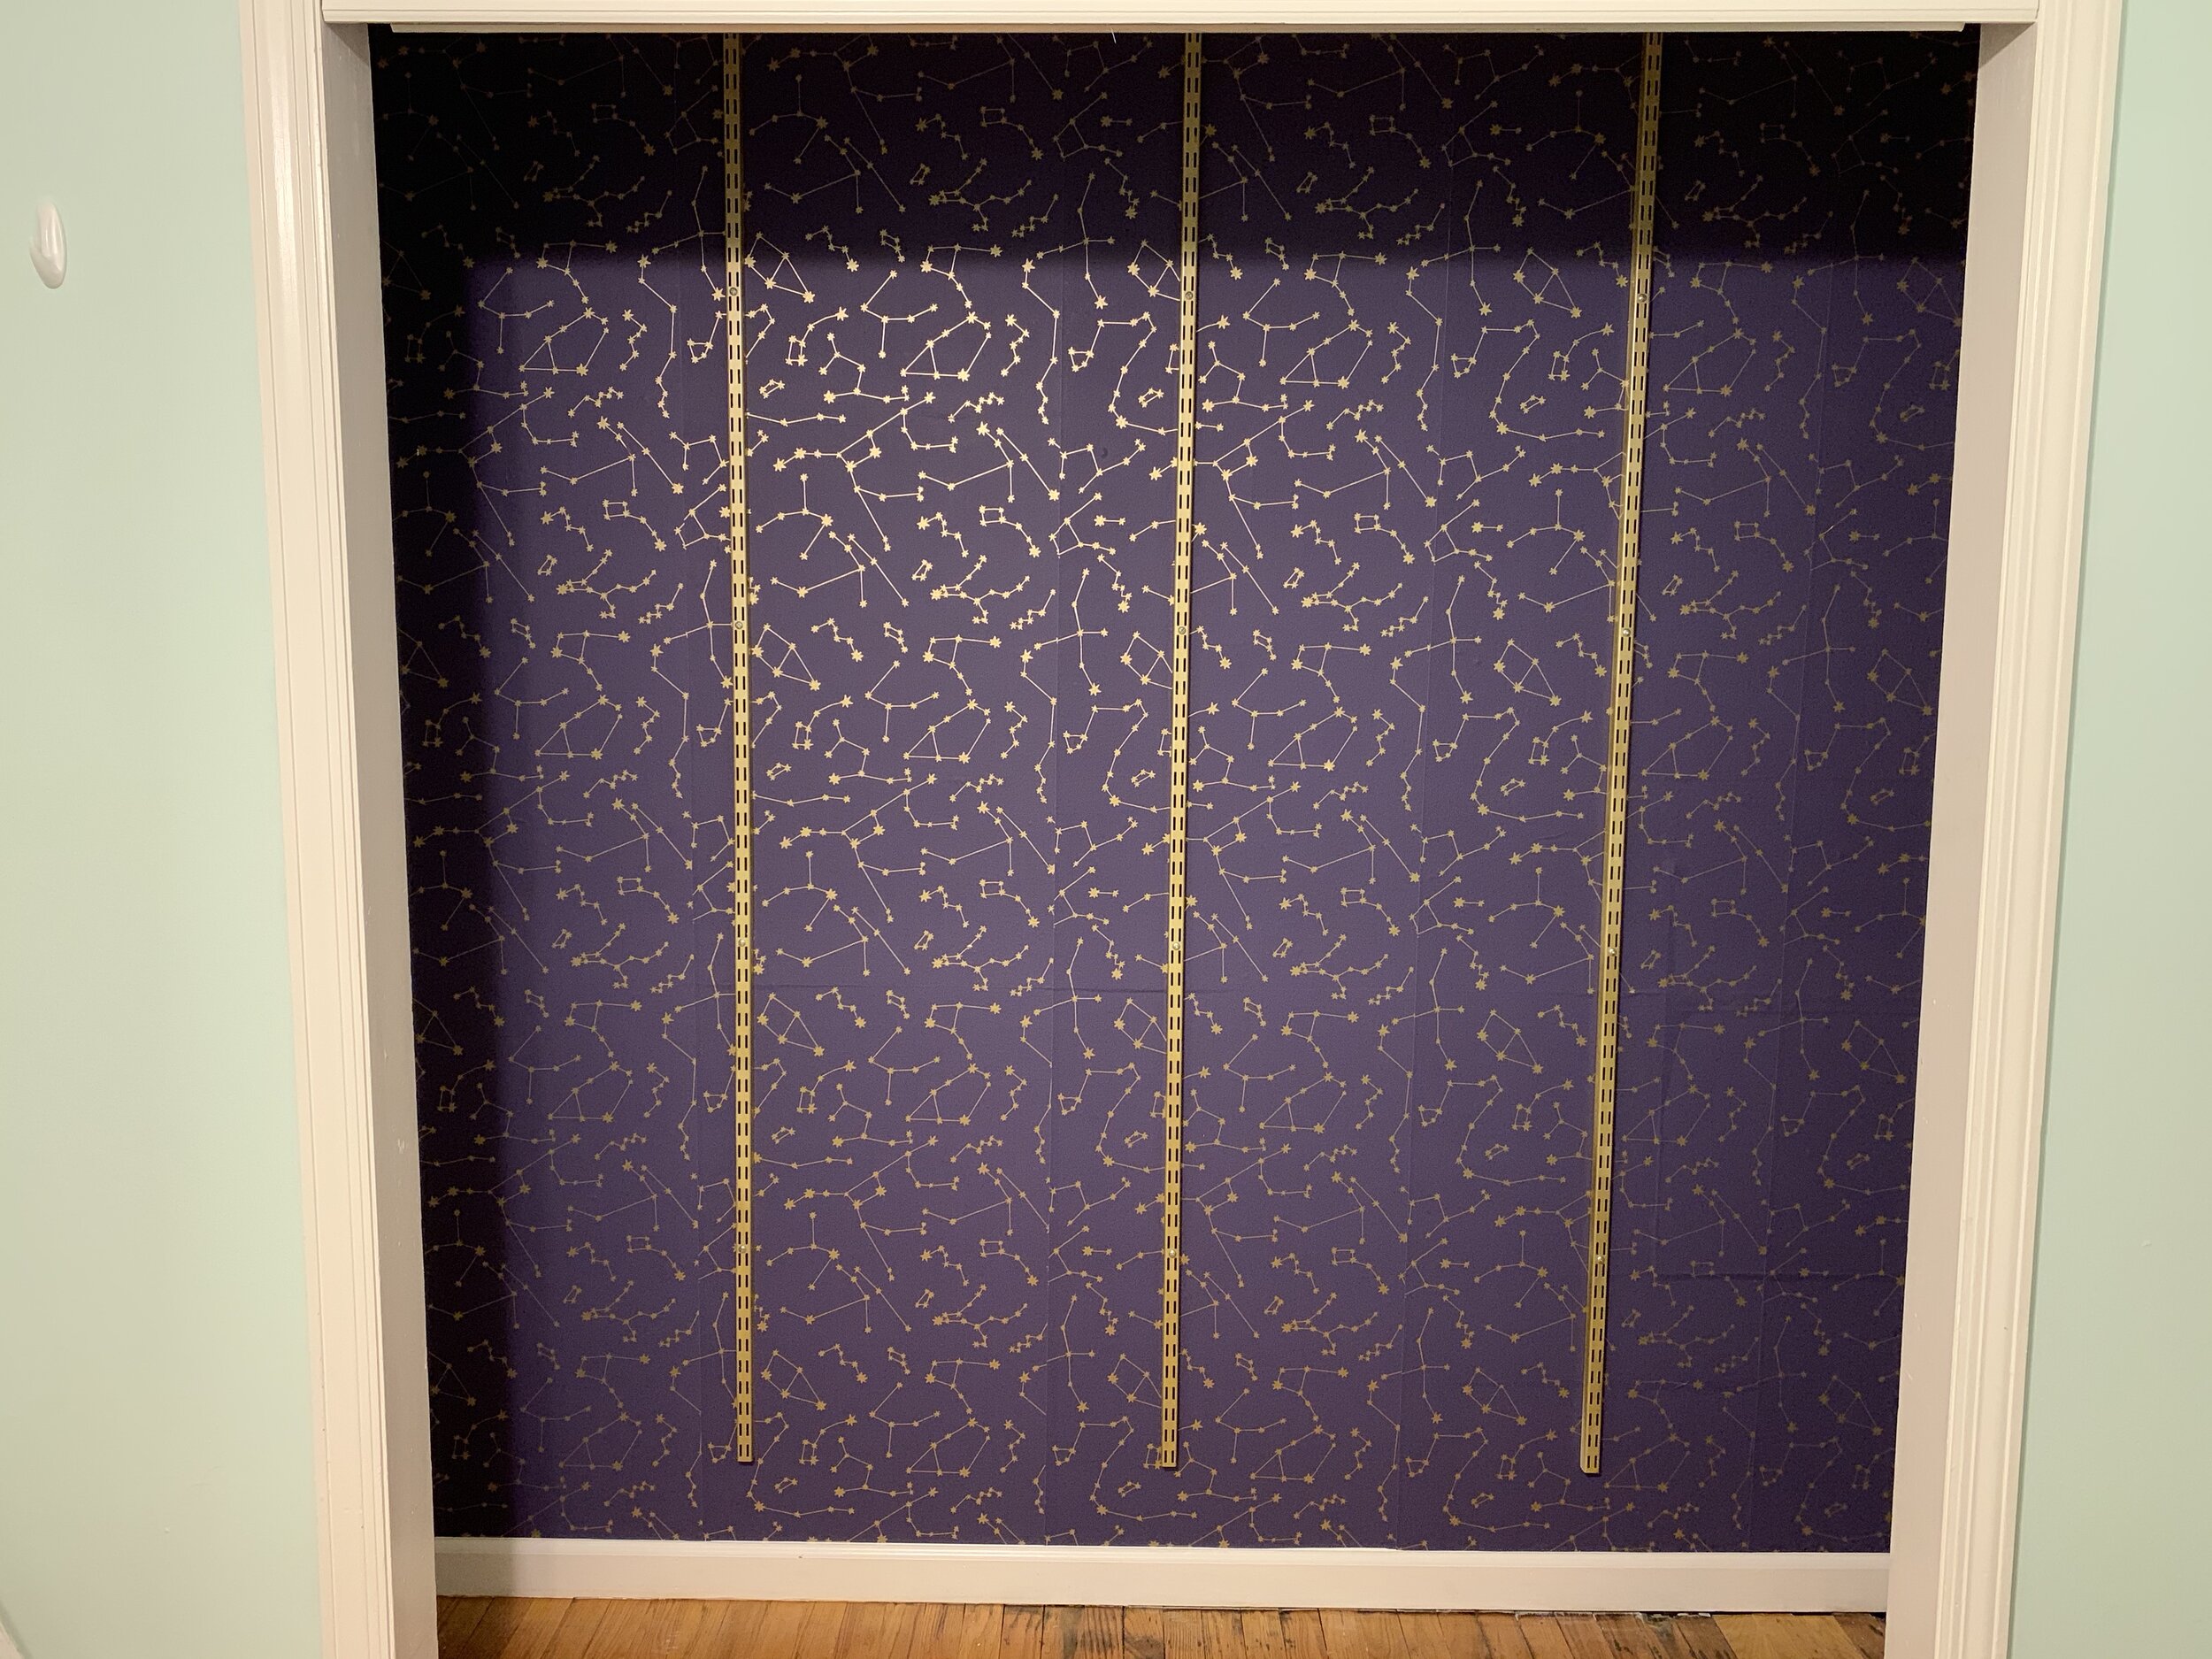
For inside the closet we fell in love with the dark blue wallpaper with gold stars. This was peel and stick wallpaper that made it easy for application. That segued into spray painting all the closet shelves and brackets gold.

To keep costs down we purchased the furniture and accessories from Ikea, Homegoods, and Amazon. What also helped with the budget was hanging the wallpaper, painting, and assembling all the furniture ourselves.

Overall I’m thrilled with the way the project came together. More importantly, my friend and her daughter are so happy with their new space.

3 Steps to Creating the Dressing Room of Your Dreams

As a professional organizer in Los Angeles, I get to work with some amazing people and spaces. I couldn’t wait to design this dressing room for my client. I’ve been working with her for years and she was moving into a bigger home and we were able to use one of the rooms as a dressing room. At first, we were initially thinking of a stand-alone vanity and armoire but, as I thought it over, I had a vision of a kind of walk-in closet. I was familiar with all of her stuff and knew she would need more space for her accessories and shoes.

Here are the 3 steps I used to create the dressing room of her dreams.

First, you want to declutter. I sound like a broken record because I say this all the time but it is so important to have only what you need, use, and love. Everything else will get in the way of your vision. Start by sorting like with like and then pick the best and get rid of the rest.

Second, you want to take inventory of your items. It’s important to know what you have so that you can create the space that you need. How many shoes, scarves, purses, belts and hats do you have? Also, ask yourself, do I want to hang my t-shirts and jeans or fold them? And, if I fold them, will they be in a drawer or on shelves? Think about the socks, underwear, intimates and pj’s you have. How many drawers will that take up?  How many feet of hanging space do you need? Double-hanging in the closet is a better use of the vertical space if you don’t have too many long hanging items. I also took into consideration all the jewelry she owned. There were many necklaces that needed a home. She also had an ample supply of makeup and a vanity so plenty of drawer space was imperative. This brings us right into the next step.

Third, you want to design the space now that you know what you need. I designed the space and then we hired Inspired Closets to build it out for us. Of course, if you don’t want to do the design part they will do it for you. It was easier for me because I already knew what my client needed. So we looked at the layout of the room and picked the wall that would best be suited for the unit. I drew a sketch of what the unit would potentially look like. Starting with the vanity in the middle and then adding shelves for the shoes and purses to the left. On the right side, I added the drawers. The top one was for her jewelry and the rest for socks, pj’s, workout, etc. I wanted to include these cool pull-outs for hanging jewelry that Inspired Closets had, I added those above the drawers. I added double hanging bars in the closet for all her blouses and she also wanted to hang her jeans. Then I gave the sketch to Inspired Closets and they came out and took the final measurements. My client went down to the showroom and picked the finishes and hardware that she liked. All we were waiting for was the vanity mirror with lights to come. We ordered that separately. Inspired Closets really are a dream to work with.

If you are looking to create a space that makes you want to get up and get dressed in the morning, use these three steps. No matter what size space you have you can create a dressing room or area of your dreams.

Downsizing

I feel like I'm hearing that word, "downsizing," so much more these days.  The mono-word turn of phrase is getting some social acclaim as of late, and as a de-cluttering pro, I can't help but do a little happy dance every time I hear or see the word in public.

Example: A few weeks ago, I had the pleasure of watching an advanced screening of Matt Damon's new film Downsizing; what a great movie! If only we could shrink down our trash like those brilliant Norwegian scientists!  My head was spinning from the imagined possibilities. Then the word popped up again! This time in a book title from one of my favorite people and clutter organizers, Peter Walsh. His new book Let It Go, Downsizing Your Way to a Richer, Happier life will be in my hot little hands come January at the event his is hosting for NAPO-LA.

Practice what you preach: I did some serious downsizing myself over the summer. I moved from a 1000 sq ft, two-bedroom apartment, to a 400 sq ft studio, because "why-am-I-in-a-two-bedroom-apartment-when-it's-just-me-and-I-can-move-to-a-better-neighborhood-for-half-the-cost?" was a question that plagued me for a good six months. I didn't have room for the question anymore, and it was time to let go - of it, and my possessions!

I got rid of 75% of my stuff! Me! I'm already a minimalist by most people's standards, but even I was surprised at what I didn't truly need.  So, what did I do with the 75%? I decided to have a yard sale while I was downsizing.

My clients often ask about hosting a yard sale with their purge, and having never done one in Los Angeles, I believed they deserved a first-hand account of the hassle and shenanigans involved.  To give an honest answer from someone who's "been there," I decided to endure the process. And document it. For posterity. You're welcome.


Spoiler: We may have had fun making the video.

I walk you through the yard sale process in the video, but in case you just want to read the highlights, what follows are the steps and outcome from our endeavors (which I like to imagine printed up on a trifold pamphlet you might find at your doctor's office entitled):

So, You're Going to Have a Yard Sale...

1. Sort and stage - Here is where the bulk of the work comes in - good time to call your friend or family member (or trusted de-cluttering professional, ahem) over for the often overwhelming decision-making portion of your downsizing. Going through all of your belongings can be daunting to say the least, and I highly recommend the buddy system when going down the dark path to clutter freedom. If you have a garage, use it! The separate location can be a great staging area for your former treasures, plus you get the unwanted items out of your space sooner. Unfortunately, I didn't have a garage to keep things in neat, like-item'd piles, so I made due by opening up my organizing tables in my living room, and I stocked them with the goodies I wanted gone the night before the big event. Setting up the night before made the following early morning pretty easy; we just carried the tables out onto the lawn, ready to go.

2. Price - how to price it can be tricky. No one is going to pay what you paid for the item, or even what it's worth, so let that fantasy fly away with your limited-edition left-handed Frisbee. If you paid $100 retail, you'll be lucky to get $10 for it at the yard sale. (Side note, this part is sometimes painful, especially if you're forced into downsizing rather than choosing it.  Haggling with strangers over possessions you're forced into giving up can be a truly horrible experience, and to me there is nothing more hurtful than feeling devalued. So going in, know this, you are not valued by your stuff-don't take it personal!) Use the round stickers to price everything out. I priced things out for a few dollars each, knowing people would talk me down. Speaking of down, get your wares off the ground; take care to place items on a table or blanket. I happened to have a clothing rack which came in quite handy for displaying my former wardrobe.

3. Advertise - Place an ad on Craigslist/your local paper, and put up signs in your neighborhood.

4. Get change - You will need some cash to start. Get $1's, $5's and even quarters. Yes, it will come down to change.

5. Have fun! It's going to be a long day, might as well make the best of it. Make a video:) and it wouldn't hurt to have some ice cold Coronas on hand; your comrades will thank you.

The outcome from my yard sale experiment: It turns out that I didn't have a lot of the items people were looking for at yard sales. Many would-be patrons came early, between 6-7am, looking for electronics, microwaves, jewelry, gold/silver, and men's clothes. If you're dripping with these items then I say go for it! Put on that yard sale and make that sweet sweet cash.  As for me....I made a whopping $48.

Not everything sold at the yard sale (go figure). I ended up selling the larger items on Craigslist and OfferUp, which yielded $555. Adding the yard sale's $48 totaled me out at $603.  But wait; there's more - I donated the remaining items to the National Council of Jewish Women and got a tax receipt for $768.

Offer up and craigs list items.jpg
National Council of Jewish Women.jpg

Downsizing = Worth it!  Yard sale = Not! -  Hindsight is alway 20/20. I would have saved myself (and my loving pals) a lot of time and effort if skipped the yard sale and sold my stuff on Craigslist/OfferUp and donated the rest. I would have, but now I can authoritatively say that unless you have the right items, yard sales are not worth it! Again, you're welcome!

4 Piles to Pitch: Win Back Your Storage Closet

Yes! Clean out that storage closet once and for all. I just helped a client do this, and I want to share a few things that might be useful for the closet you have been ignoring... and the skeletons inside.

My client had recently moved, and didn't have time to purge or organize before transitioning from old place to new.  As a result, her storage closet was riddled with random items (because it had a door to close and hide it all behind). Sound familiar?  Well, it happens all the time. Time to reclaim your space!

To get started, take everything out of the closet. As you remove items, sort them into piles with similar types of items - put like items with like items.

With my client, as with most clients, the piles looked something like this: the first pile was composed of packing supplies, including empty boxes, bubble wrap, tubes for posters, etc.  A second pile contained decor items that worked in her old place but didn't work in her new home, including items that needed to be returned. Off to the side, we had a pile of stuff that was to be sold on eBay and Craigslist, and finally, my favorite pile, the bag of bags. Over 90% of my clients have at least one of these piles:)

We also had piles of old makeup to go through, bedding to make decisions on, and office supplies to sort. However, the 4 piles I want to focus on are the four piles mentioned above: packing supplies, things that aren't working, stuff to sell, and the bag of bags. By just dealing with the items in these four piles, you will reduce clutter by half.  So, in no particular order, give yourself permission to let go of ---

1 - Items that are not working in the new (or current) space. This is often a frustrating endeavor, but it's time to realize that even alternative facts won't make your drawer organizers from your last residence fit your new space, and those pictures that looked great on your former living room wall don't catch the light in the same way in your new (or now) house. Yet, these items get tucked away in the storage closet in hopes you will find someone to give it to or eventually sell it. A big crutch in the letting go process is the "waiting to give it to someone who will need it" crutch. We always want to help someone out (or in some cases, pass the obligation of the item onto someone else), but then the unwanted item ends up chewing up valuable real estate in your space for way too long. So go ahead, give yourself permission. Donate it. And those things that need to be returned that didn't work for the new space that got shoved in the storage closet to collect dust and be forgotten? Put them in your car with the receipt and make sure it gets returned before it's too late.  Or donate them. 

2 - The eBay and Craigslist pile. My client had fancy and pricey dresses; some still had the tags on them, plus other items she thought could be worth selling. Of course, I'm all for donating it. Too often the ideal amount you think you can get for a given item is a lot more then what you can actually get for it. With my client, we started looking up how much similar dresses were selling for online and found that they were going for $20 or $30, and some were being stolen at $10. So I ask, how much is your time worth? $10/hr? $20/hr?  Because the time you use listing the item, the time spent in sale limbo/haggling with a stranger, the time and energy physically exerted in shipping the item... is the sale really worth the trouble and your time?  I suggest establishing a minimum listing item price of $50 or more to make the listing worthy of your time. If you can get at least $50 for an item, then list it.  If not, donate it.

3 - The pile of packing supplies. It will be easier to let these items go when you realize you are donating most of the stuff you thought you were going to sell. The act of breaking down empty boxes from deliveries alone (ahem...amazon) will reclaim a significant amount of space.

4 - The bag of bags, or should I say the whole closet, considering how they seem to fill up space like some magic growing jello. Like many people, my client was keeping every bag that was ever given to her, and all the ones she paid for like the ones from Ikea, etc. We looked through them all, and kept a select few that were in good shape.  We used some to bag donation items, and, get ready, donated the rest.

How many shopping bags does one household need? If you go shopping and use about 5 recycled bags, then keep that amount in your car, and get rid of the remainder.  Rest assured, more reusable bags will come into your life; someone is always giving away a free bag. Oh! And if you get paper and plastic bags every time you go to the grocer's and keep them for trash, then take one bag and fill it up with other bags; whatever doesn't fit in that one bag, you recycle. You will keep getting more every time you go shopping; have faith that you will not run out.

By focusing on items in these 4 piles, and not worrying about the organizing part yet, we saw a huge difference in reclaimed closet space. My client even had drawers in the closet that (I didn't know she had) she could never get to, now ready to be filled with items worthy of storing. 

So, what can you donate today to win back your storage closet?


Stay Organized in Your Bathroom & Take Back Your Morning

What would you do if you had extra time in the morning, without having to change your wake up time? Would you make yourself a cup of coffee with extra care, and actually have the time to enjoy it?  Would you write that friend you don't see often enough?  Would you journal, meditate, yoga, or even catch a few more precious Zzzs? Like in any area of the home, having an organized bathroom will save you time and money.  A well-planned bathroom will also reduce anxiety in your morning routine while saving you time, so you are set up to have a good morning, every morning.

So let's take our mornings back!  And let's start with the first stage of organization bliss: de-cluttering. To get started, and I can't stress enough, you must de-clutter first. Go through every individual item, pull what you use and need, then get rid of everything else. Most people tend to collect and hold on too many products, especially makeup. This is usually done with the best intentions; we don't want to be wasteful and there is a chance we might use the product again. I'm guilty of this...I think I might want to wear that purple eyeshadow for a girls' night out or Halloween. Of course, I bought it about 3 years ago, and I haven't worn it once; so, in the trash it goes. It's also good to keep in mind that makeup has a shelf life of about 3 months to 2 years; check out time frames in this article at popsugar.com; you'll be surprised how soon you should be ditching that liquid eyeliner. 

So you've de-cluttered; now it's time to organize what's left. Since we were on the topic of makeup, these are my favorite acrylic drawer organizers from The Container Store. Measure the drawer in your bathroom to find the best fit and arrangement. I also recommend using grip drawer liners to help the acrylic organizers stay in place.  I love these drawer organizers because they can be used for so many different bathroom items...your toothbrush, toothpaste, dental floss etc., and if something spills or leaks, you only need to take out one caddy for easy cleaning.

Let's take a look at the sink area; bathroom counters are a prime spot for clutter. Cluttered Counter Syndrome usually occurs because we like to keep out what we use everyday to get ready in the morning. On the whole, CCS makes sense, but I like to give my clients a basket or bin, and the morning routine goes inside, so things like body lotion, deodorant, hair gel etc., are not lingering on the counter tops. I recommend storing the basket/bin under the bathroom sink, so you can grab the b/b in one motion after your shower, get ready, and then tuck the b/b back under the sink when finished, and, voila! No CCS. 

Now, the under-the-sink area can get a bit cramped, so I've become obsessed with these Like-It modular drawers, because they take full advantage of usable vertical space.  With these modular drawers you can store items with double or even triple the space, and with the variety of sizes, you can find one or two that fit even in the smallest of under-the-sink spaces, and still have room for your morning routine b/b.

So take some time to invest in taking back your morning, and save yourself future aggravation. 

Happy organizing:)


3 Ways to Organize Baby Clothes

For new and expecting moms, it can be overwhelming with all the baby items that come into the home. Many of the items are baby clothes. You see cute outfits at the store, or there was a great sale and maybe they're four sizes too big, but you get them anyway because they'll eventually fit, right?! And it's not just you, friends and family give baby clothes as gifts or bags of hand-me-downs that can range from all different ages. But what do you do with the clothes in the meanwhile? For this blog we are going to concentrate on clothing storage solutions for newborn to two year olds. 

I've found the best way to get started is to make piles of clothes by size. We know the first two years are broken down into newborn and/or 0-3 months, 3-6 months, 6-12 months, 12-18 months and then 18-24 months. First we separate, then we decide what we want to keep. Even if that skull-and-crossbones onesie was a gift for your darling Penelope, or the threadbare hand-me-down was given by a cousin you don't see enough, it doesn't mean you have to keep it. Focus on what serves you, and what will be right for your child.

Now that we have our "keep" piles, separated by size, we can decide how we want to organize the clothes. You can use one or a combination of these ideas, but I like incorporating all three.

  • Baskets with chalkboard labels.

  • Dividers for hanging clothes.

  • Clear airtight plastic storage bins with labels.

The baskets with chalkboard label method is great if you have a lot of shelf space; I encourage storing the baskets on the shelves in a closet or bookshelf. Pro Tip: Don't forget to measure your shelves before buying any baskets to make sure they will fit properly. Adhere chalkboard labels on them if they don't already come with them.

This method is great because as your child grows, you can easily swap the sizes. The baskets in the picture below did not come with labels, so I purchased chalkboard gift tags from The Container Store, trimmed them to the shape I wanted, and used this double sided tape to attach them. Personalize it: there are oodles of baskets and labels to choose from, so you can add your own style to your organization endeavors.

The hanging clothes with dividers method is terrific if you have lots of hanging space. You can use clothes dividers, pre-labeled by month/size, or use plain ones. With the latter of the two, using a label maker or chalkboard labels for each divider, allowing an easy change of the sizes as your child gets older.

The third method works for the months to come. The labeled, airtight storage allows for long term keeping, and knowing your baby's clothes are staying clean, and bug and dust free, is especially great if you are storing in an attic, basement or shed. This is also wonderful if you plan on having more children. When you are done with one size, replace it with the next size up, and the first size goes into storage.


The picture of the shed is from a client that has four boys. We wanted to keep all the hand-me-downs organized, so when she is ready for the next size up, she knows exactly where everything is. We also did bins for shoes for the kids by size. 

Did you find this helpful? Comment below with your thoughts, and I would love to hear how you organized your children's clothes! For more useful tips check out Momlovesbest


A Few Ways to Store Your Purses

Living in Los Angeles, I get to work with a lot of opened minded clients, that let me try different organizing ideas to discover what works best for them. After I finished organizing this client's closet, the last thing to consider was her many purses and bags. 

It would have been fine to keep the bags neatly on the top shelf of her closet, but I was concerned about the dust and not being able to see the purses that were in the duster bags.  For me, out of site, out of mind; I forget I have, and I feel this is the same with my clients. 

So, off to The Container Store I went, in search of a solution to the problem of dust, seeing all the bags, and time ... I don't want to spend the time looking through duster bags to find a purse for the evening.

I don't know why I find such joy out of using an organizing tool for something that was actually designed for something else ... anyway, I found sweater storage bags, small PEVA Chest Clear 12" x 9" x 6", just big enough for one or two purses, and the storage bags can be stacked; I love it when you can use more vertical space. 

Ok, that works, right? Well ... now you can see the bags but all the black and brown ones look the same. So, I went back to the old picture trick. It works great for shoes, and now I will be using this for purses as well. I don't have a polaroid camera anymore, but I did have 8168 shipping labels. I took pictures of all the purses on a white background, printed them out on the labels and cut them with a paper cutter for a straight edge. They stick on really well, so no peeling corners over time.

What I also like about the pictures, is if you want to store the purse in the duster bag that it came with, you can and still know what is what in your closet. 

Of course, there's not only one way to organized purses. Here are some other tools to use. I like these Cubbies that are made for shoes and purses, as well as Hanging Canvas Shelves; these are great for clutches.

Like these tips or have a great one to share? Let us know in a comment below. 

If you have a storage dilemma, I can help! Email me at info@spacetolove.com. 

Slim Down your Closet for Summer

Decisions decisions...What gift should I buy for the graduate? What to get dad for father's day? What am I bringing for the 4th of July picnic?  

Anybody want to add, What clothes to keep in my closet? to that list?

While shopping for the perfect gift and making fun summer plans with your family and friends is not a chore, I don't think cleaning out your closet has to be either. It can be fun and really rewarding. It's like giving yourself a gift and everyday you get dressed will feel like a holiday.

All you have to do is ask yourself a few simple questions about the clothes that you have in your closet.

Of course, if you don't like the garment anymore, just donated it. However, not all pieces of clothing will be that easy to decide on. 

Below are three questions to ask yourself. 

1. Does it fit me? Right now? Today? Not two months from now or two months ago.  

2. Am I holding on to it out of obligation? If someone bought it for you and you really don't like it but feel bad getting rid of it. 

Also, I didn't say in the video another thing about obligation, is when you paid a lot for clothing but don't like it. You had a bad day and went out and bought an expensive outfit, harmless. Now, a year later, it's still in your closet with the tags on it. You know you're never going to wear it. You've even tried it on a few times hoping it will look as good as it did in the store but it just doesn't work. However, you won't let it go because of the money. If it makes you feel guilty or bad it's still costing you.

3. Have I worn this in the past six months? Did I wear it this past season? Every new season is a new opportunity to purge.

Bonus tip...I would wear it but I need to get them fixed first. They need to be hemmed, the button fell off or it needs to be taken in. Any unfinished project is unnecessary clutter for the brain. Put the items in a bag by the door and set a day with in the next 3 weeks to get it done or off to Goodwill it goes. You will feel so much better either way.

I added before and after pictures from a past client for some motivation. 

So, if you're feeling motivated, the way to start is by taking everything out of your closet and before you put the items back ask yourself the questions above. If you're keeping them put them back in the closet. If not, have a bag ready for donations and another for mending. It also helps to have a "maybe" pile, something you're not sure you want to get rid of yet. If that is the case, you can give yourself more time to decide at the end.

I always say, "if your not wearing it, it's best to give it to someone else that really needs it".

Also keep in mind, as you're slimming down your closet, you're making room for new and better things to come into your life.

It's a win win! 


Adding Color With Fabric.

I remember the time my sister asked me to help reupholster dining room chairs and I thought, "How do I get out of this one?" It sounded so labor intensive and to be honest, I didn't think I had it in me to take on such a project. However, my sister does not take no for an answer. 

The next day we got started with just a few tools. I watched as the seat came off the bottom of the chair with just a screw driver. "Well, that was easy" I thought, and then I starting pulling out the staples from the bottom of the seat in order to remove the bottom cloth from the chair. Here I had to put in a little effort but I do like a challenge once I get started onto something. 

The fun part was lining up the new colorful fabric and then stapling it into place. Just be sure you have it centered. I learned that the hard way. Nobody likes doing things over and want to save you the trouble.

Then we replaced the seats back onto the bottom of the chairs. One after the other and soon enough we completed all six.

Done and done!  They looked so much better.

What was I so afraid of?

Oh and I didn't stop at dining room chairs.

As soon as I got my new vanity set the first thing I did was went out and bought fabric to reupholster the stool. I'm good at the reupholstering part now but I bought way too much fabric, oops.

So, I used the extra fabric on these inexpensive plastic drawers. I think I paid $15 for them and I was about to get rid of them. I never really liked them because you can see through the plastic and they just look cheap. So, with my handy dandy hot glue gun, I hot glued a piece of fabric on the front of each drawer. Now you can't see the items that I have in them and they look great with the stool. 

Trying new things can always seem a little daunting but I ended up liking it. You may enjoy it as well. I was going to write out the steps on how to reupholster a chair for you but why bother when its already done on wikiHow

So go ahead and add a little color to your space. It easy:)