Client Video Testimonial for Space to Love

April fools day:) You thought you were going to get another quick tip from Space to Love....sorry, no organizing tips today but all kidding aside....

Instead, I had the rare privilege of interviewing one of my long time clients and that is no joke! It’s a fact, most people don’t want others to know that they hired a professional organizer let alone talk about it on camera.

Sofia is amazing and one of the first to find and hire me on Yelp. While we had lunch in this beautiful park, we got to talking about all things organized and what we had accomplished over the past 6 years.

I’m so grateful for the time she took out to do this and that she could answer some questions that a lot of potential clients would always ask. Here are some of the things we talk about in the video.

*Once we are organized do you have to keep coming back?

*What is your method?

*Do I have to get rid of everything?

*Are all organizers alike?

*Can I maintain the organization on my own when we are done?

*What about memorabilia?

*Will I feel judged?

*What is the best thing about hiring a professional organizer?

I hope you enjoy this video of us going down memory lane.

Life is a journey, and as you can see from this video, that journey is so much better when organized.

5 Ways to Label Your Stuff

Labeling is the last step in the organizing process. It happens after you've set aside time for dedicated de-cluttering, after going through all your things and getting rid of the stuff you don't want or use, after you're left only with the things you need, use and love. The label goes on after your trip to The Container Store for a stylish upgraded storage solution, and after every item in the process has been nestled in a location that is intuitive to your lifestyle. Now. Now is the time. All you have to do is label.

As a professional organizer in LA, I know that if you label your stuff, it will save you time and aggravation. Here are some ways to get you started with the final step in organizing, labeling: 

Easily the least-tedious and hand-touched way to label is to utilize containers with blank labels already on them. I love using these Jars (above) in the pantry; they have a clean look and they're air-tight to keep your food fresh. Tip - Cut out the directions from your favorite pantry items and place it in the jar with the expiration date on it.

Sticker labels are another way to go. I like using the chalkboard type for easy re-purposing, and I use them just about everywhere: kitchen, bedroom closets, hallway closets, etc.

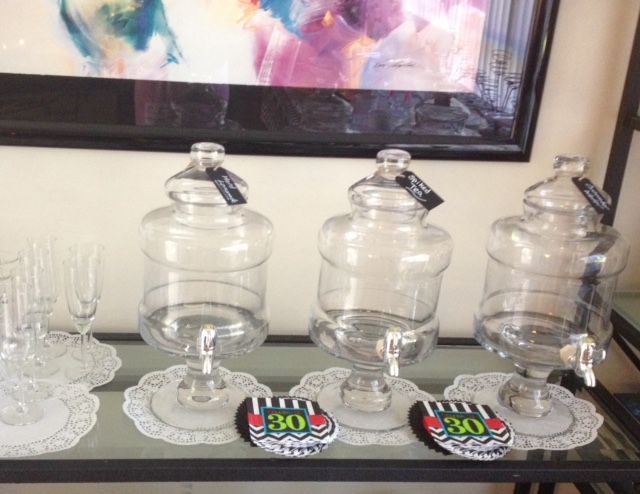
Hanging labels are great when you can't use labels with adhesives. I often use the chalkboard gift tags but there are tons of different types. I primarily use hanging labels for baskets, but they also come in handy at parties to label beverage servers, favors, etc.

Of course, I cannot get through this blog without talking about my organizing companion, the P-Touch. I got my first label maker over 10 years and I still use it. It's great for canisters in the pantry, folders for the filing cabinet, for craft bins and drawers. The P-Touch-80 is easy to use and it's light weight. And 10 years. That's longer than most of my relationships.

About a year ago I upgraded to Brother P-Touch D400AD - don't worry, P-Touch-80 is thankful for the shared workload. The P-Touch D400AD offers more personality then the P-Touch-80, boasting nifty boarders, basic clip-art-like pictures, and a variety of fonts. If my clients are game, I ask them to choose the pictures and boarders to personalize their space. 

Of course, if you don't want to get too fancy, you can just print on address labels and call it a day. I employ this method for larger jobs for efficiency and to avoid hand cramps, and to corporate clients for a more professional, less personal touch.

In the end it doesn't matter what method you choose, but take my word as a professional organizer; labeling your items will make your day-to-day life easier: imaging finding exactly what you are looking for in the first place you look for it, every time.

Find this helpful? 

I'm always looking for knew ways to label things. 

Have a great method? I'd love to hear it! Thoughts on labeling? Leave them below! 

Thanks for reading, and happy organizing!


4 Tools to Organize the Kids' Craft Closet

With the summer just around the corner and school letting out, it's a perfect time to get the kids' craft closet/area in order. There is nothing worse than knowing you have projects to entertain the kids for the afternoon, but can't find the things that go together: you located the paint but not the brushes, you have the glitter but no glue, you have all-the-beads-in-the-world but no string. 

I was helping a client get organized in Malibu this week, and came up with some tools to get organized that will work for any child's craft closet:  

  • Plastic Bins, with or without lids
  • Modular Drawers with inserts
  • Stackable Paper Drawers
  • White Dry Erase Clingboard

I'm always at The Container Store where there is a plethora of plastic bins. I picked these basketweave bins in white because the size and style worked for this project, and I needed vertical clearance in order to store larger craft items. I used the 6.5 qt bins with lids to house the sidewalk chalk and other outdoor toys. Bonus with these bins: if you leave them outside it's okay; they're waterproof...as long as the lid is put back on;)

The second tool, modular drawers, are fab because they are sturdy, they come in many different sizes, and can be arrange in a variety of ways. I added small and medium inserts to these drawers to better organize brushes, scissors, sticks etc. 

Stackable paper drawers make the list because they are perfect for craft paper, tape, glue, stamps and stickers. I like that the drawers easily come all the way out; you can take the whole drawer with you to the craft area! When crafting is complete, everything goes back in the drawer for easy clean-up. Another stackable version that click and stack are great for pens, pencils, crayon and markers.

The fourth item I added for fun...well maybe fun for me, because I like making lists.  How often, when it comes to craft time, you're not sure what you have?  You forgot what you bought and now the babysitter is here, and you need to rush off to an afternoon appointment, but can't remember what to tell the sitter? With the dry eraser board, you write down the fun craft projects as you buy them, before storing them. Creativity can be more impulsive when you know what you have and where to find it!

To finish up the Malibu craft area, I labeled all the drawers with a p-touch label maker...I'll talk about how to make labeling fun in my next blog.

Did you find this helpful? 

I'm passionate about organization! I'm always interested in new ideas; what do you do to keep the craft area in order?