For new and expecting moms, it can be overwhelming with all the baby items that come into the home. Many of the items are baby clothes. You see cute outfits at the store, or there was a great sale and maybe they're four sizes too big, but you get them anyway because they'll eventually fit, right?! And it's not just you, friends and family give baby clothes as gifts or bags of hand-me-downs that can range from all different ages. But what do you do with the clothes in the meanwhile? For this blog we are going to concentrate on clothing storage solutions for newborn to two year olds.
I've found the best way to get started is to make piles of clothes by size. We know the first two years are broken down into newborn and/or 0-3 months, 3-6 months, 6-12 months, 12-18 months and then 18-24 months. First we separate, then we decide what we want to keep. Even if that skull-and-crossbones onesie was a gift for your darling Penelope, or the threadbare hand-me-down was given by a cousin you don't see enough, it doesn't mean you have to keep it. Focus on what serves you, and what will be right for your child.
Now that we have our "keep" piles, separated by size, we can decide how we want to organize the clothes. You can use one or a combination of these ideas, but I like incorporating all three.
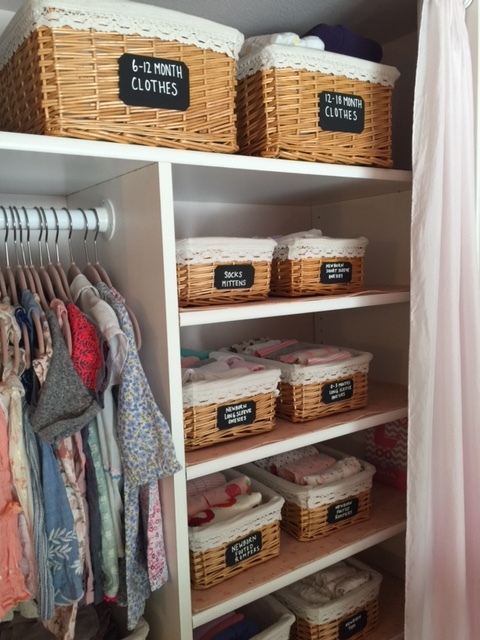
Baskets with chalkboard labels.
Dividers for hanging clothes.
Clear airtight plastic storage bins with labels.
The baskets with chalkboard label method is great if you have a lot of shelf space; I encourage storing the baskets on the shelves in a closet or bookshelf. Pro Tip: Don't forget to measure your shelves before buying any baskets to make sure they will fit properly. Adhere chalkboard labels on them if they don't already come with them.
This method is great because as your child grows, you can easily swap the sizes. The baskets in the picture below did not come with labels, so I purchased chalkboard gift tags from The Container Store, trimmed them to the shape I wanted, and used this double sided tape to attach them. Personalize it: there are oodles of baskets and labels to choose from, so you can add your own style to your organization endeavors.
The hanging clothes with dividers method is terrific if you have lots of hanging space. You can use clothes dividers, pre-labeled by month/size, or use plain ones. With the latter of the two, using a label maker or chalkboard labels for each divider, allowing an easy change of the sizes as your child gets older.
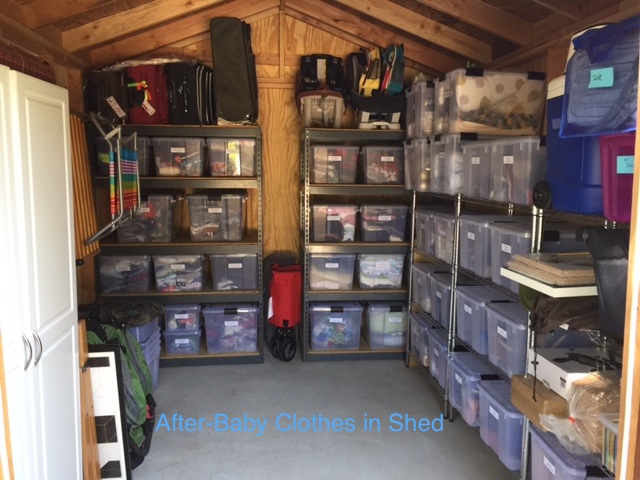
The third method works for the months to come. The labeled, airtight storage allows for long term keeping, and knowing your baby's clothes are staying clean, and bug and dust free, is especially great if you are storing in an attic, basement or shed. This is also wonderful if you plan on having more children. When you are done with one size, replace it with the next size up, and the first size goes into storage.